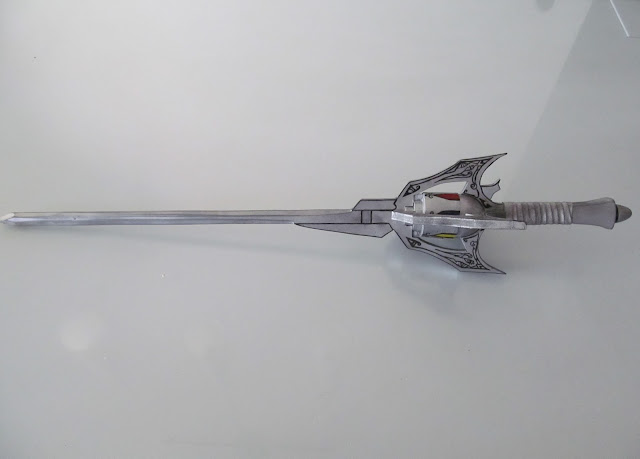
As with all my builds I like to start off by drawing up some plans using Inkscape, after spamming a whole heap of screenshots from the White trailer, I was able to make a vector that I was able to scale up and cut out of the 12mm (1/2 inch) MDF board using a jigsaw.
From there I then went about making the Cylinder and the Crane of the Revolver Rapier, this consisted of using mainly a hole saw drill bit that essentially cut out perfect circular MDF disks of the various needed sizes.
For the body of the cylinder I sandwiched about five of these disks together and glued them to make a solid piece.
Making sure at every step of the way everything fit nicely in the main body of the sword, sanding away any out-cropping and irregular parts.
Letting the Bondo cure, and using ordinary sand paper of varying grits I smoothed out the basic shape I wanted and filled any other tiny gaps with more of the bondo and more subsequent sanding.
To do the details of the six bullet chambers, I cut out a pattern on a strip of wonderflex that I then wraped around the base cylinder.
Next came cutting out the cross guards, again using templates I had made I cut them out of the MDF, soon after which were assembeld and glued with the other parts to the main body of the sword.
For the pommel of the sword I cut out some pieces of plastic which then had tiny slabs of cardboard glued to the back to give added depth.
Hot gluing the pommel shell to the handle of the main frame, I then used 'plumbers epoxy' to fill in the gaps to build up the basic shape, what's great about the epoxy is it is fast hardening and easy to sand smooth.
With that done giving the entire sword a good two coats of automotive primer and one of chrome spray paint I used a few sheets of 250 grit sand paper started detailing the blade's surface.
After achieving a surface finish I was happy with, next came the arduous task of detailing the designs present on each of the cross guards. Using carbon wax free transfer paper I transferred the ornate designs onto each of the faces followed by going over the feint transfers with a lead pencil.
Repeating this step seven more times I inked out the template on the cross guards using a ink brush tipped sharpie.
For the handle I spray painted a tennis racket grip silver and then using sand paper again did some weathering to get a surface finish in keeping with the rest of the sword.
The little nub on the end of the pommel funnily enough occured by happenstance, originally I had planned to sculpt one from scratch but I saw these miniature trophies and decided to rotary tool away the unwanted parts and fill in the gaps, and by fluke achieving a shape perfect for the pommel base I had made earlier. So always be on the look out for shapes and components you can use for your props next time your out buying supplies
Lastly came the painting of the each bullet chambers easily achieved with acrylic paints and after the dexterous and frustrating work of inking the ornate designs this was a welcomed change.
With the paint dry, a good few coats of acrylic top coat was sprayed to seal in the paint work and there you have it.
Thank You For Reading.


 '
'


