
Easily on of my favourite
weapons to date, Ember Celica is the weapon of choice wielded by one of the
main protagonists in Rooserteeth’s new animation series RWBY. I absolutely love
the visceral boxing mechanic these are used for in the show and knew I had to
make a set for myself as something to own as well as for completion’s sake to keep the other three company.

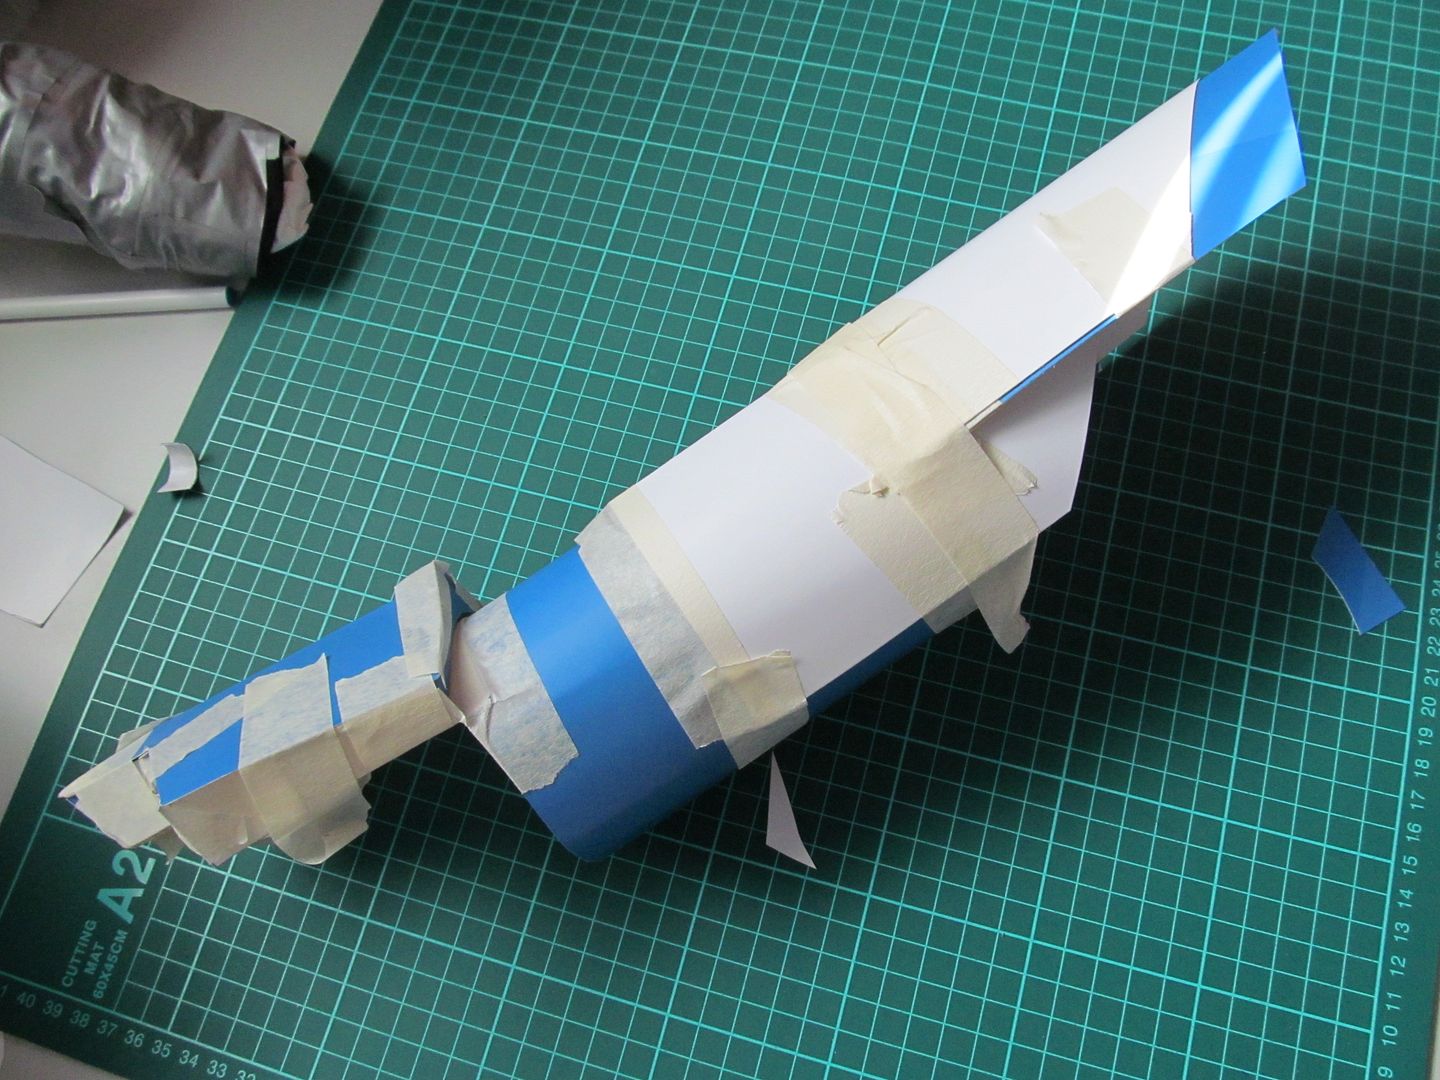
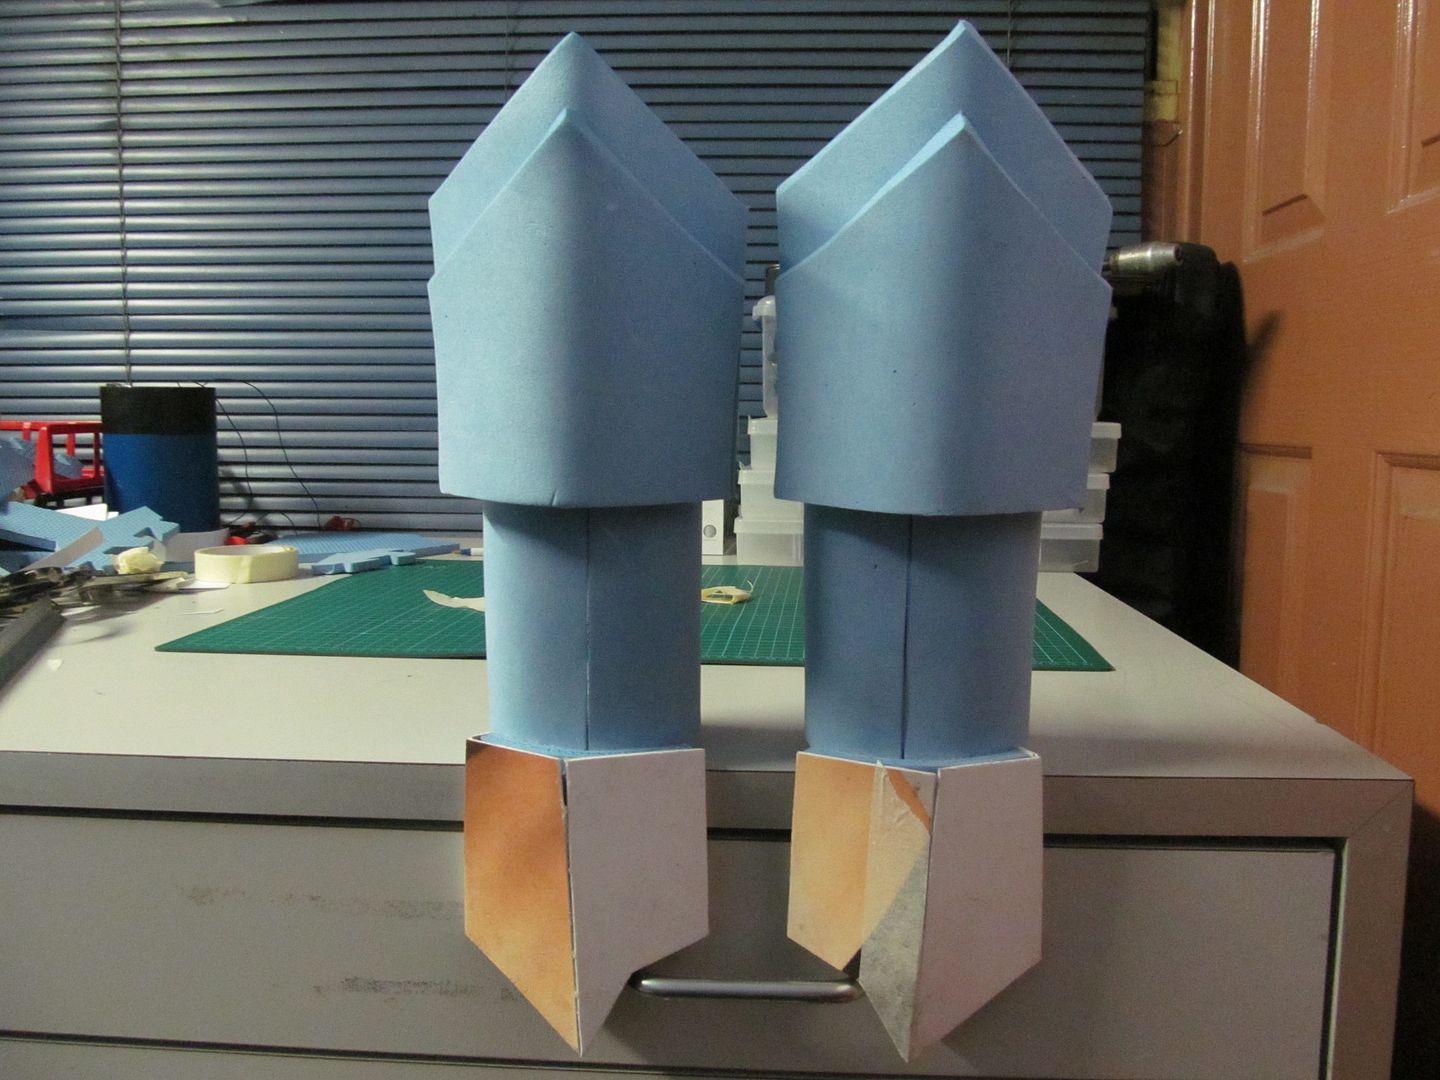
Starting off the build, I first made
rough templates of the soon to be gauntlets out of paper and thin card. Making
sure that the fit allowed me or any wearer to be able to slide them on and
off with ease as well as to check if they looked good from a distance.
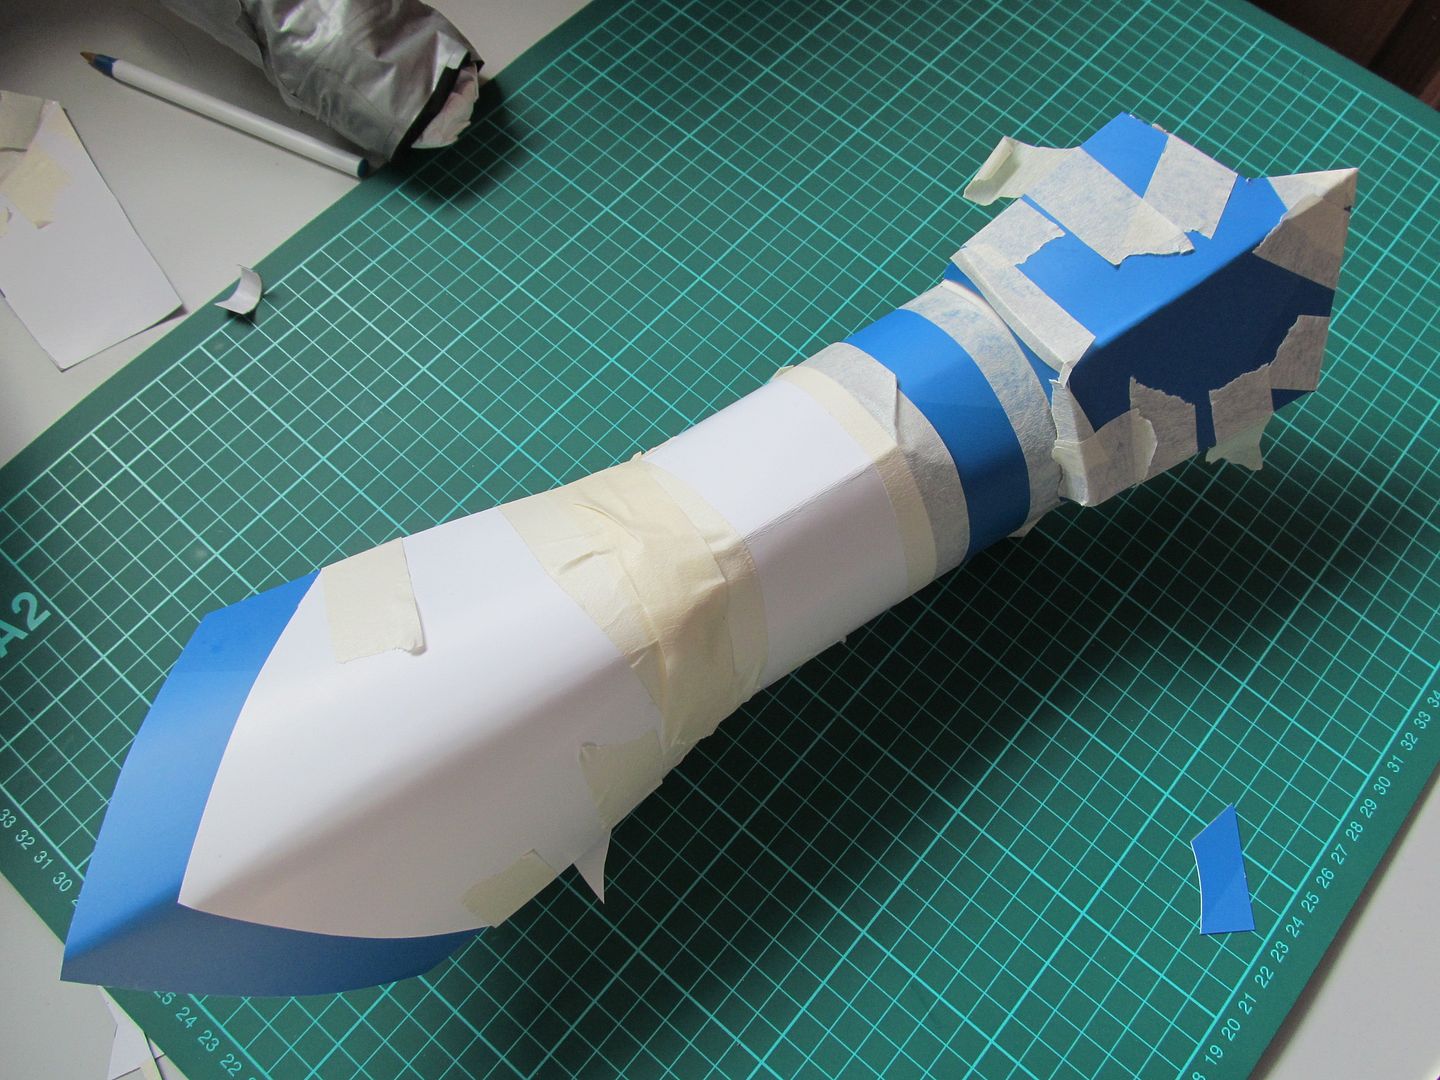
It's good to do paper mock-ups of
armour props before you actually go about cutting them out from the more
expensive material itself, as you'll start to iron out issues through
trail and error earlier on using the cheaper disposable material instead of
later and avoid wasting unnecessary material.
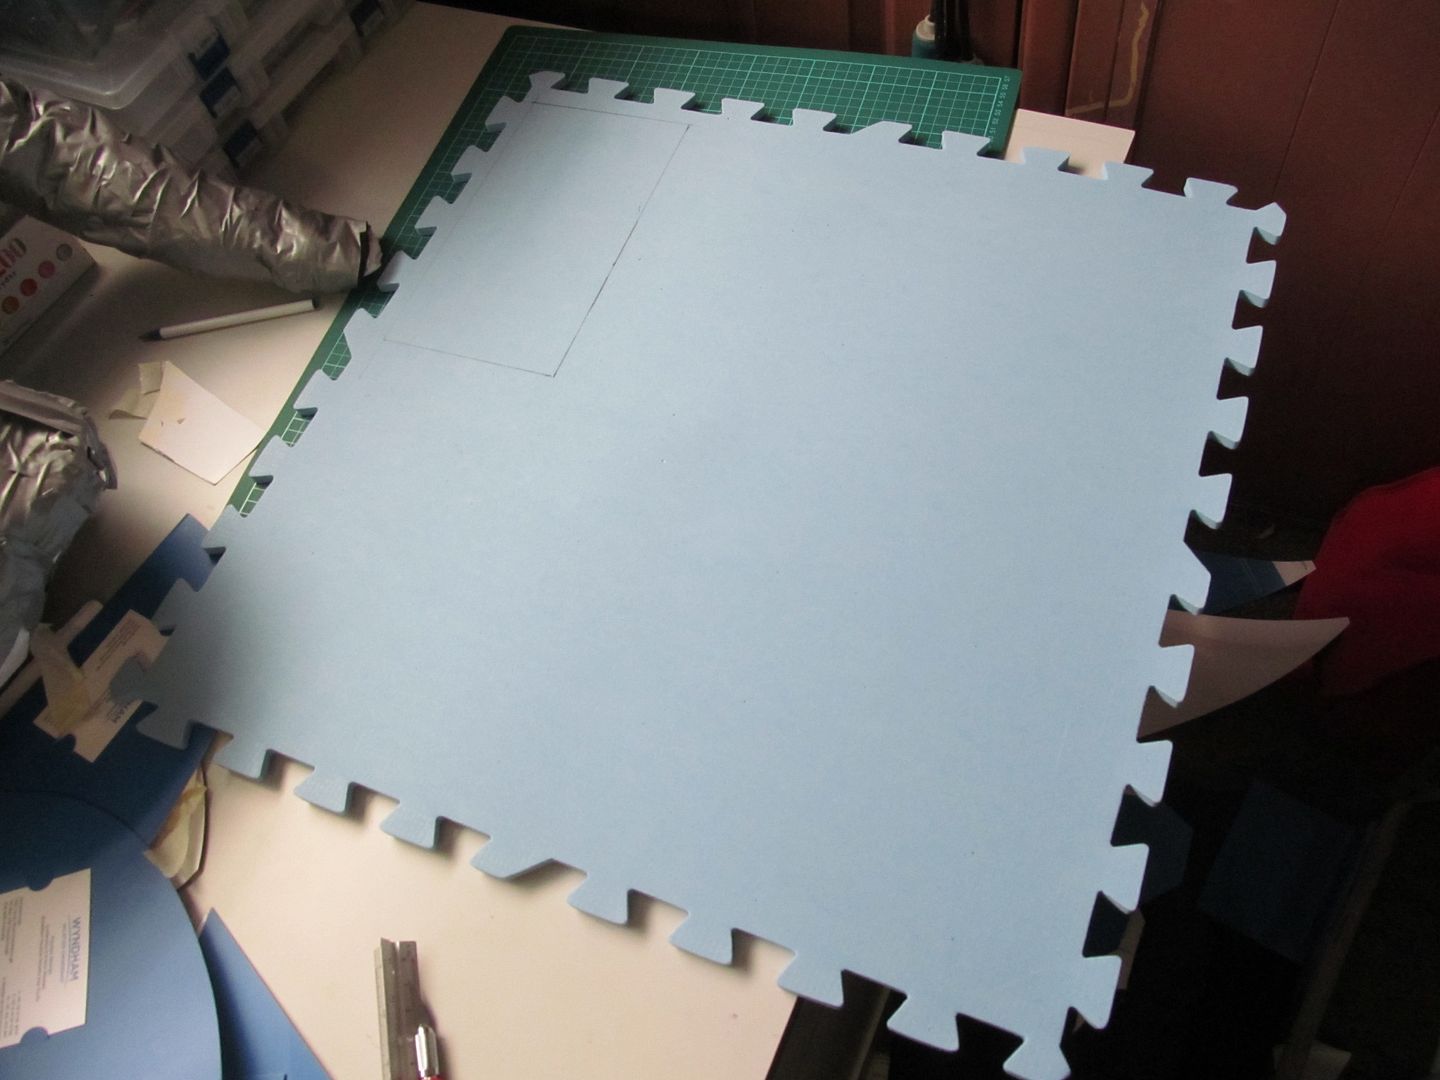
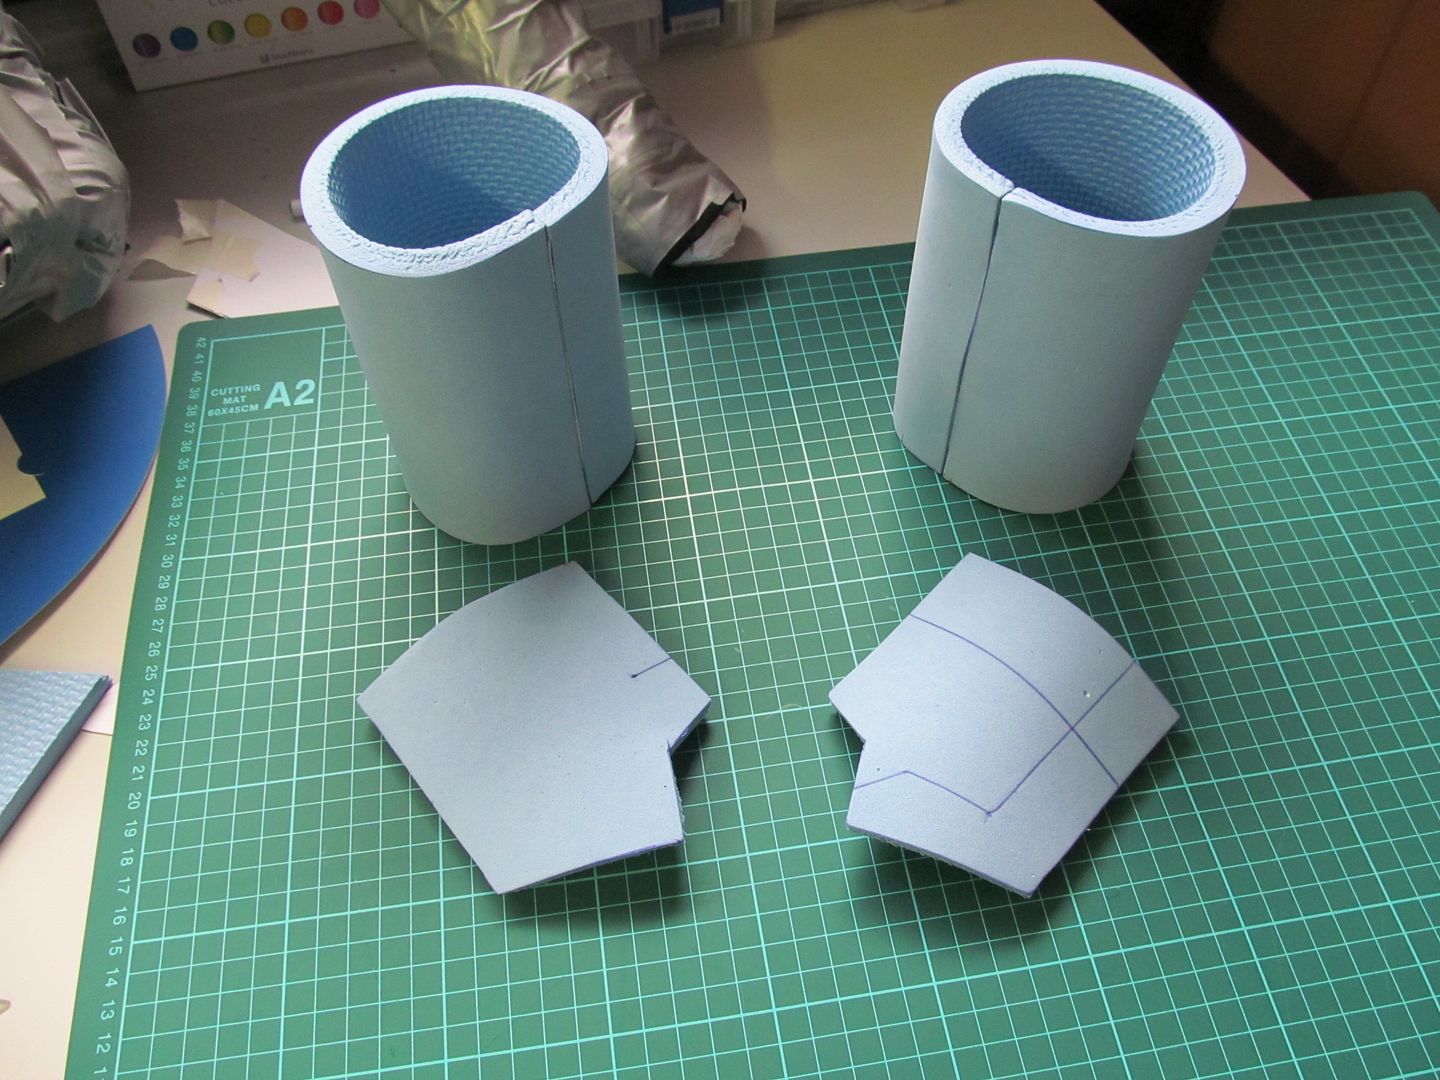
After refining them to a point I was
happy with, I then transferred the templates to several EVA foam gym mats, I particularly
enjoy using gym mats on account of how dense and rigid they but more so on how
simple they are to work with for armour; So with the aid of a steel ruler and
good set of hobby knives the various pieces of the gauntlets were carefully cut
out.
To do curves in EVA foam of which
theses gauntlets and a lot of armour pieces have you'll definitely need the aid
of a heat gun. EVA foam on its own will return to its original flat shape over
time after any attempt is made to bend it. You can circumvent this by using a
heat gun or a strong enough setting on a hair dryer.
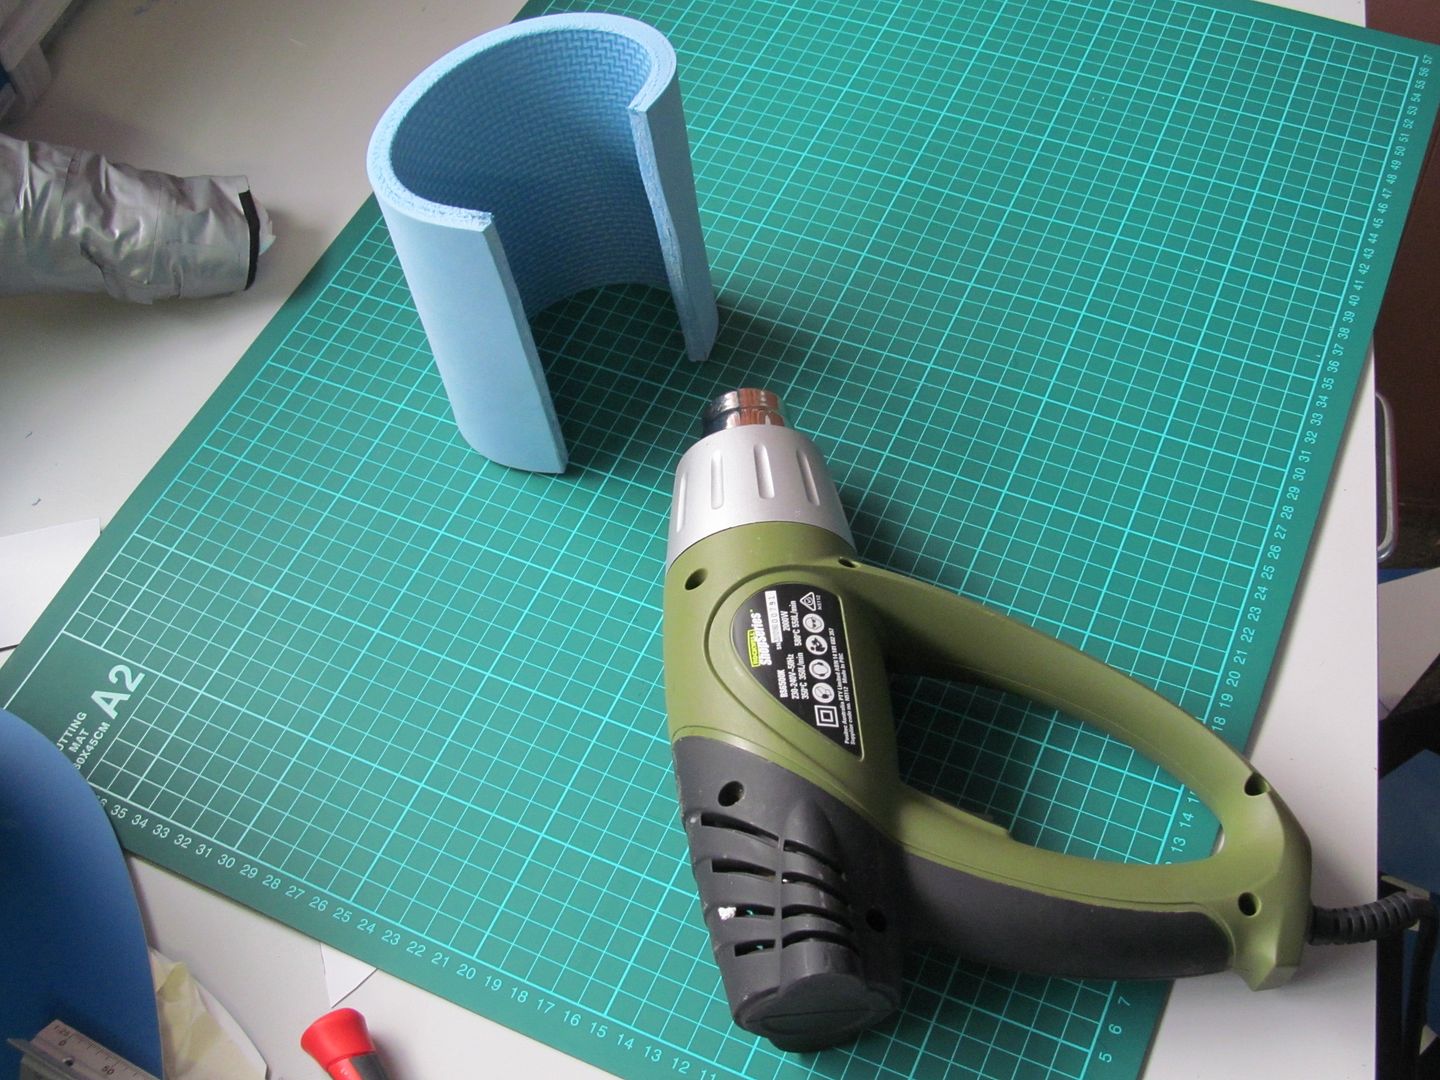
EVA foam is very susceptible to heat
so by simply heating up the foam along the direction you want to curve, and
then bending it and holding it in the desired final position as it cools you'll
find piece holds it shape and structure, however try not to heat the foam
too much at once, gradually heat and gradually bend to avoid melting.
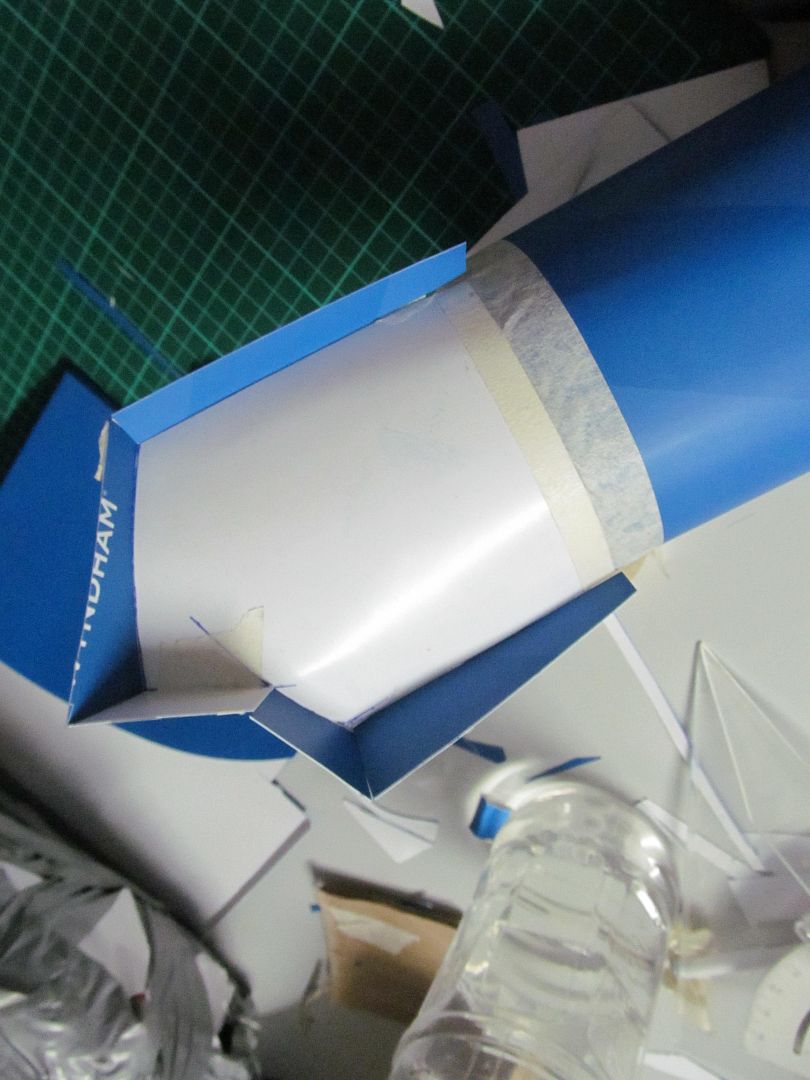
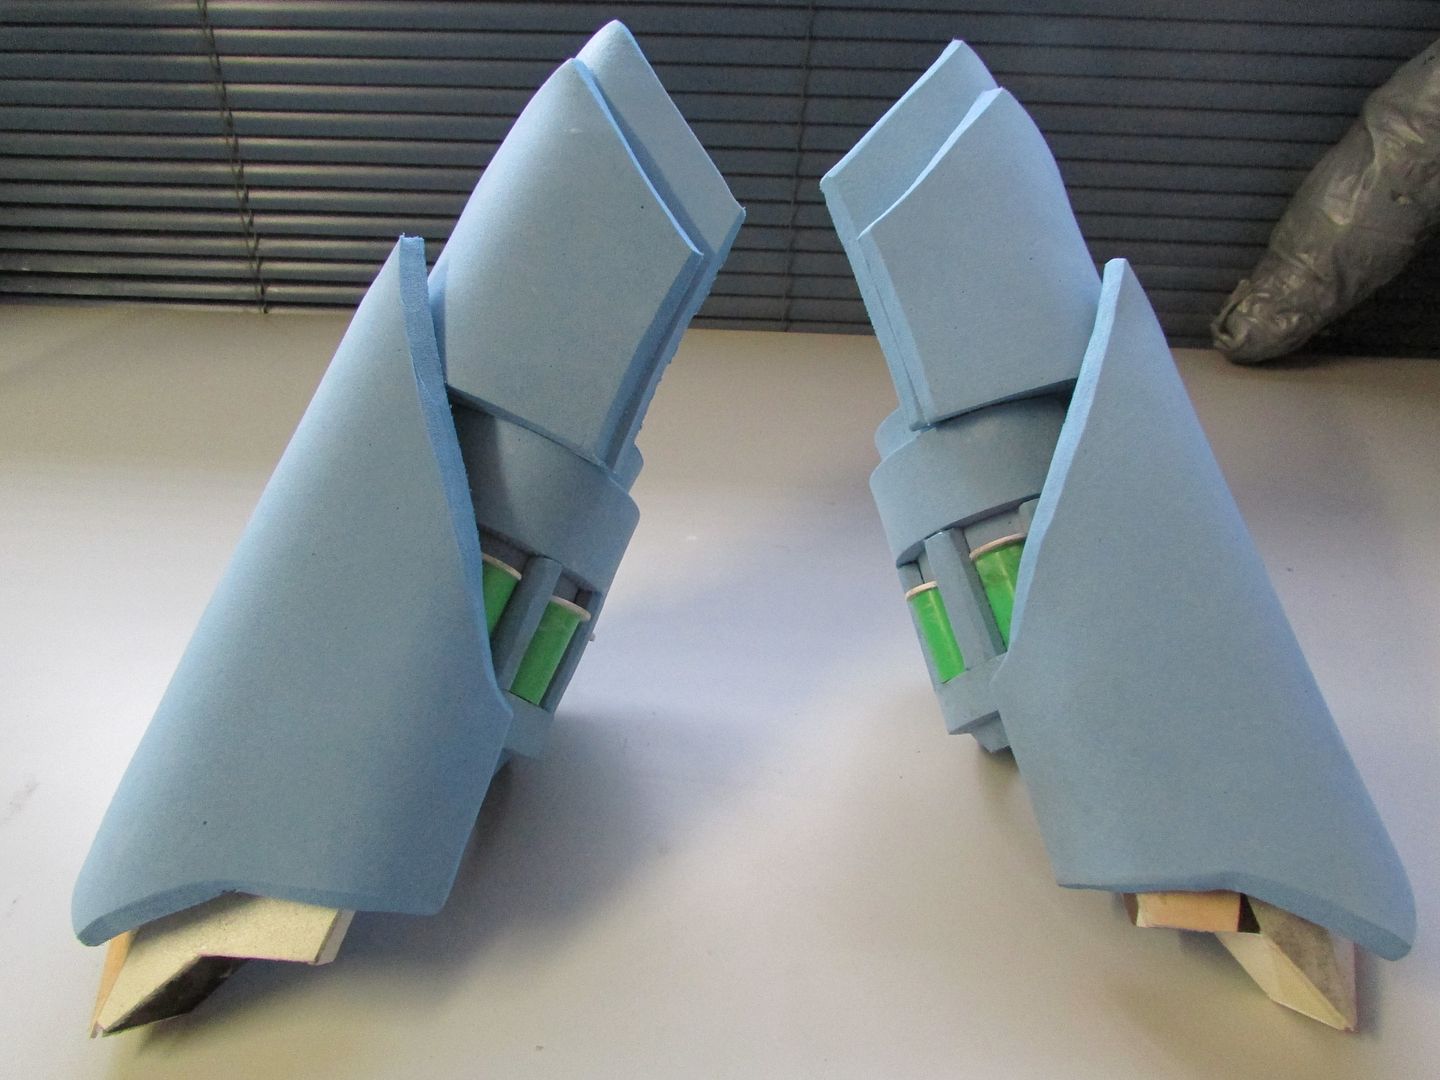
For the front business end of the gauntlets
those I knew would have to eventually support the gun barrels and needed the
width to do so. So I decided to make them out of sheets of PVC by
building them up around the EVA foam base giving me the platform for future
work.
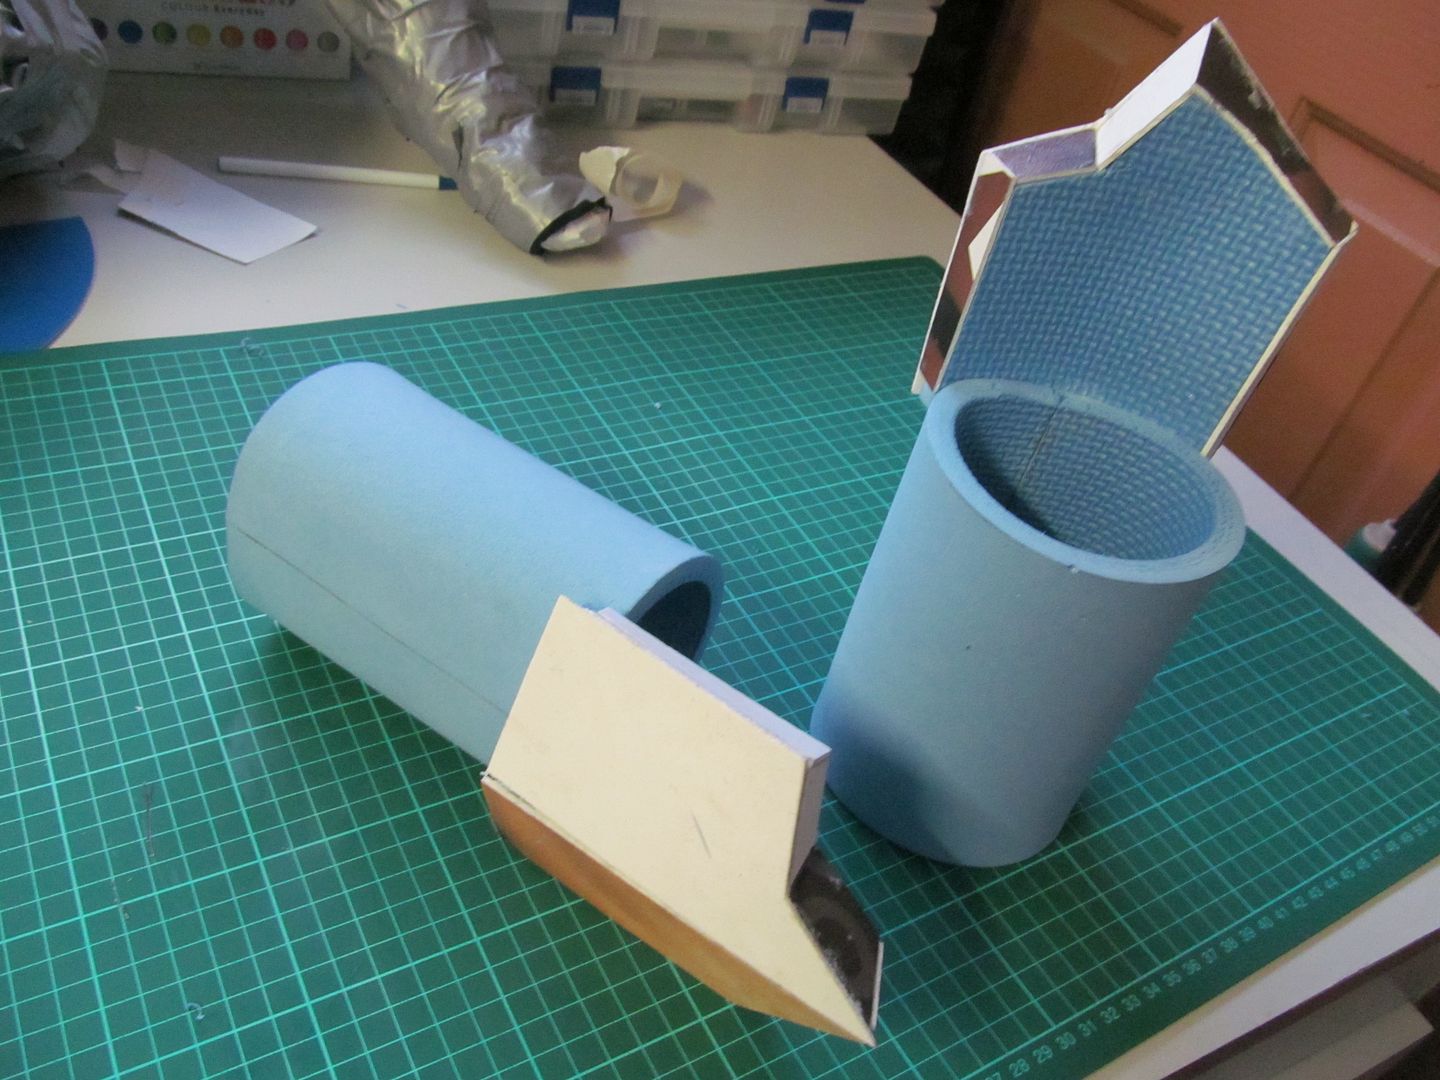
I should mention for this build to
assemble and adhere to EVA foam pieces to one another the best course of action
is to use superglue. It is relatively cost effective to use and when used particularly
with foam it has an instantaneous welding effect.
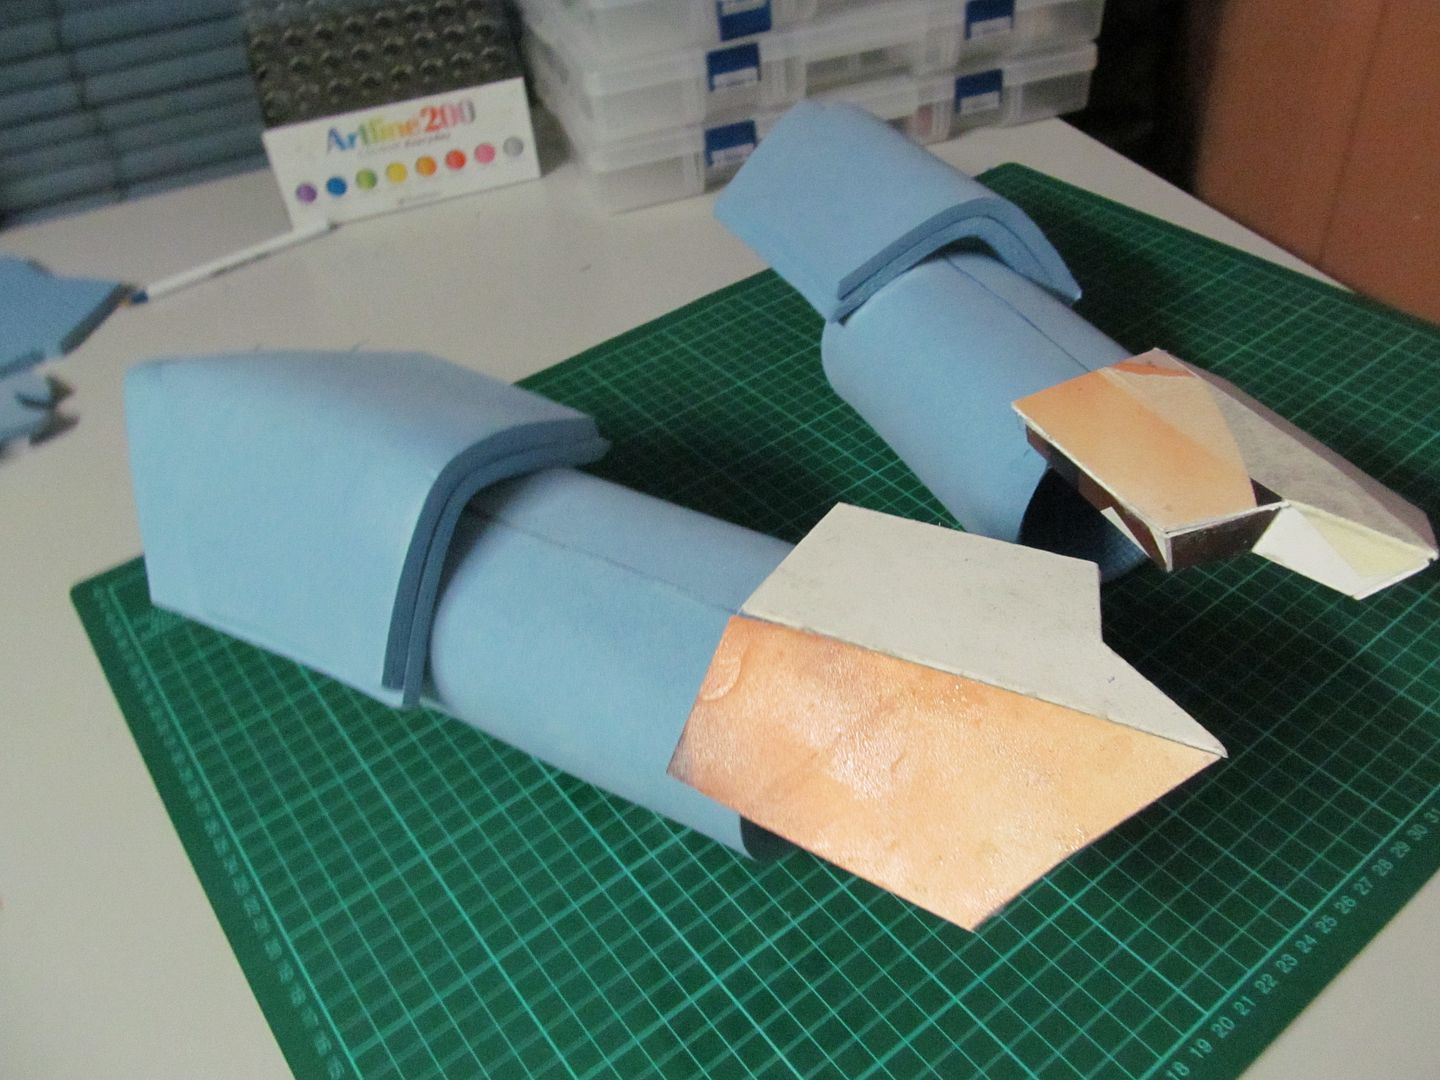
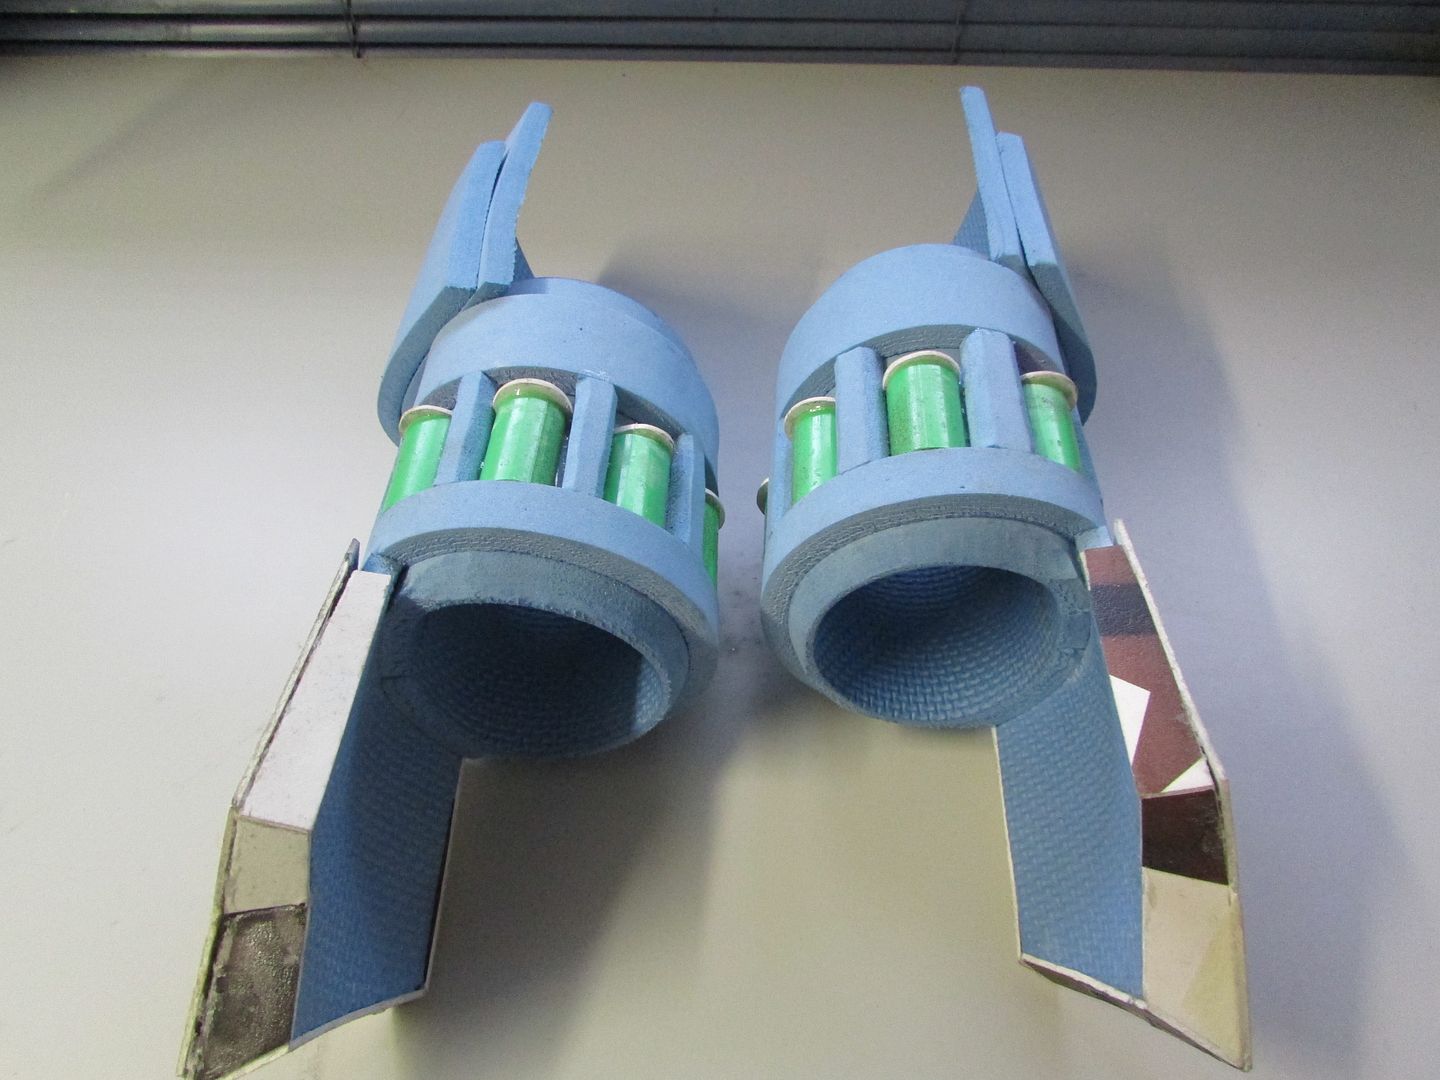
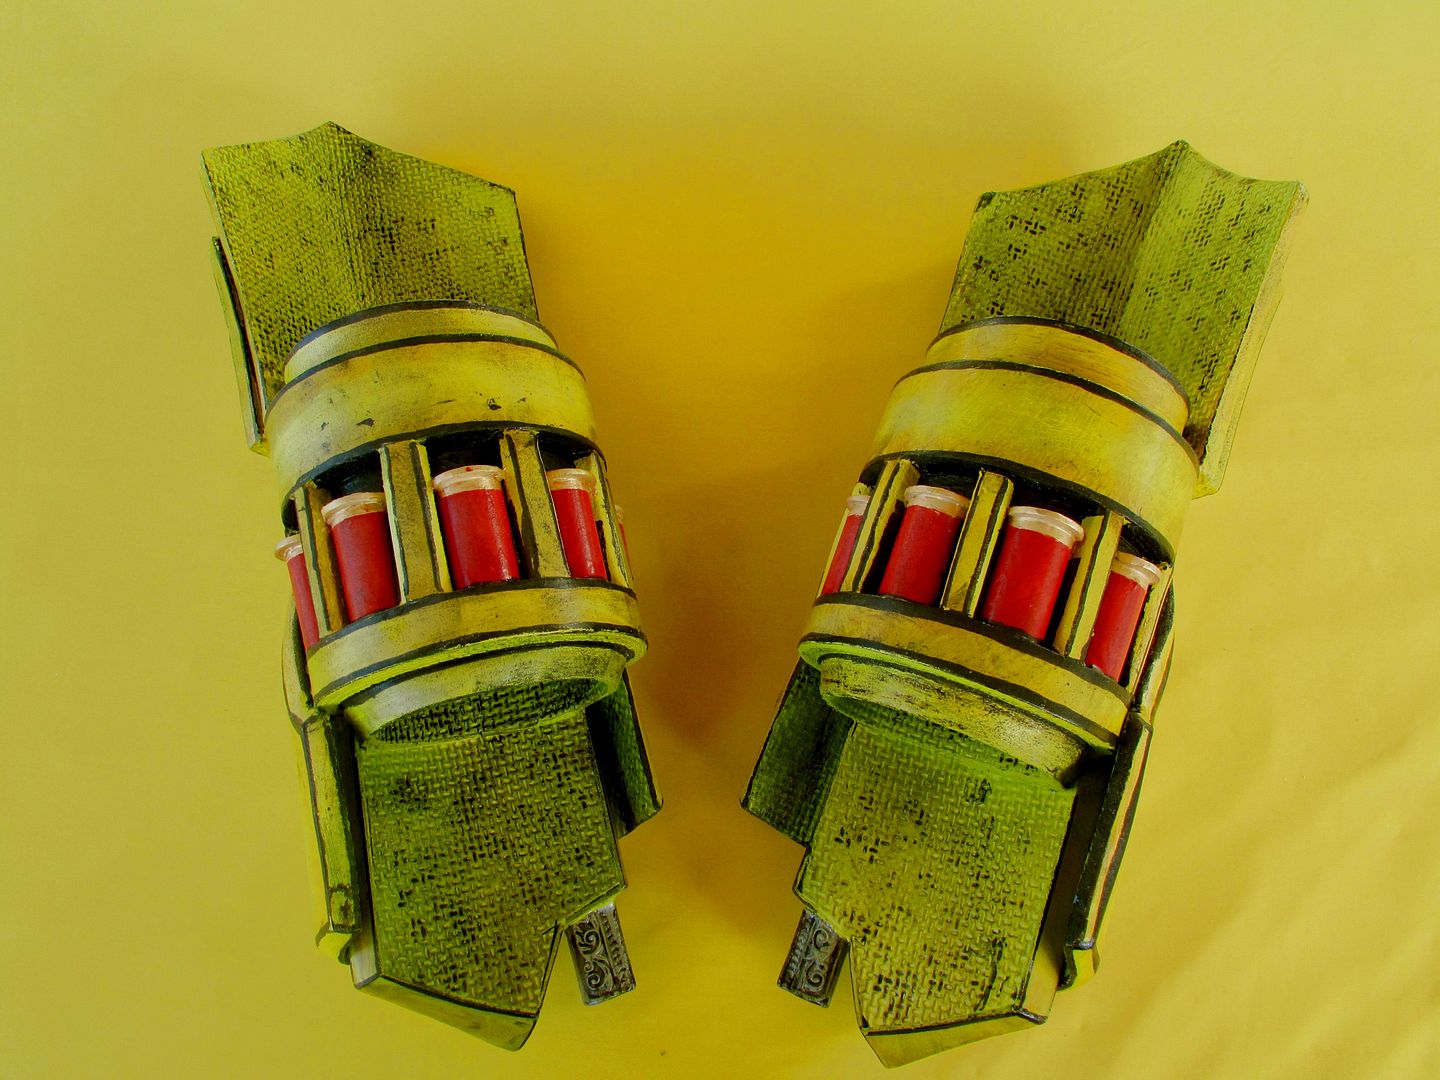
With the components
of the base gauntlets glued together next step was to start on the shotgun
shell bandolier that ran along inside them. Again through rough sketches and
trial and error with paper templates.
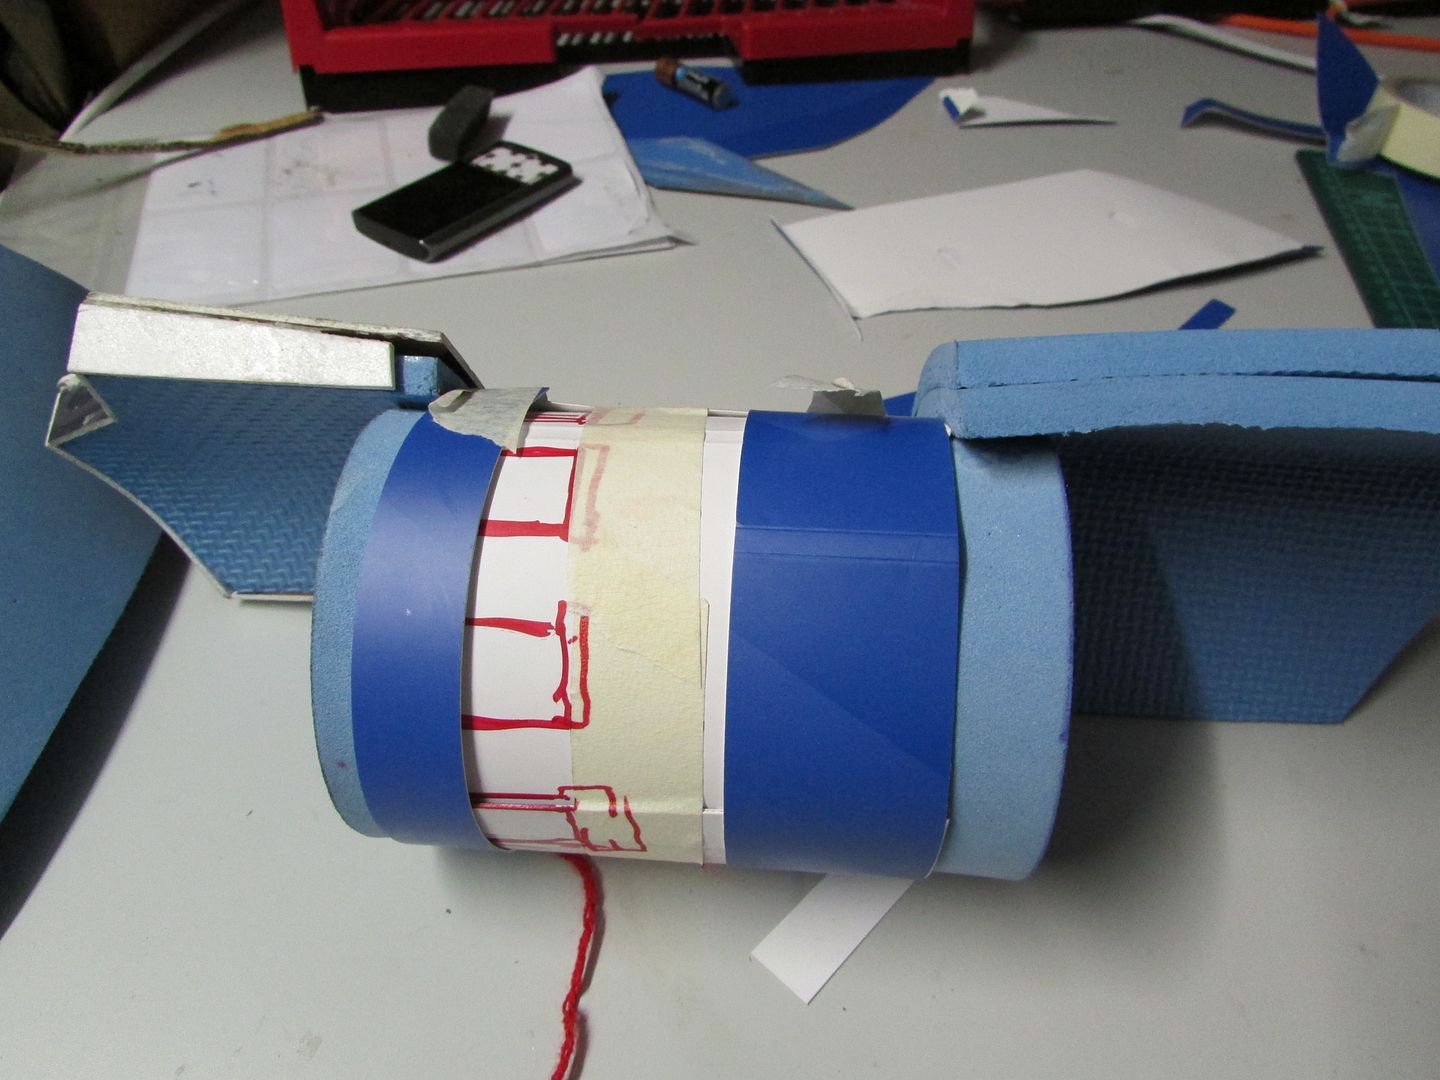
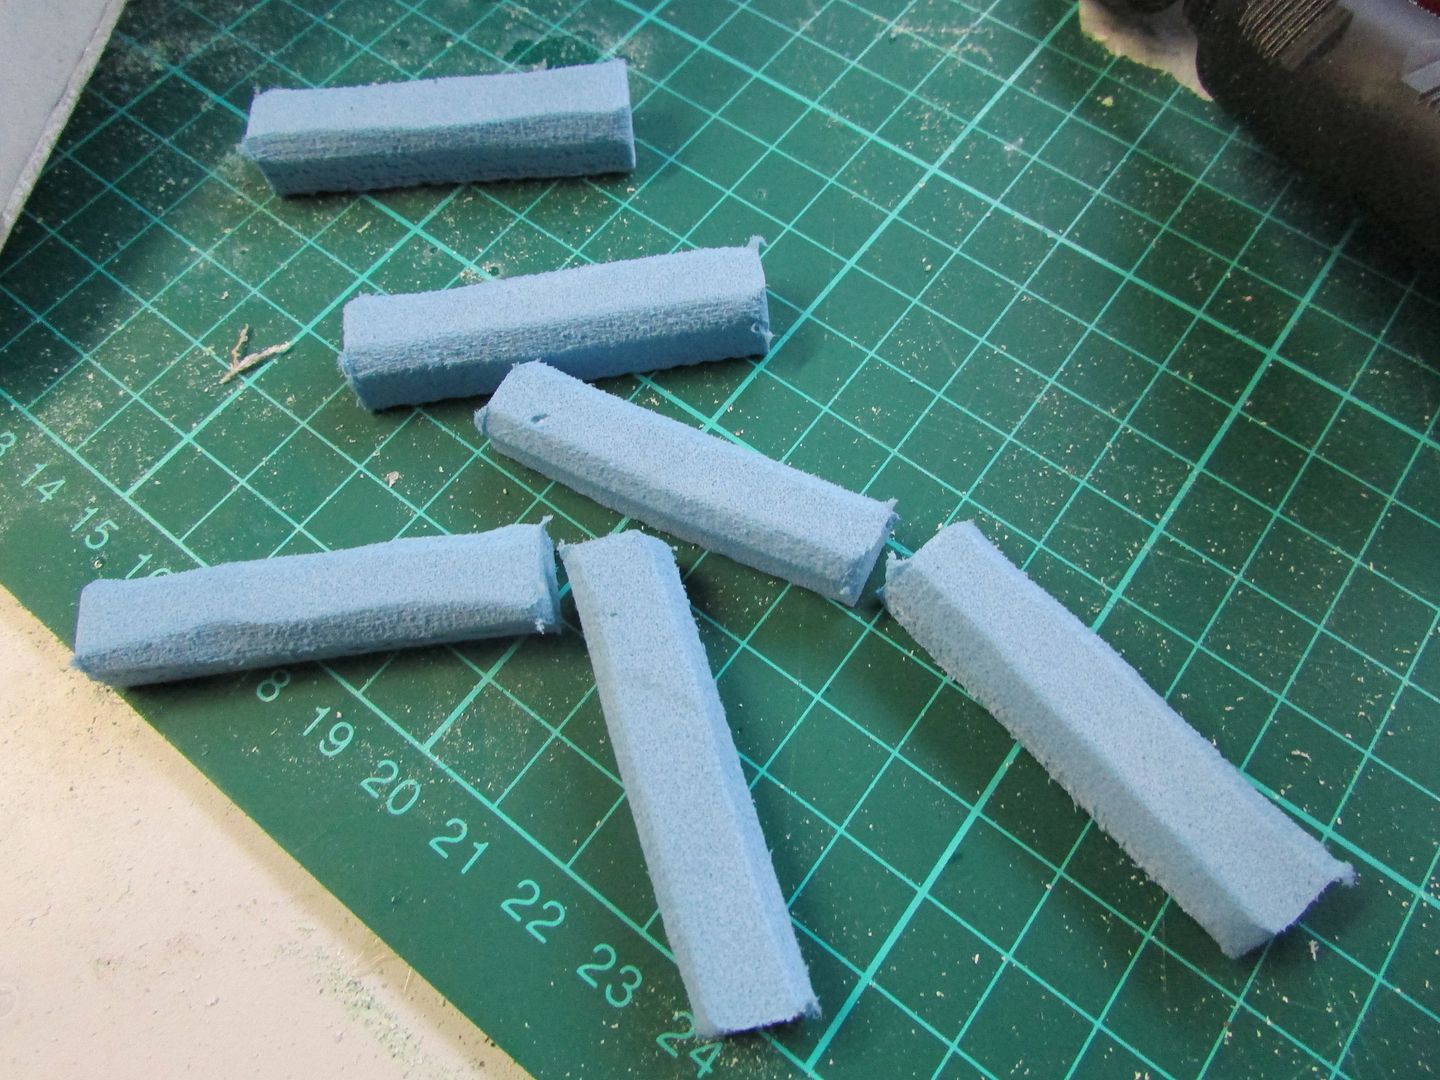
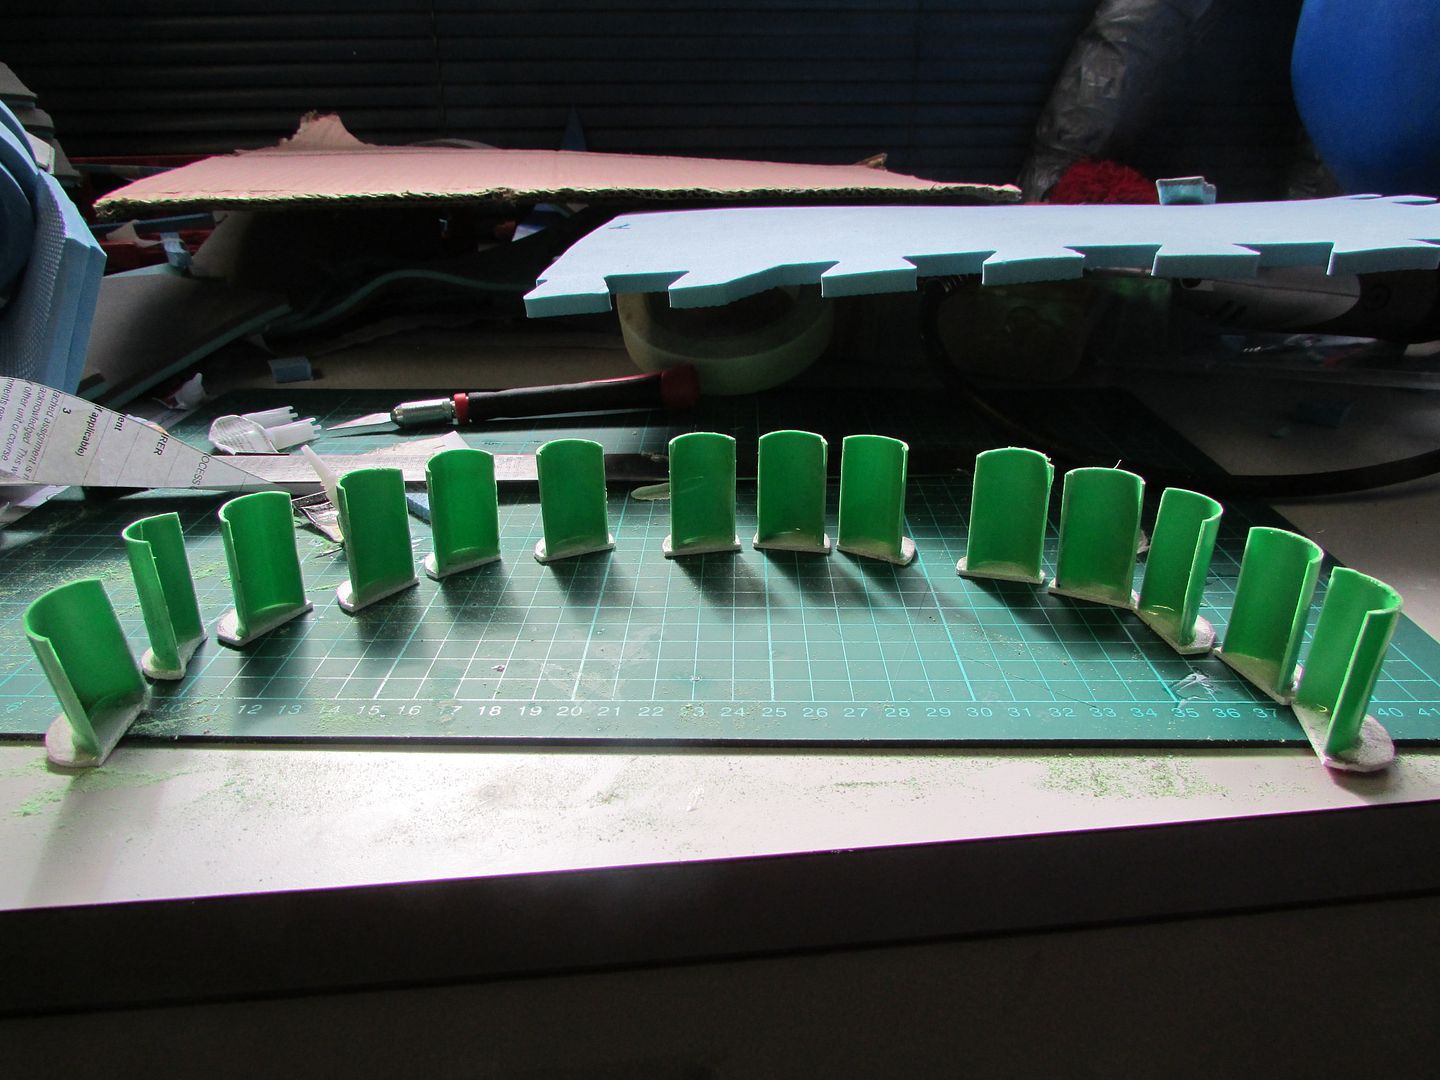
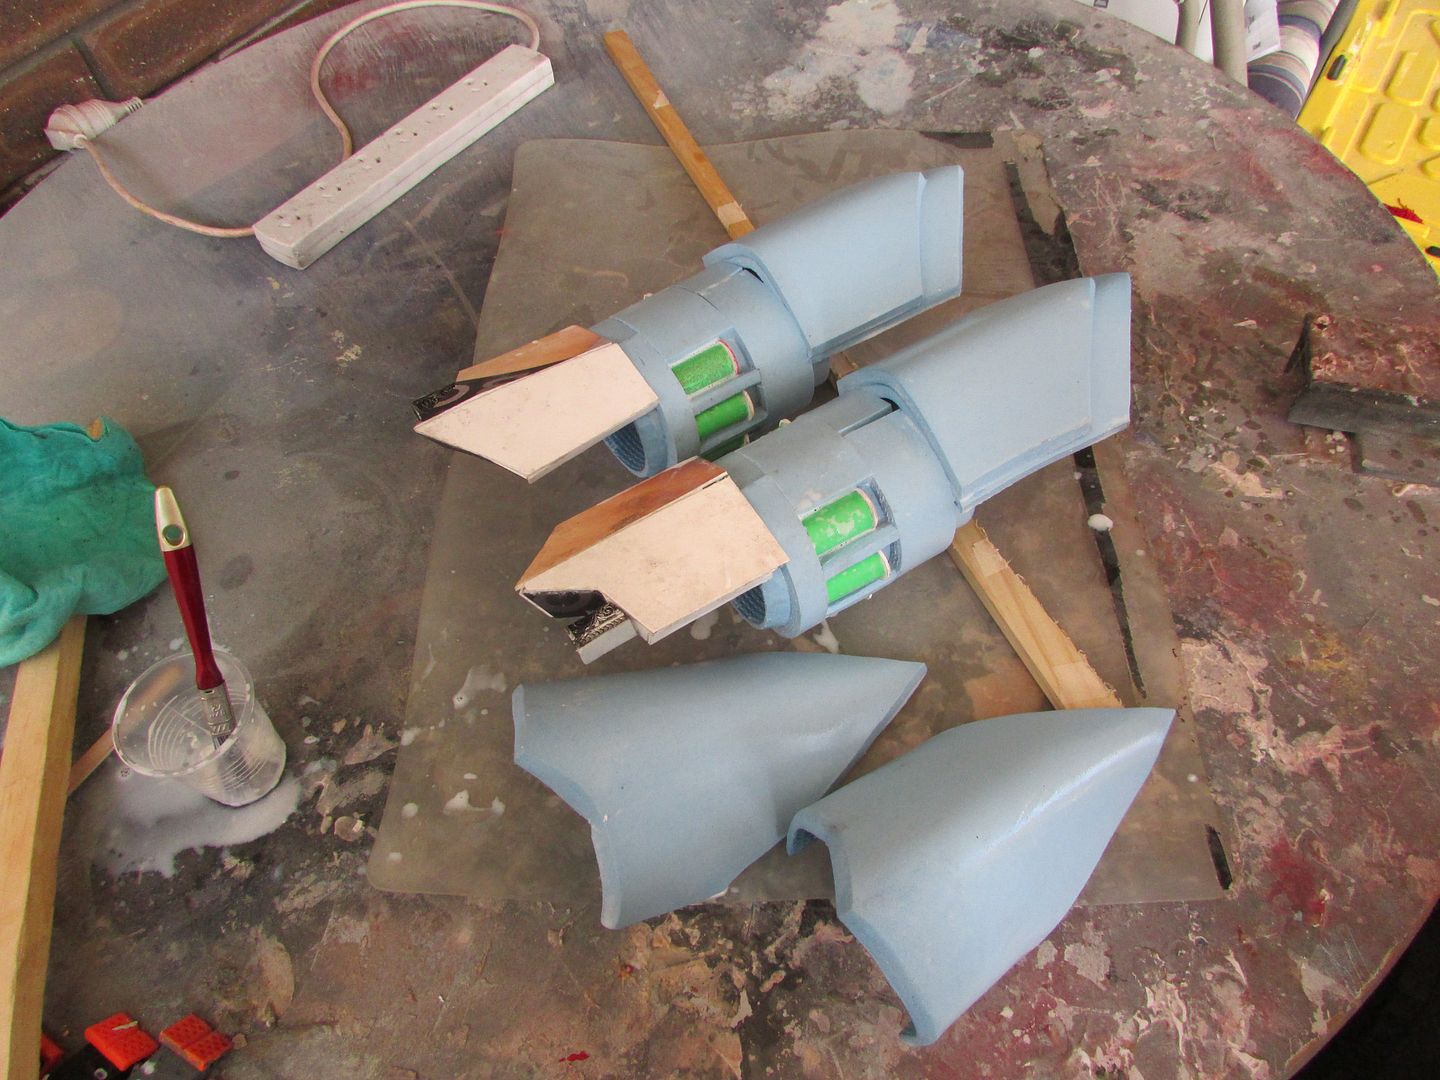
I cut out and super glued to the base
gauntlet the necessary foam strips to make up the chambers of the weapon. I
also with the aid of a rotary tool at this point started to do some bevelling
along some of the edges of the gauntlet.
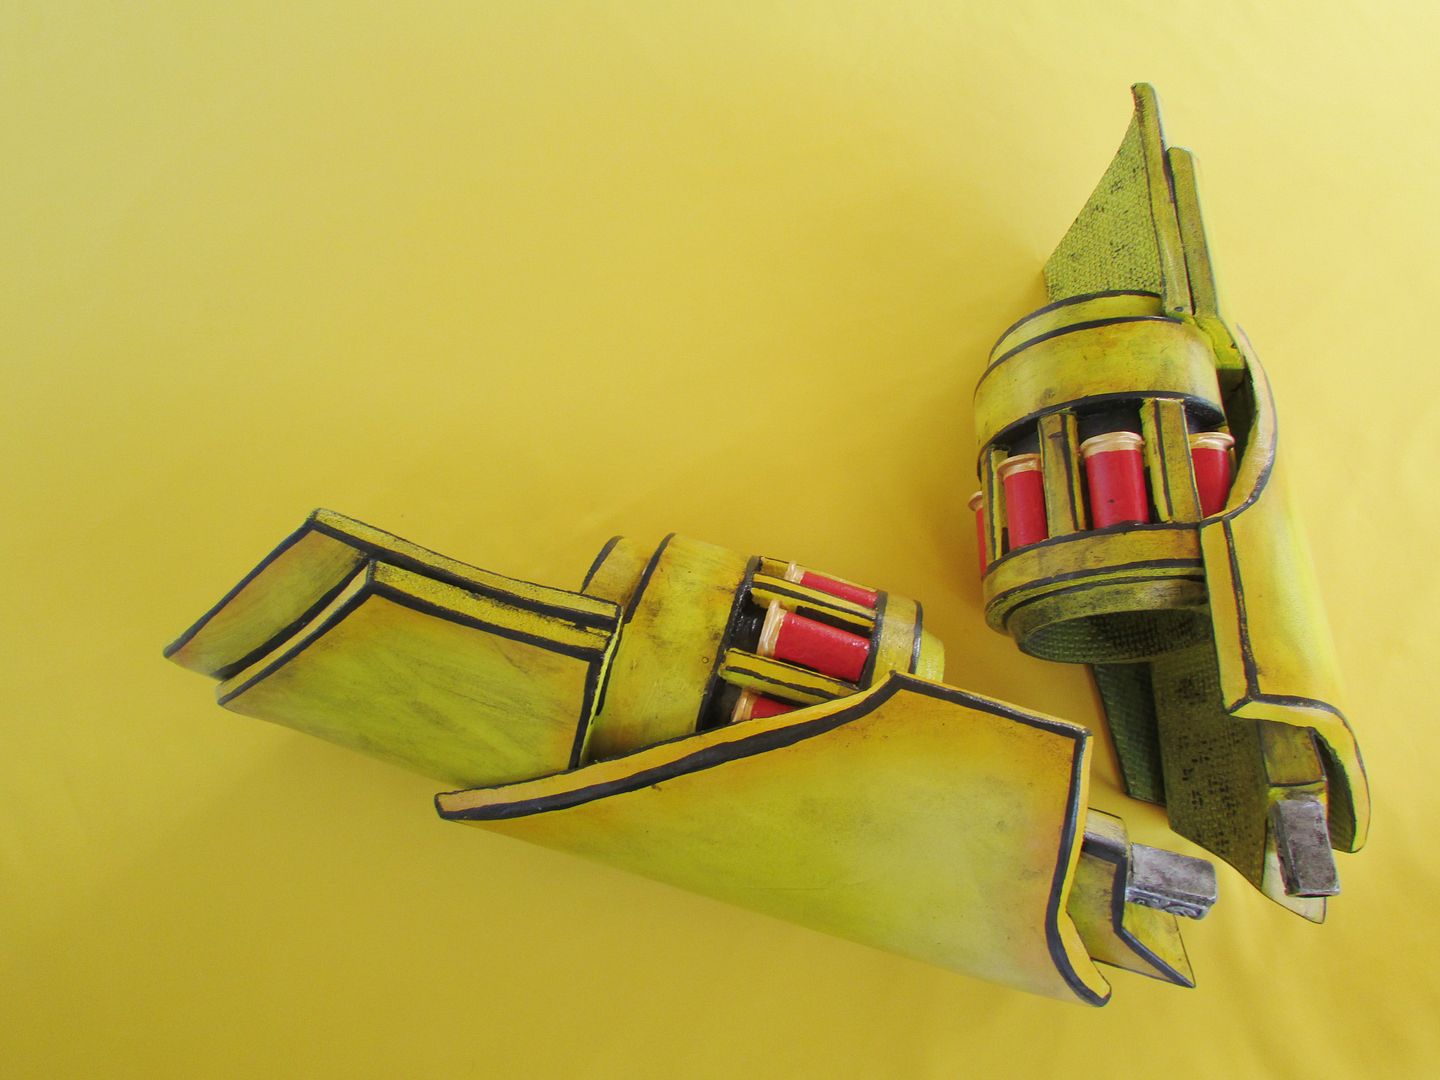
As for the physical shells them selves those were made from
cheap thin plastic tubes pulled off dollar store mini bicycle pumps, these
tubes were cut in half with a rotary tool and carefully cut to length.
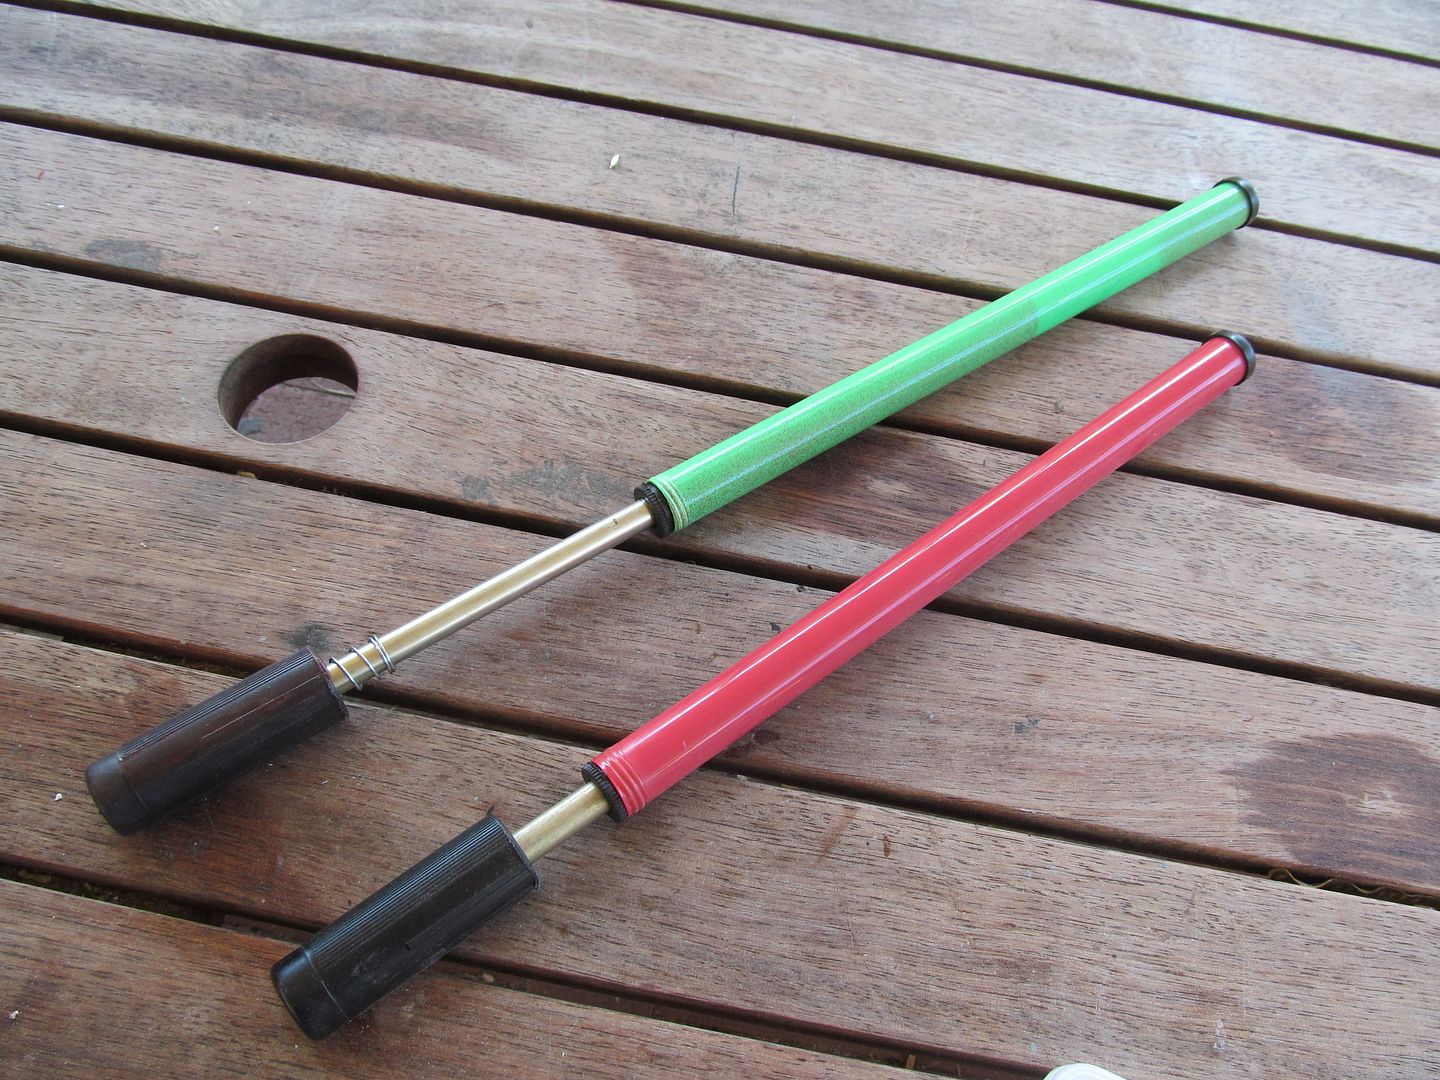
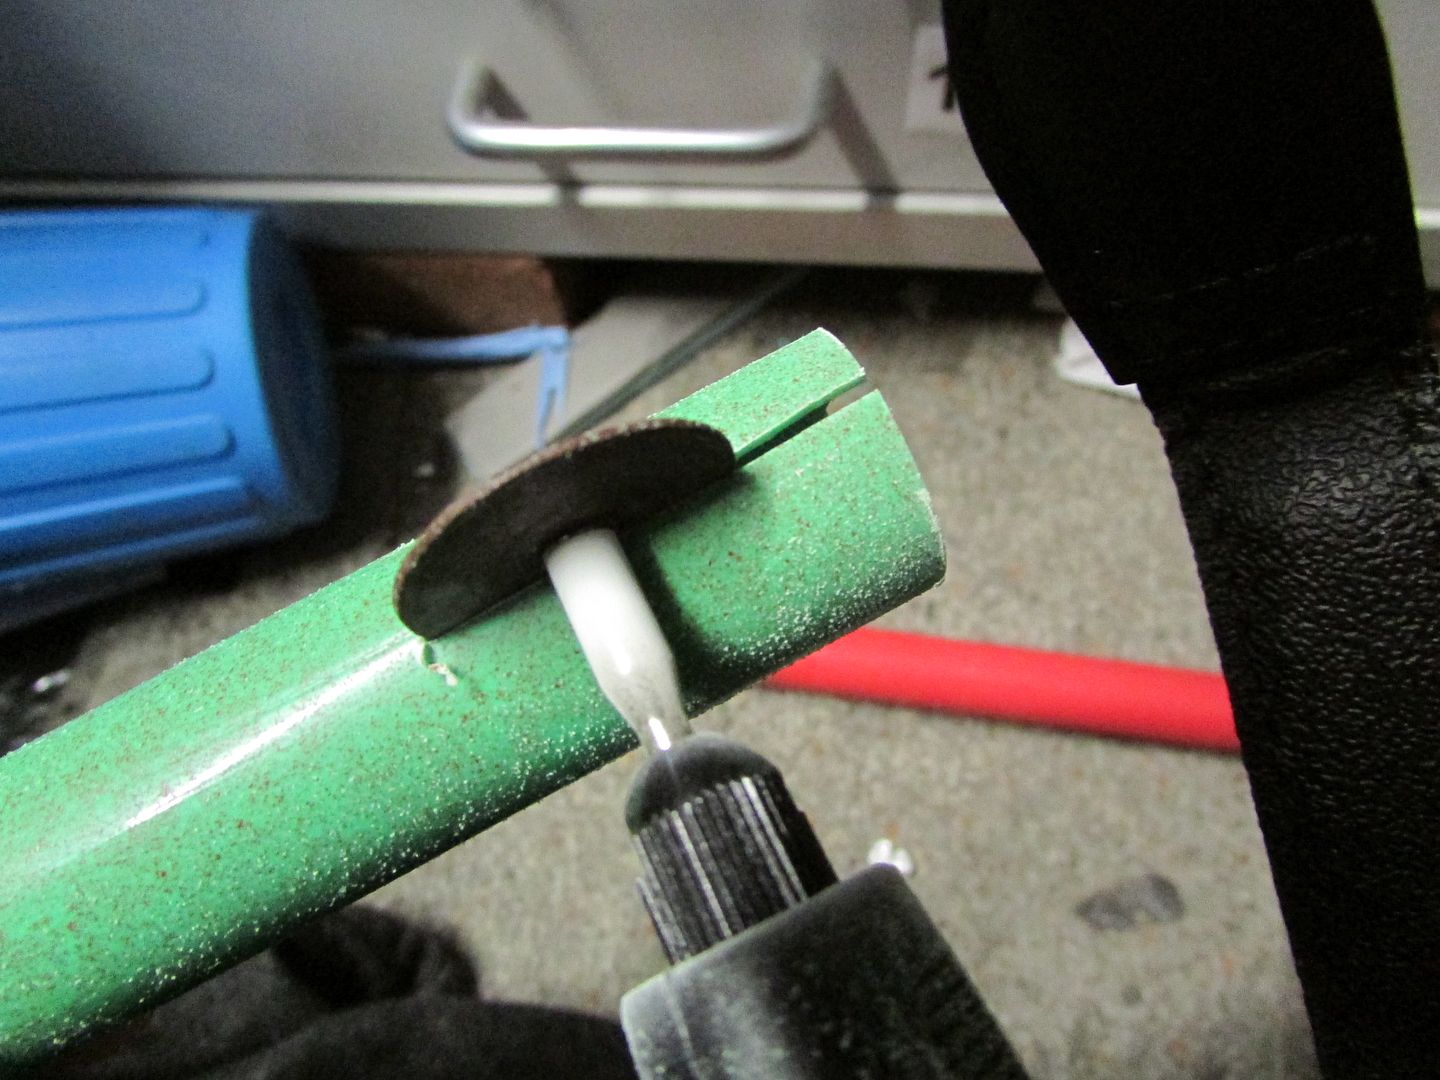
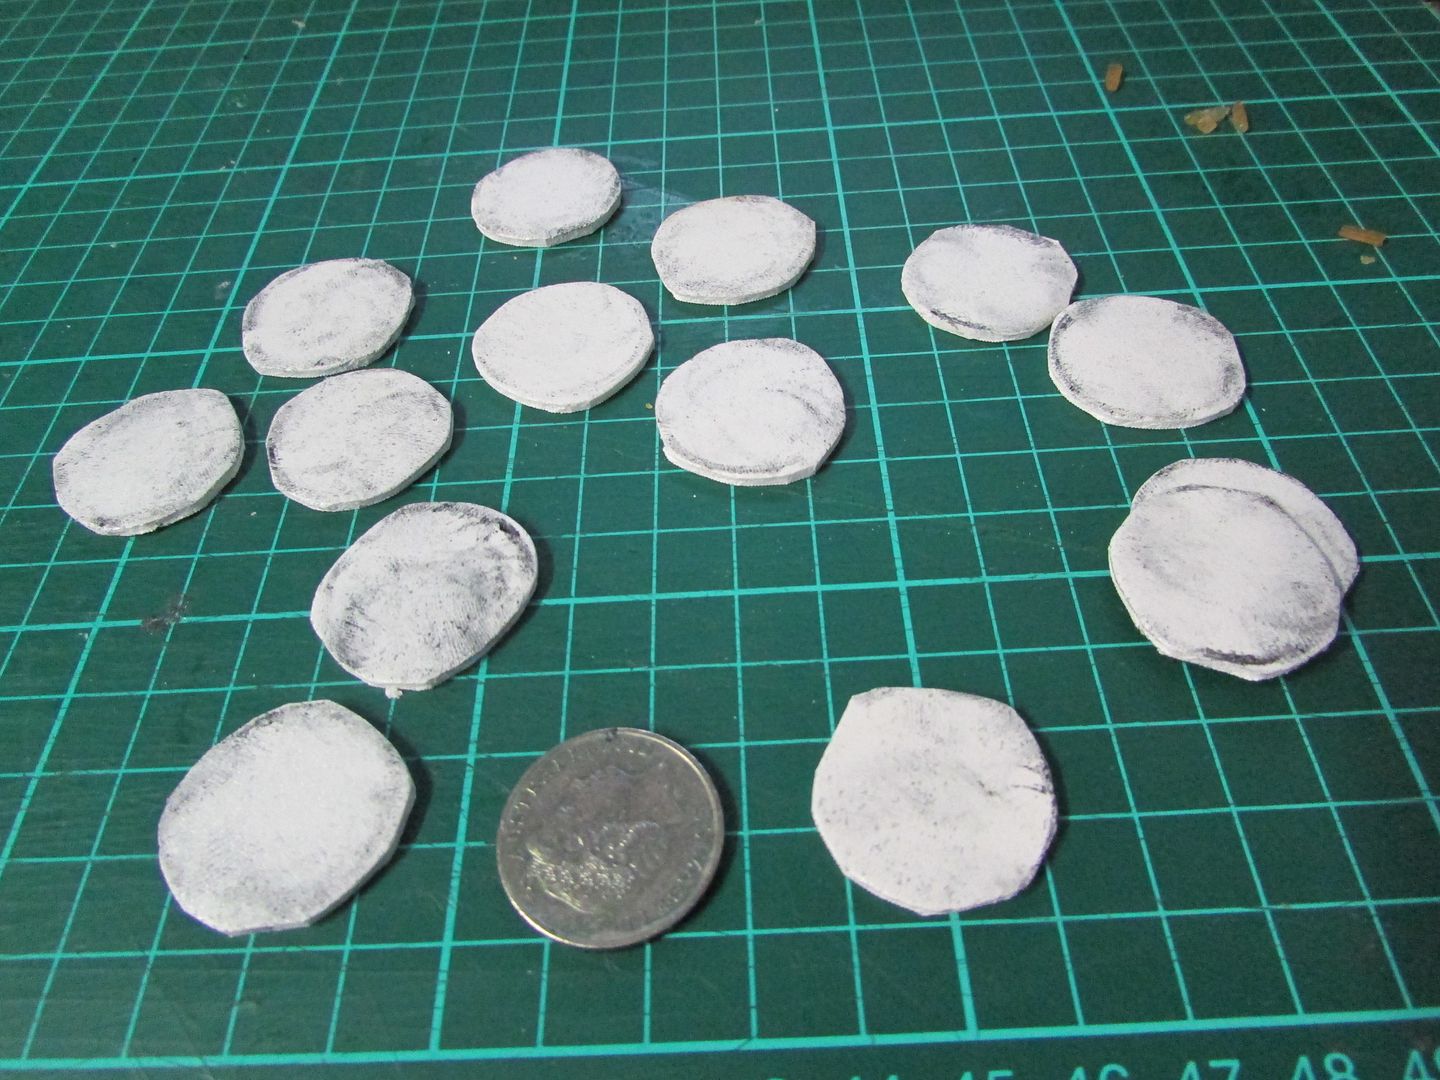
To do the brass heads of the shotgun shells, circles were cut out from the PVC sheeting and then shaped and trimmed into semicircles which were attached to the tube halves which give the impression of shotgun shells
After the glue had set the
shells these were then put into and glued with epoxy into each of their
respective chambers slots.
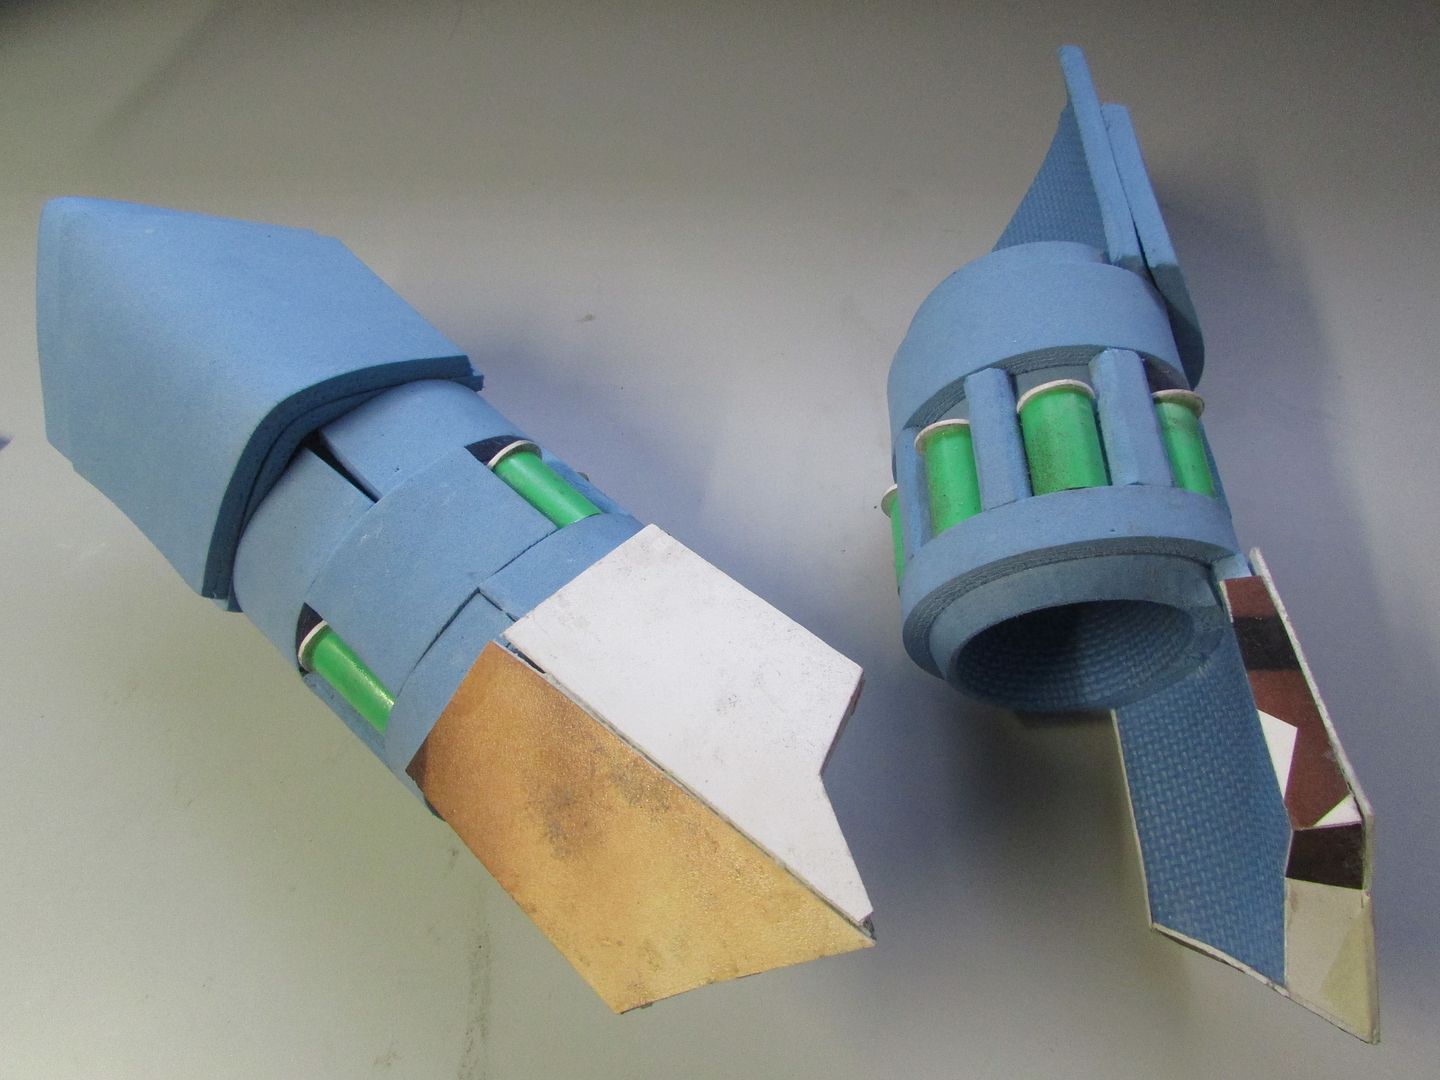
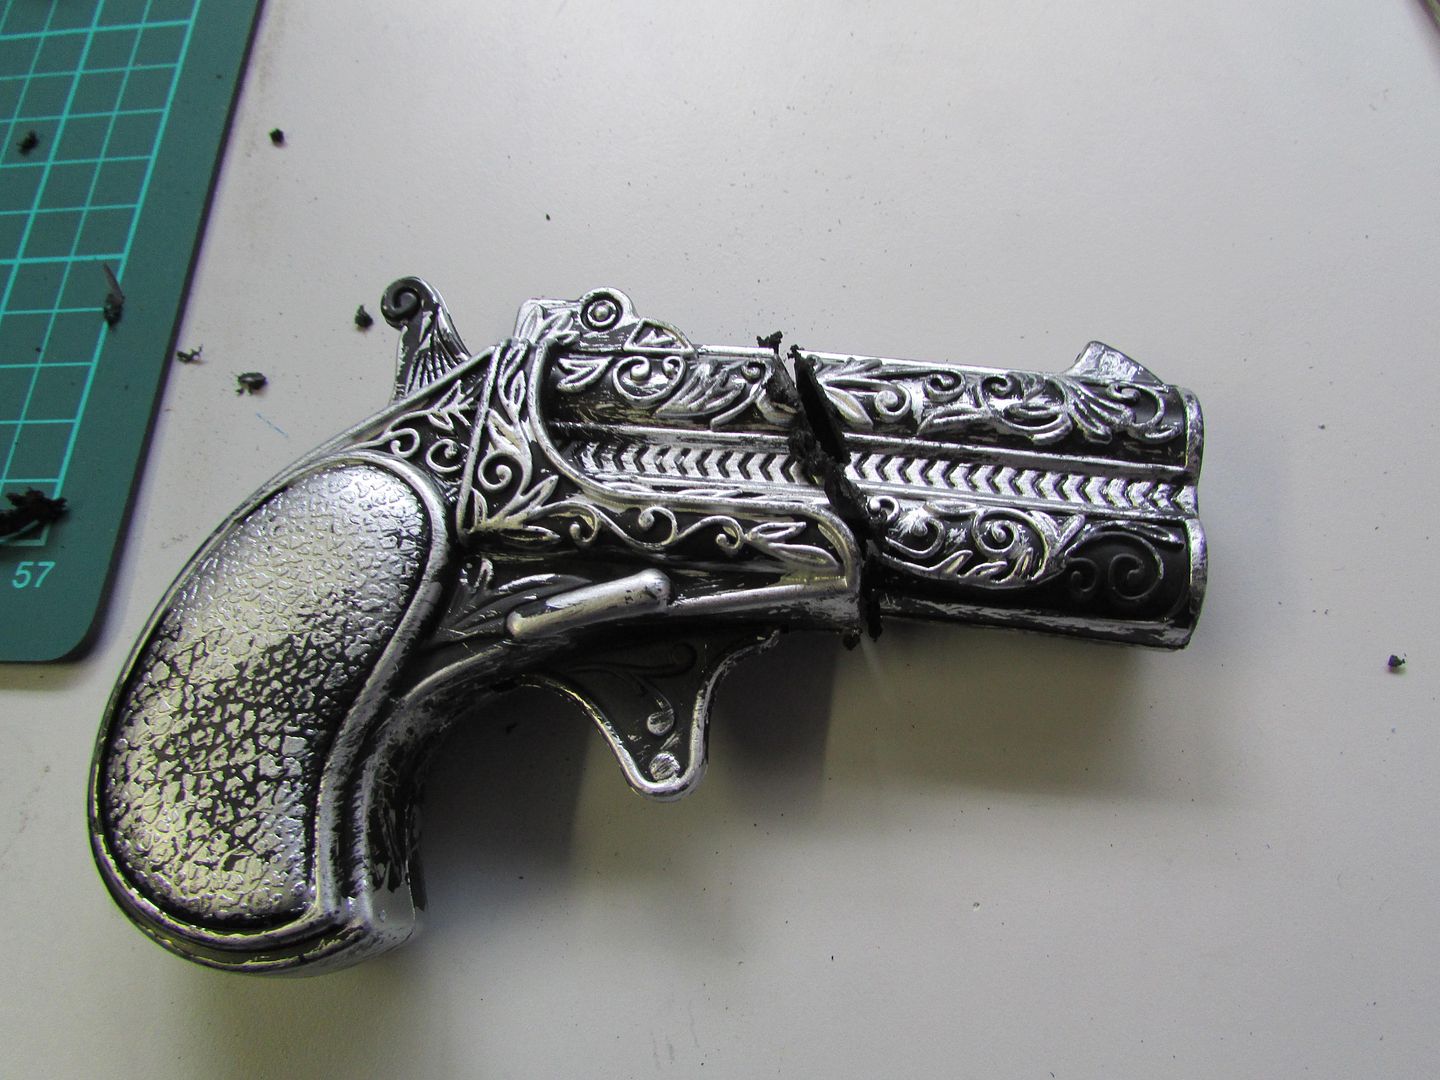
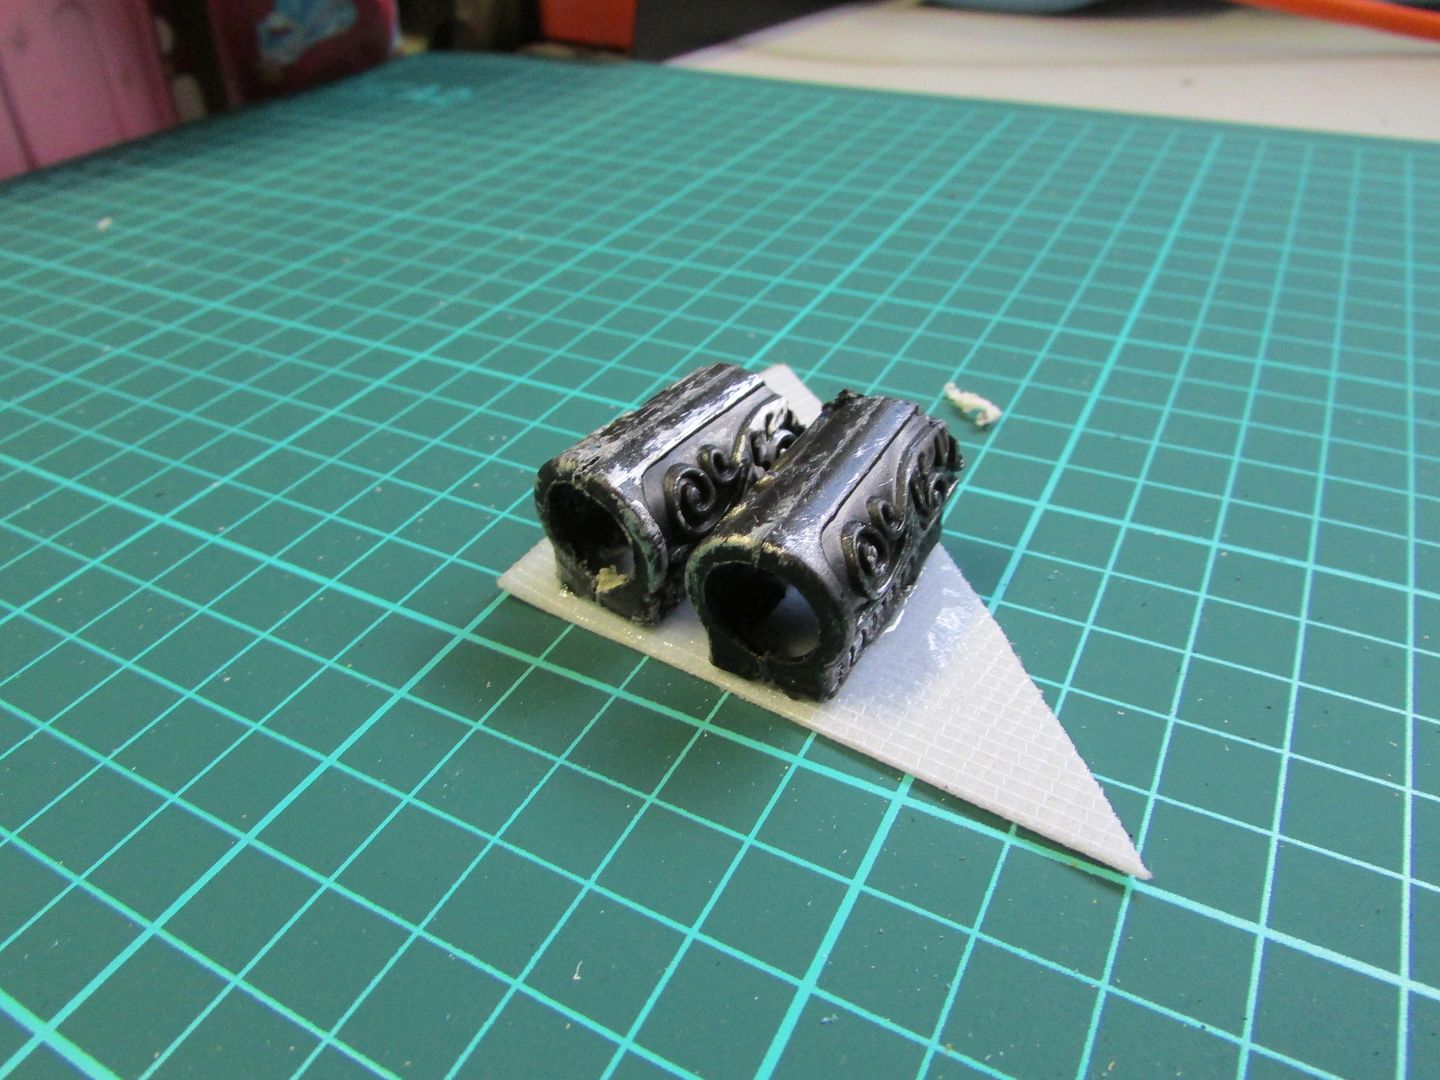
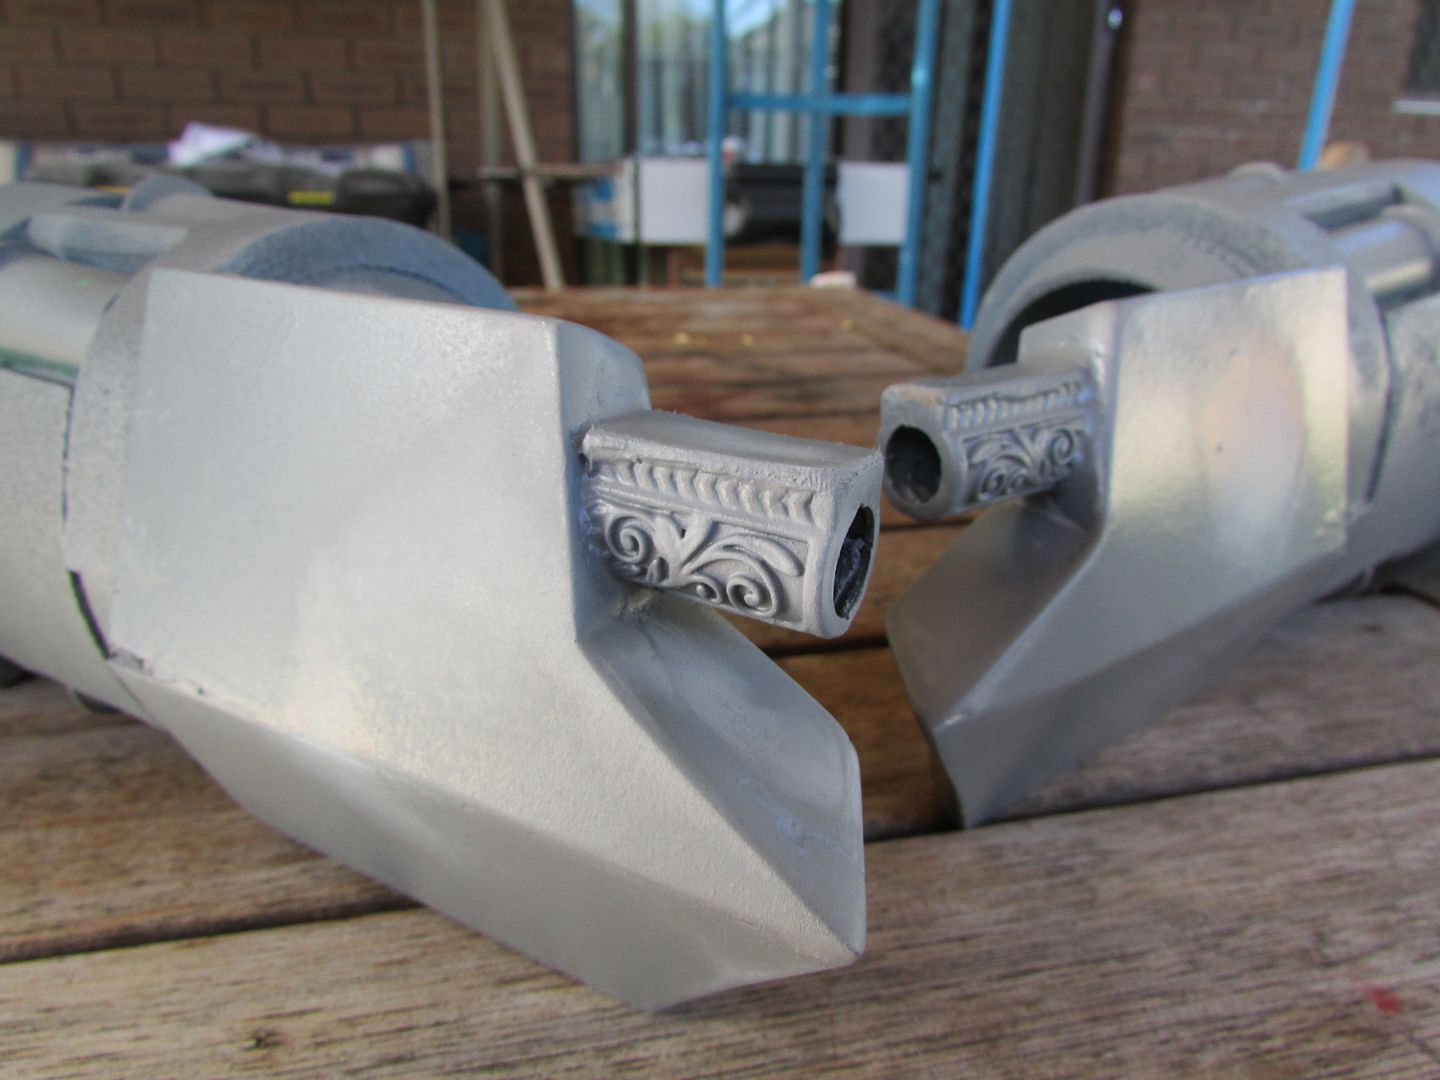
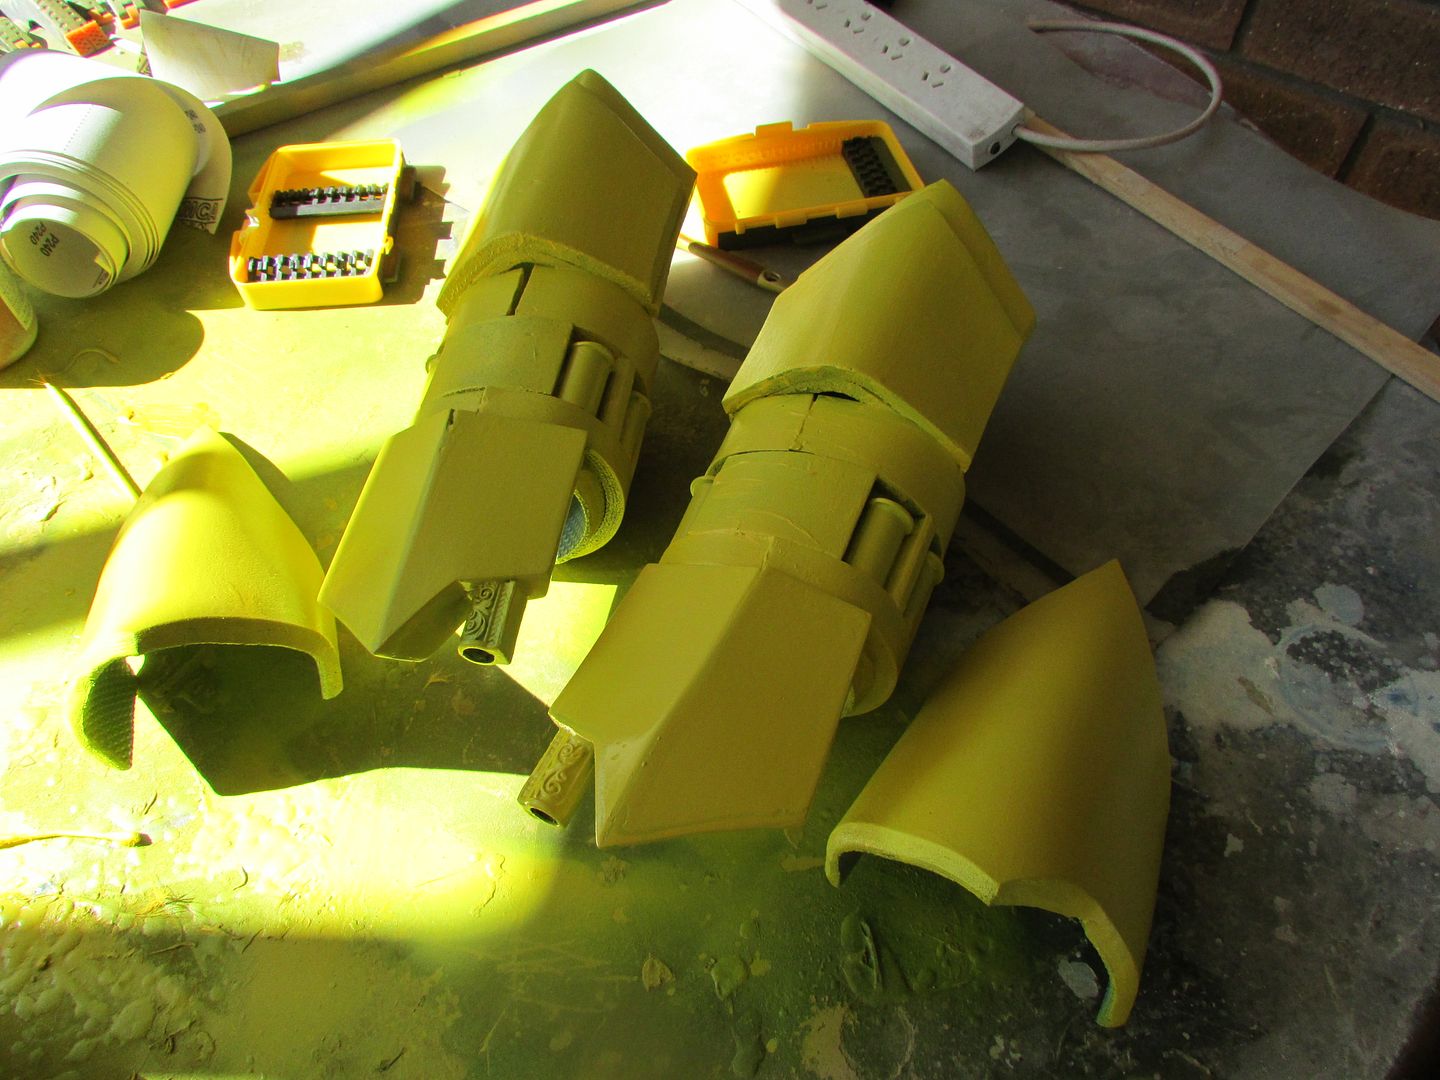
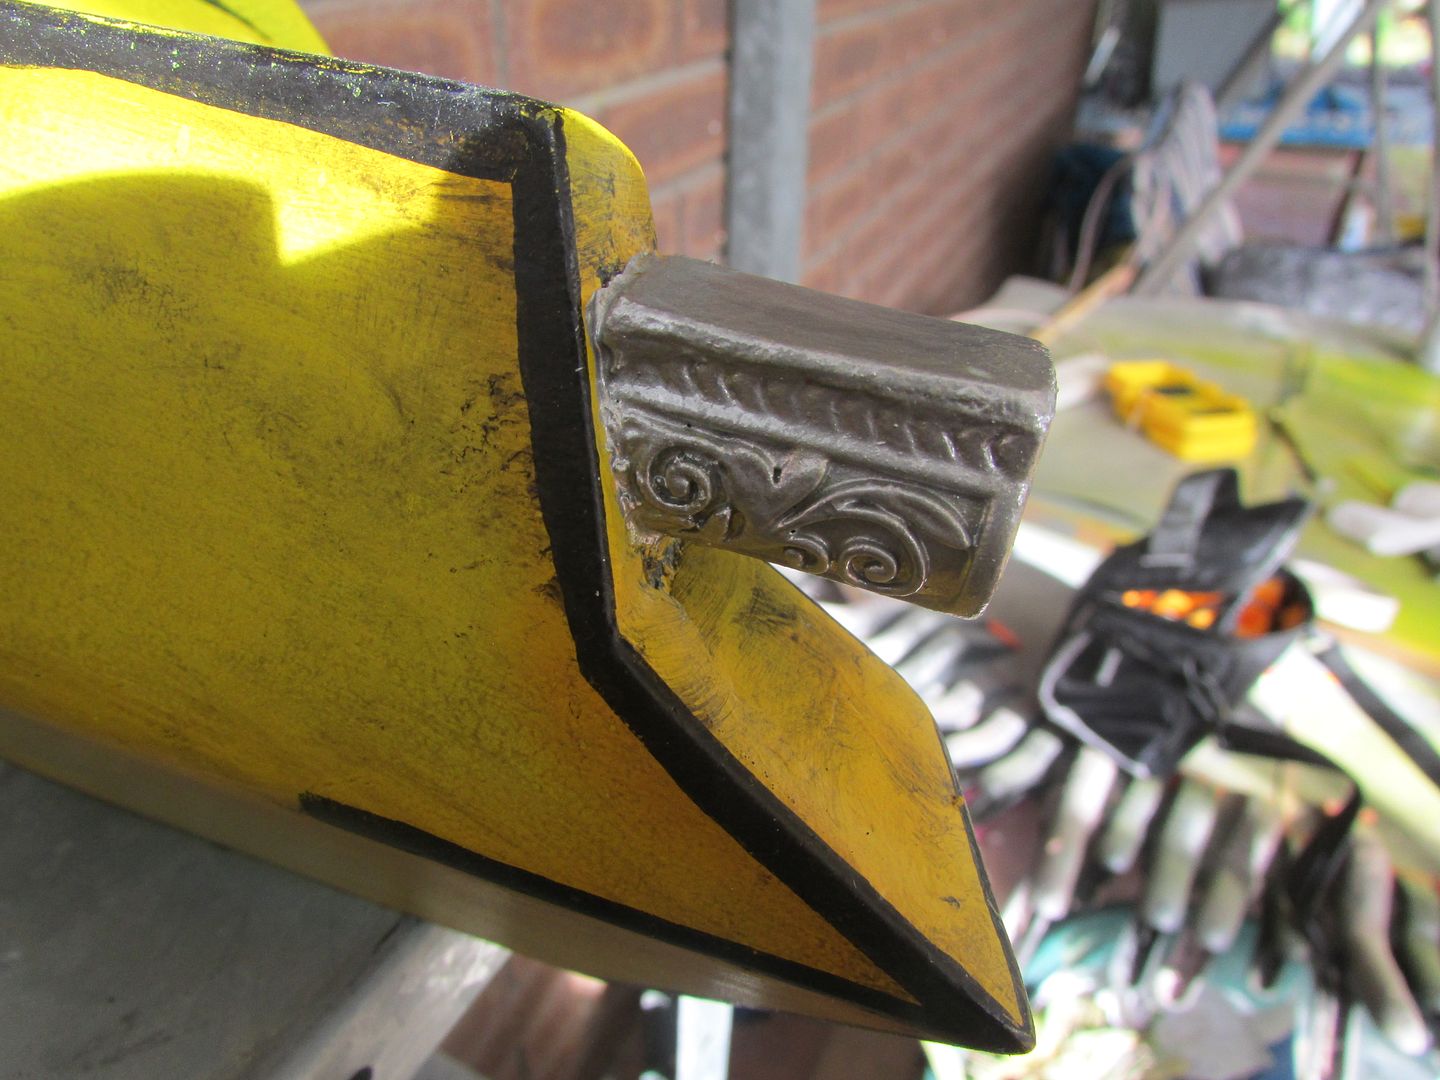
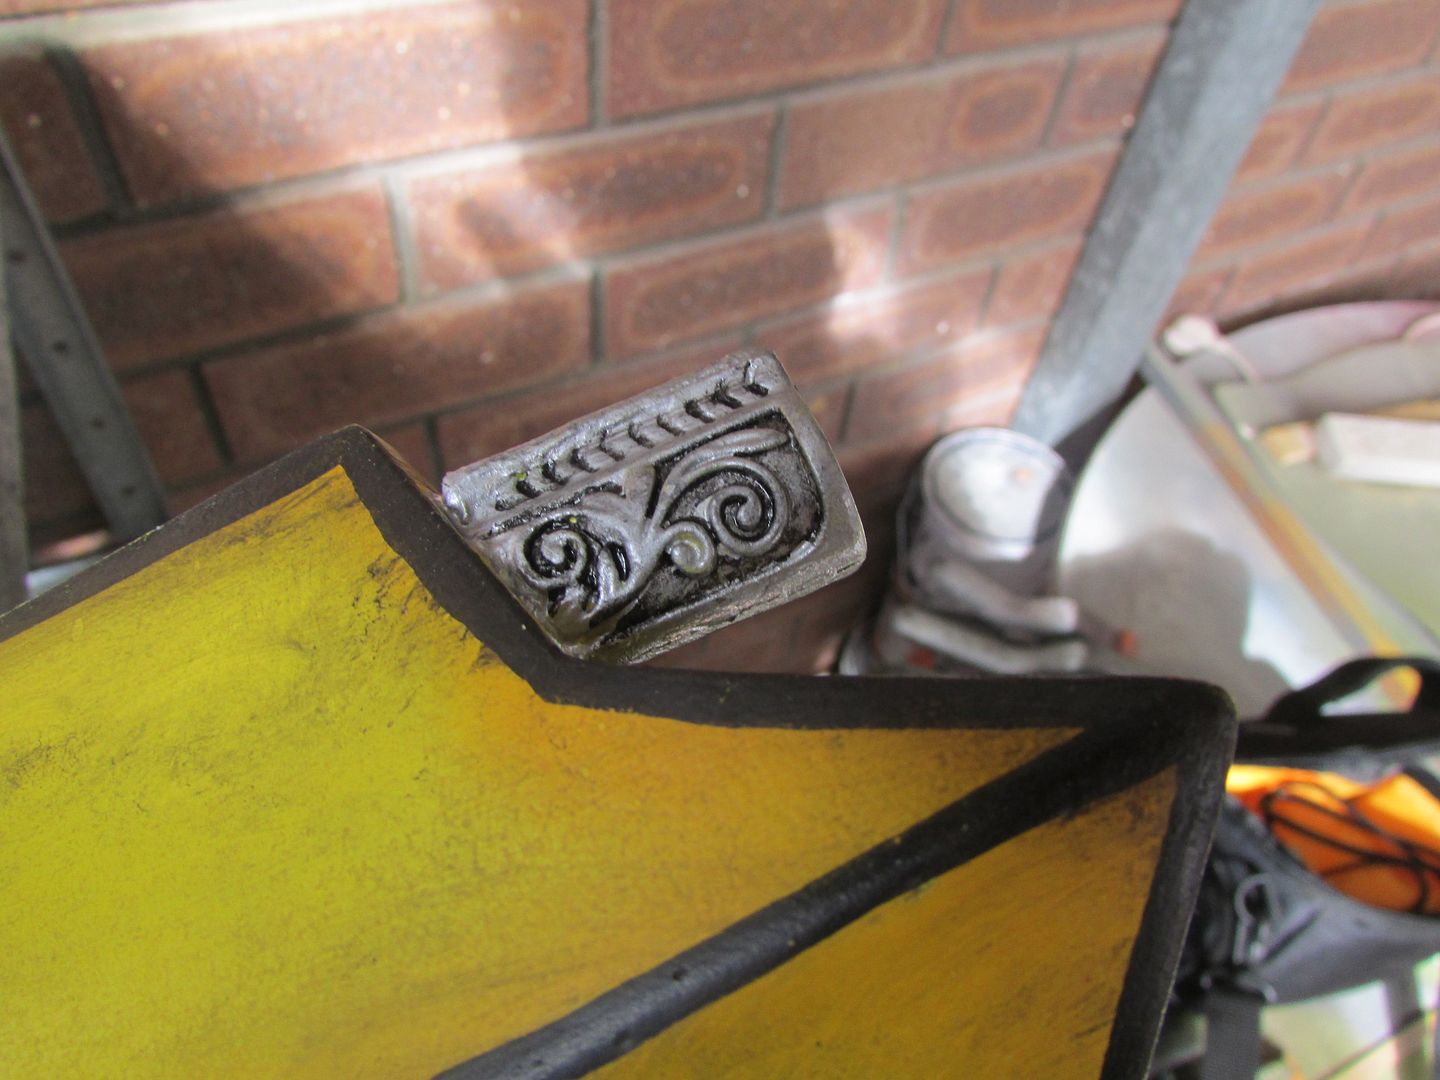
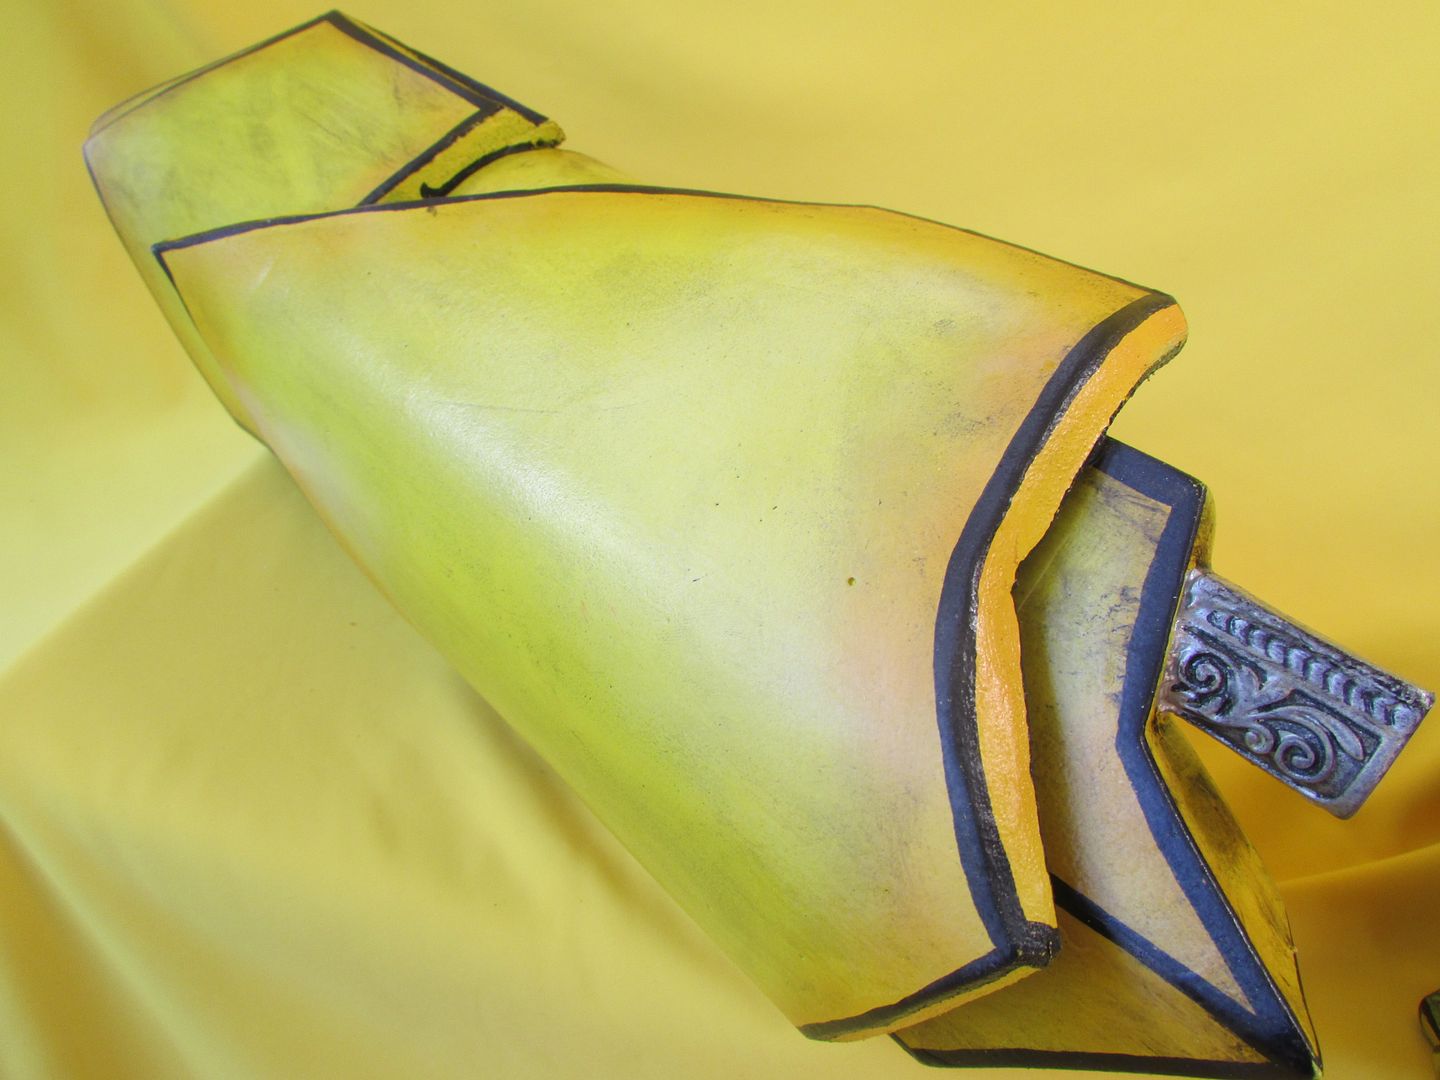
For the gun barrels those came about
as a result of me carefully sawing them off cheap cowboy pistols and sealing up
the exposed faces with a combination of filler putty and wonderflex, before gluing
them onto the business ends I had prepared earlier.
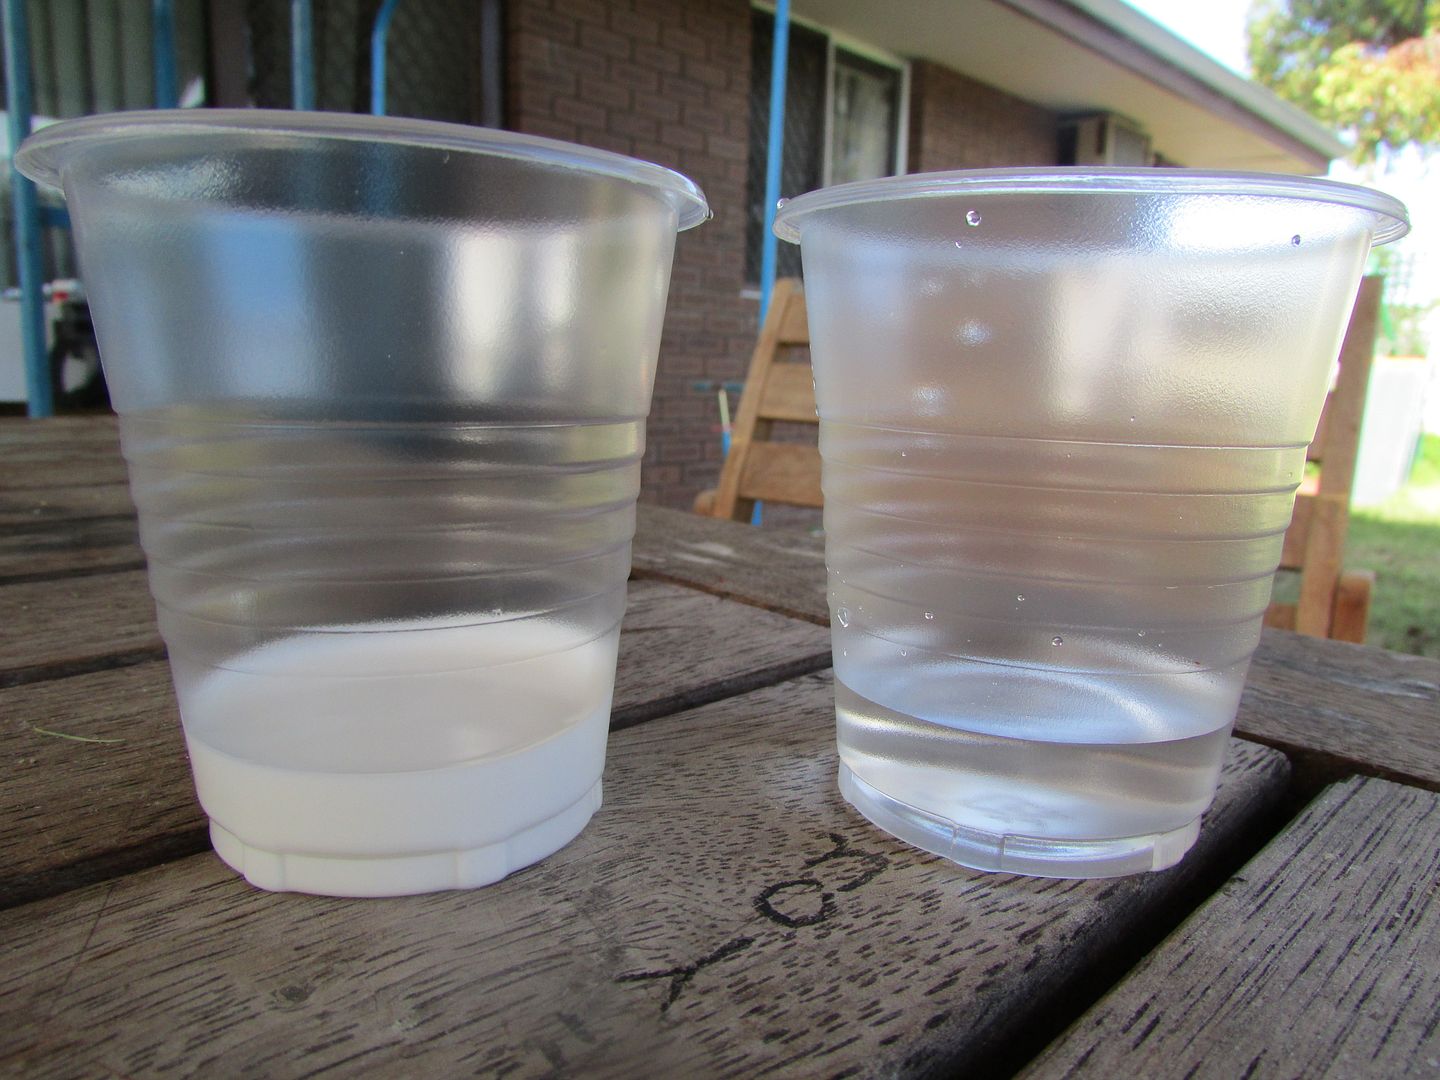
Now we come to the painting phase. however with all types of craft foam you need to first seal the material before
you can undergo painting of any kind. Without sealing the foam before
painting, you will find the paint will not adhere to the surface very
well and end up being absorbed by the material resulting in a poor
looking final product.
So to seal foam the most common technique is to use is a mixture of 1:1 PVA glue (wood glue) and water. Then using this resulting milk
like mixture, proceed to do multiple coats onto the piece with a
cheap paintbrush.
At minimum I like to do somewhere
between 8 to 10 coats allowing each coat to fully dry before going onto the
next, to get a good surface to work with. The more coats you do the more
you’ll feel the foam get stiffer, less spongy and eventually appear glossy.
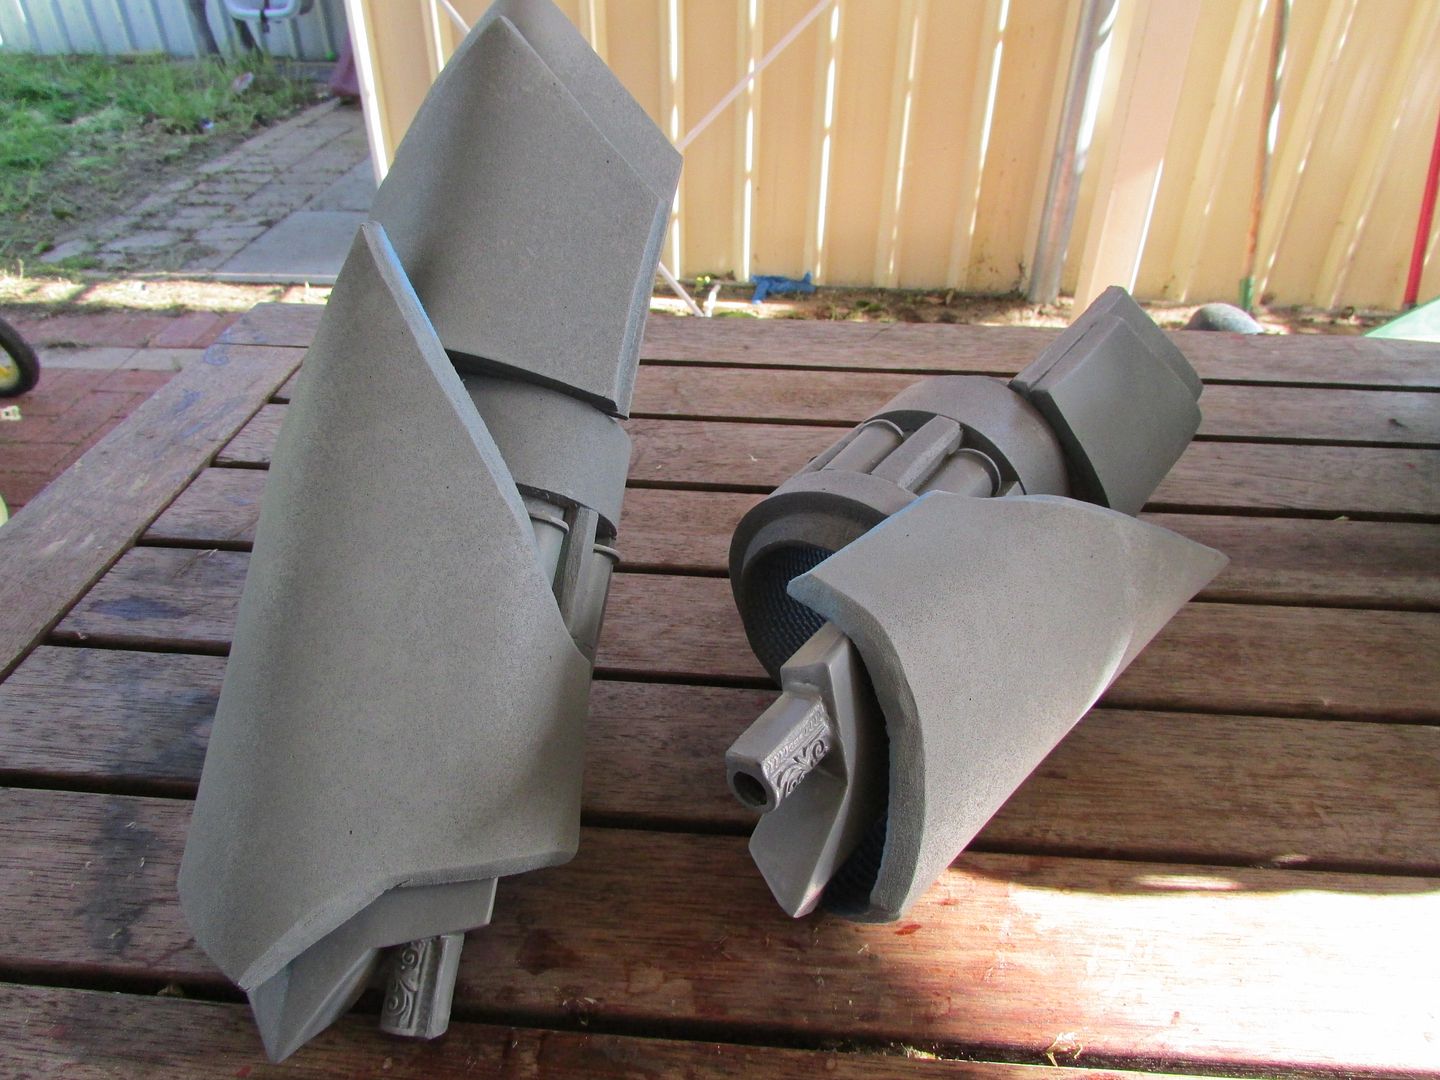
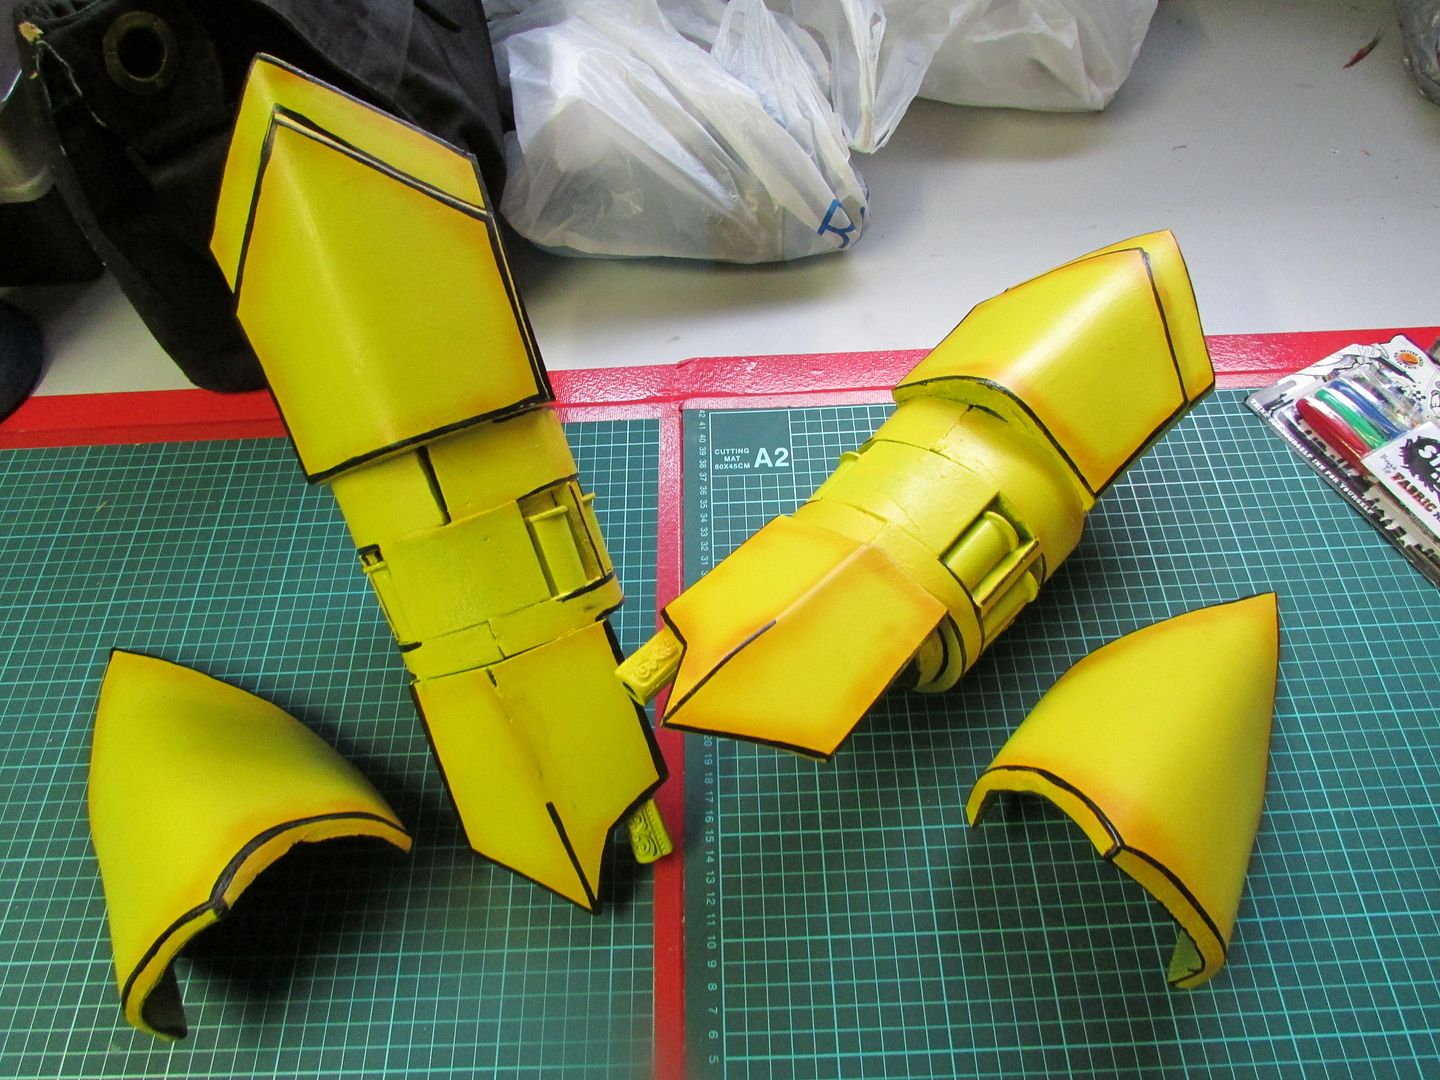
With the foam properly prepped the
actual paintwork could begin; For ember Celica the paint job consisted of
multiple stages. First was a grey primer layer which helped fill in any still
exposed imperfections and sets up the surface for painting.
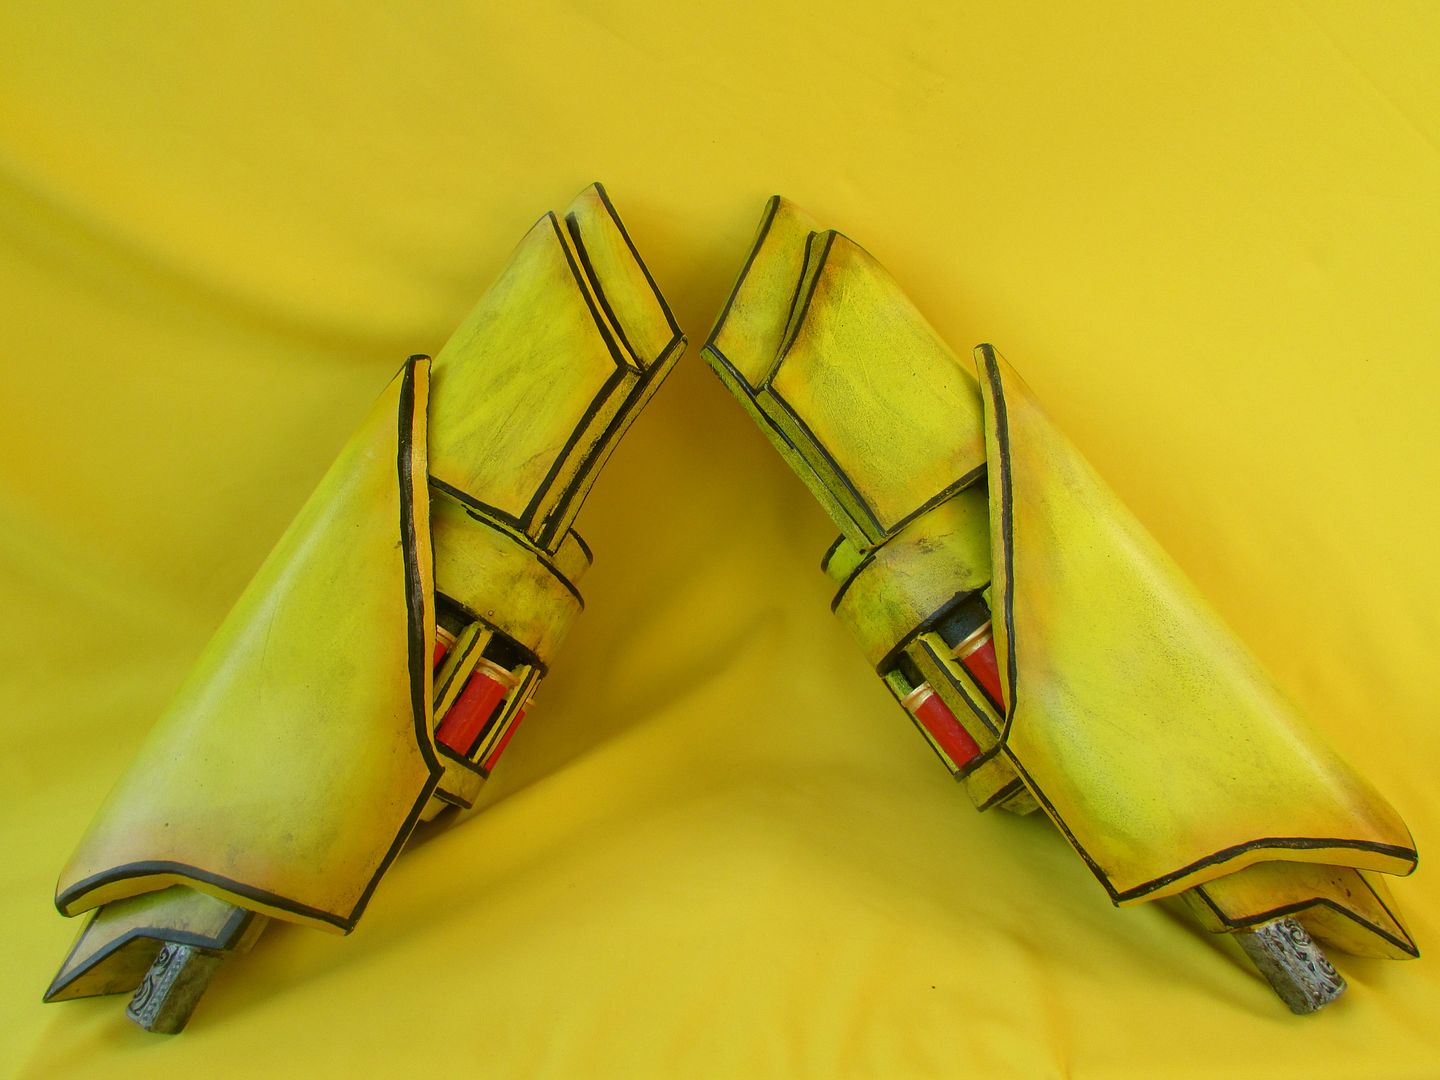
Followed by two coats of a flat
yellow acrylic spray-paint layer, I should mention when using spray
paints of any kind please wear a respirator and so in a well ventilated area.
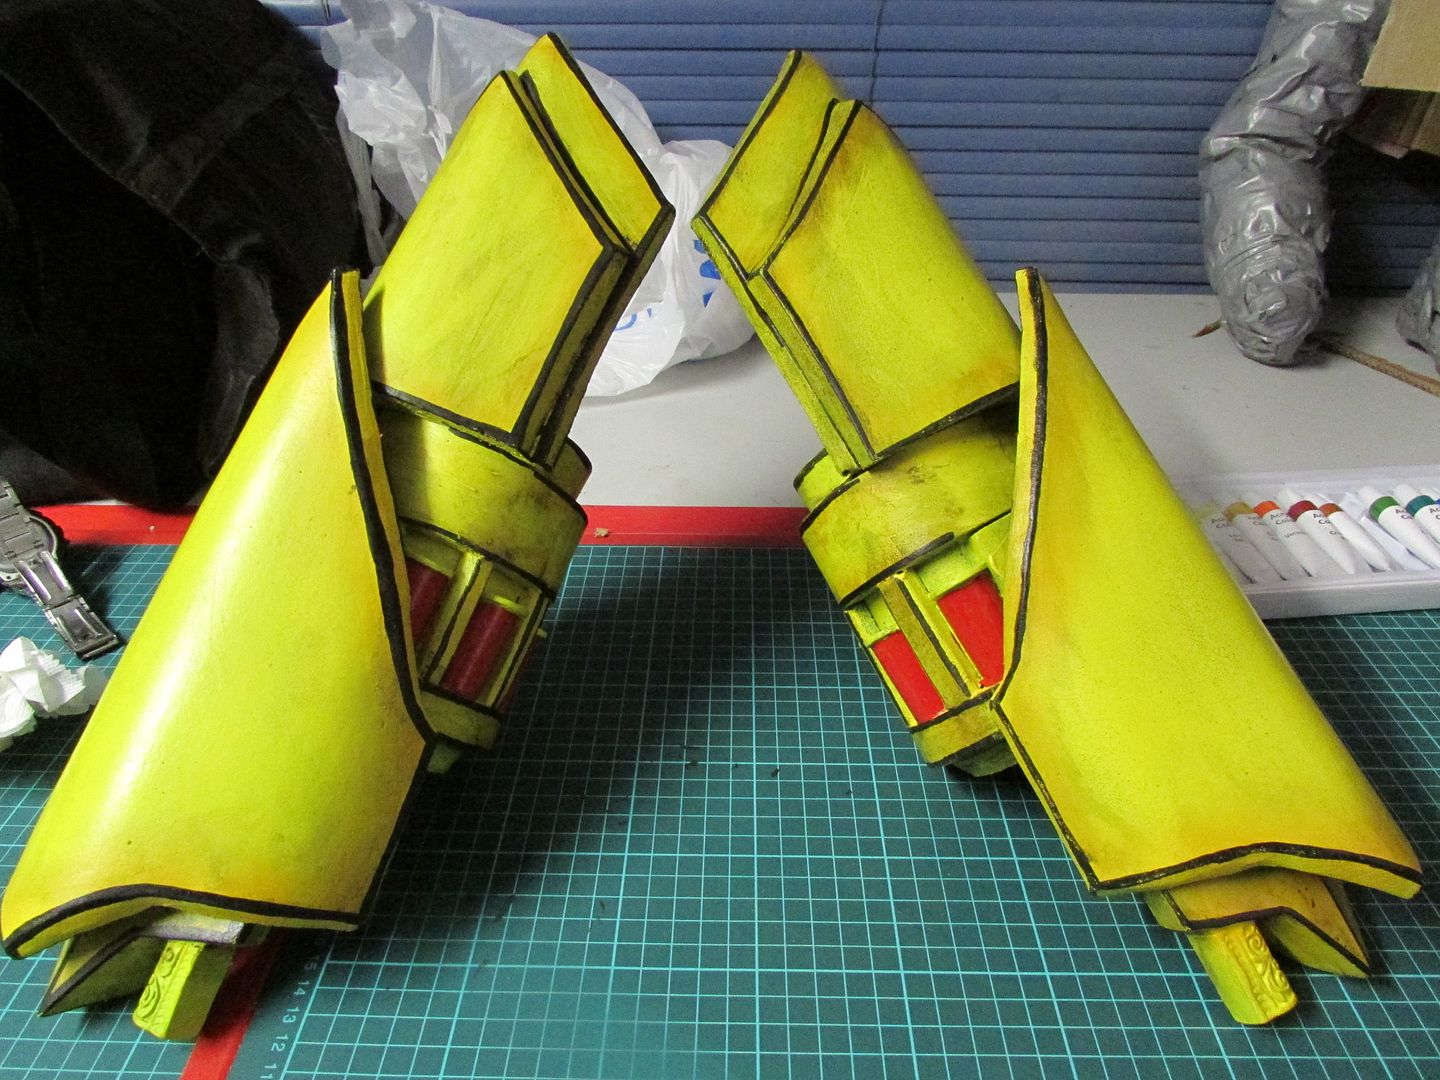
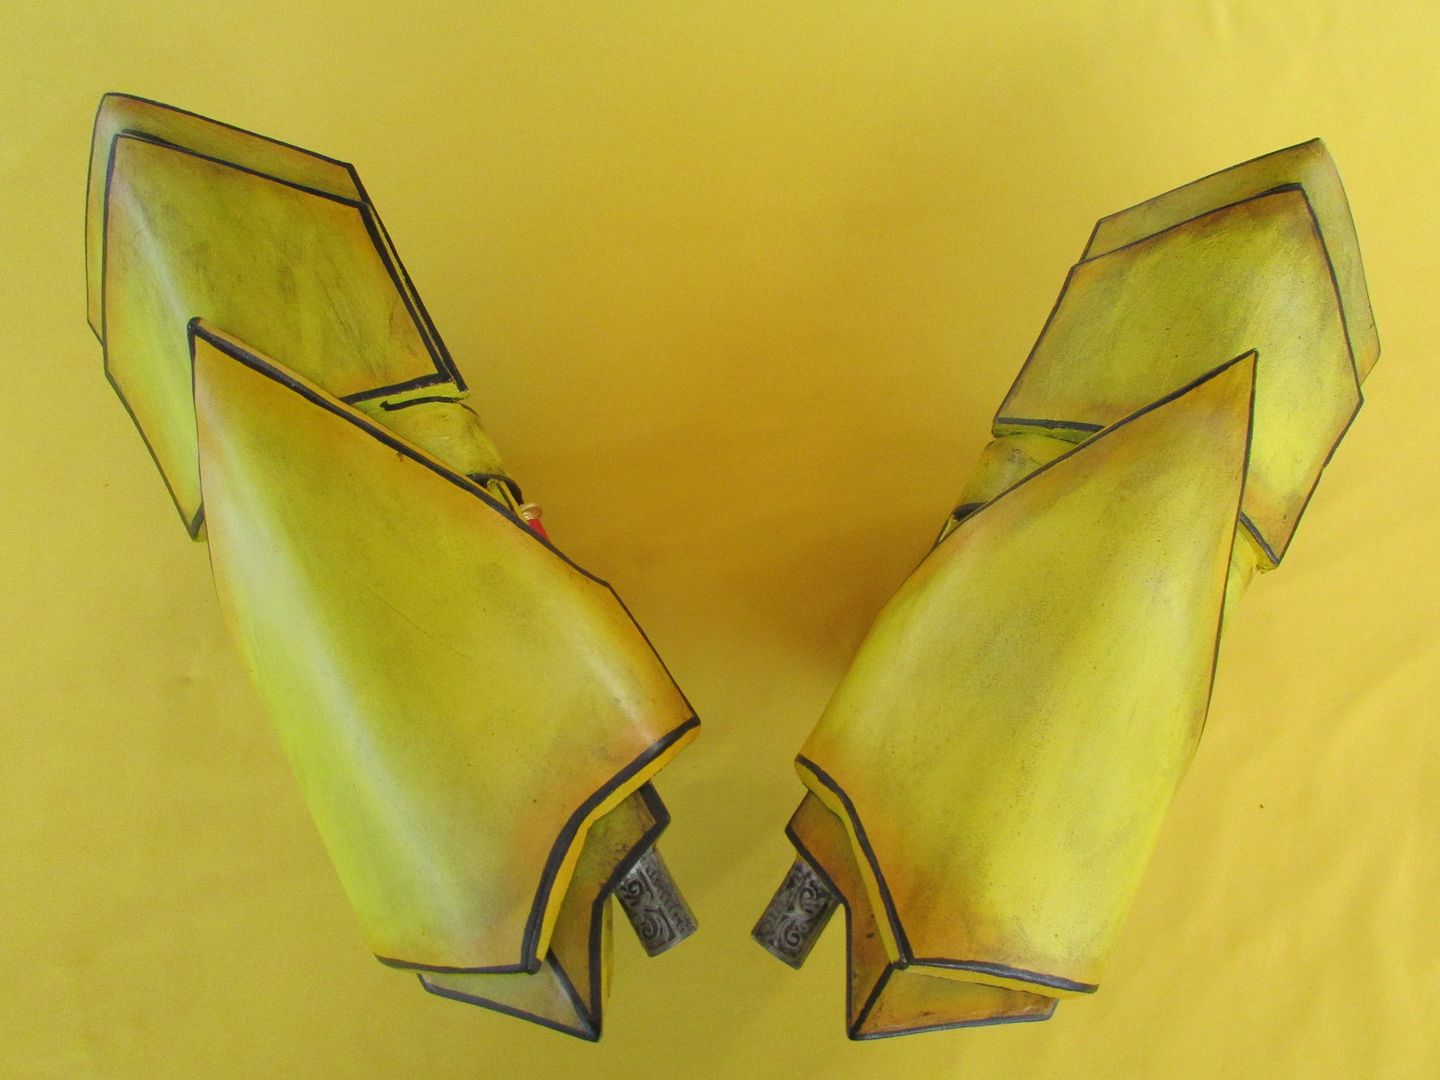
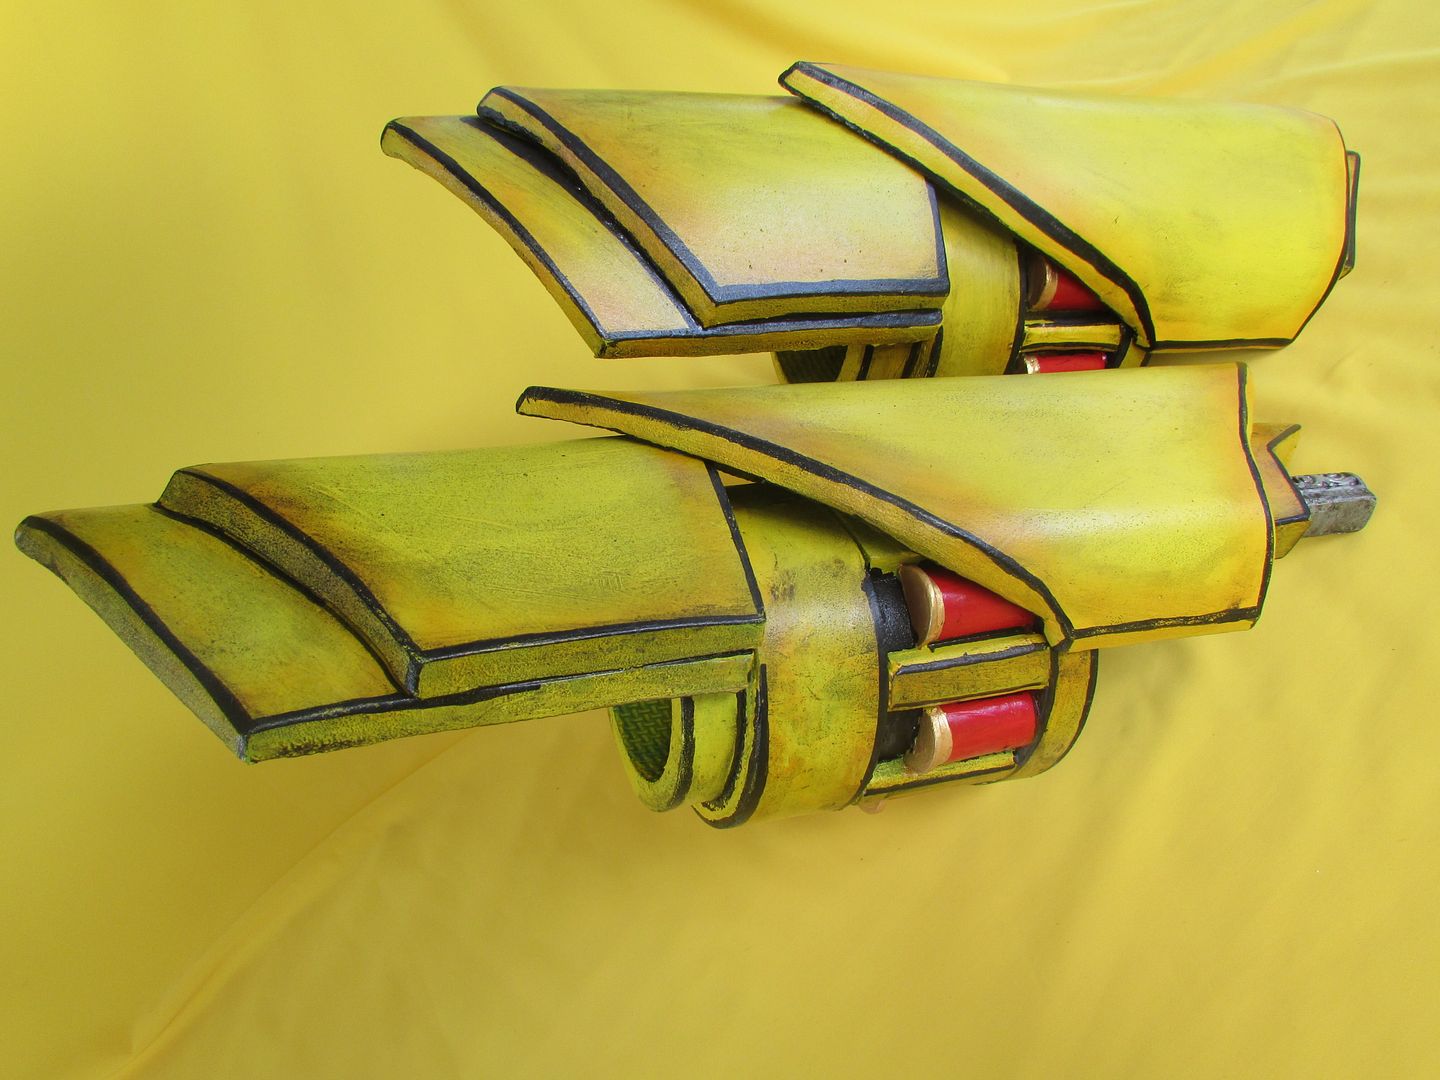
For added flare I did some light gold
sunbursts and gradients along the edges of the gauntlets with an airbrush. It
adds a depth to the paintjob I feel and once those were dried I started doing
the line work with my good friend the brush tipped fabric marker sharpie.

The shotgun shells were coloured with red enamel
hobby paints and gold acrylics for the brass caps.
The gun barrels themselves were spray
painted chrome and had subtle black acrylic paint smudged into he details to
make them stand out.
Capping it all off with a final layer of
weathering which was achieved by dabbing a combination of black and brown
acrylic paints onto the surface, allowing it to dry slightly and then smudging
and wiping away the paints with a damp paper towel to get a desired look,
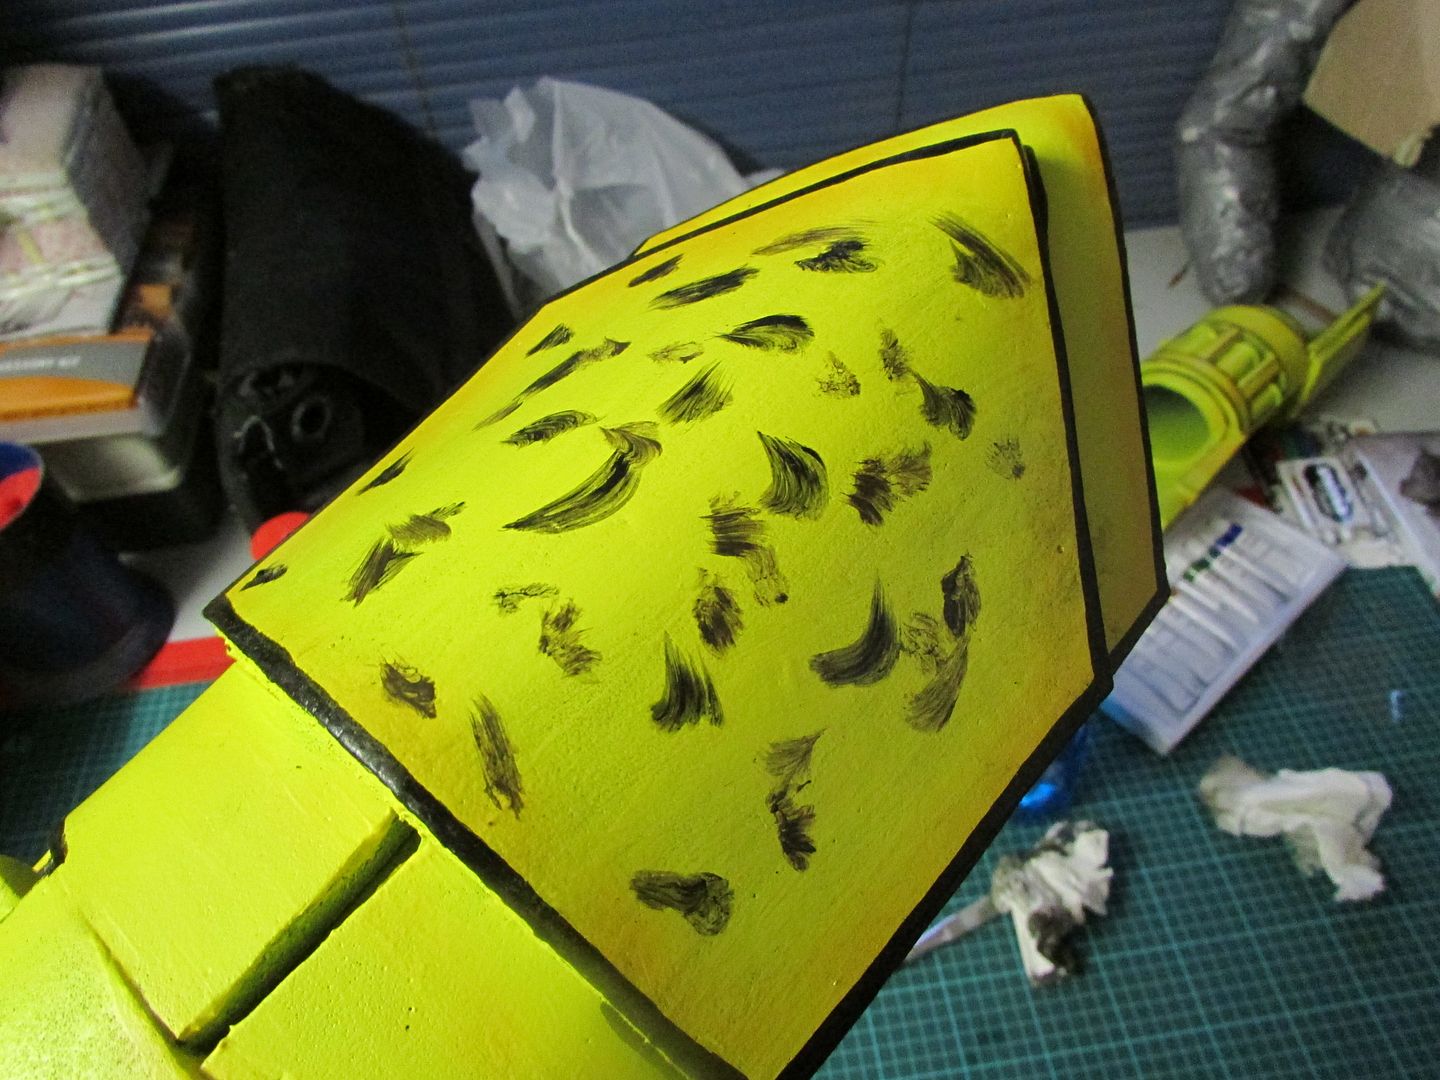
A very simple technique and definitely worth trying out, it adds a gritty aesthetic to the prop.
Thanks for reading