
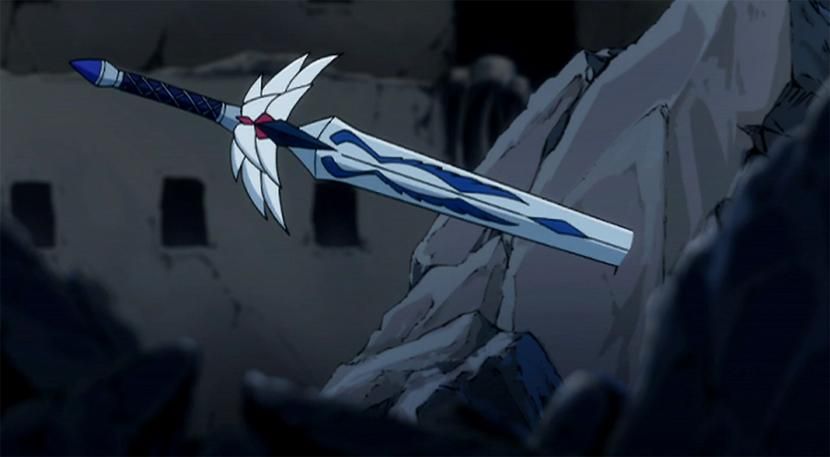
So recently a long time friend of mine made it known to me
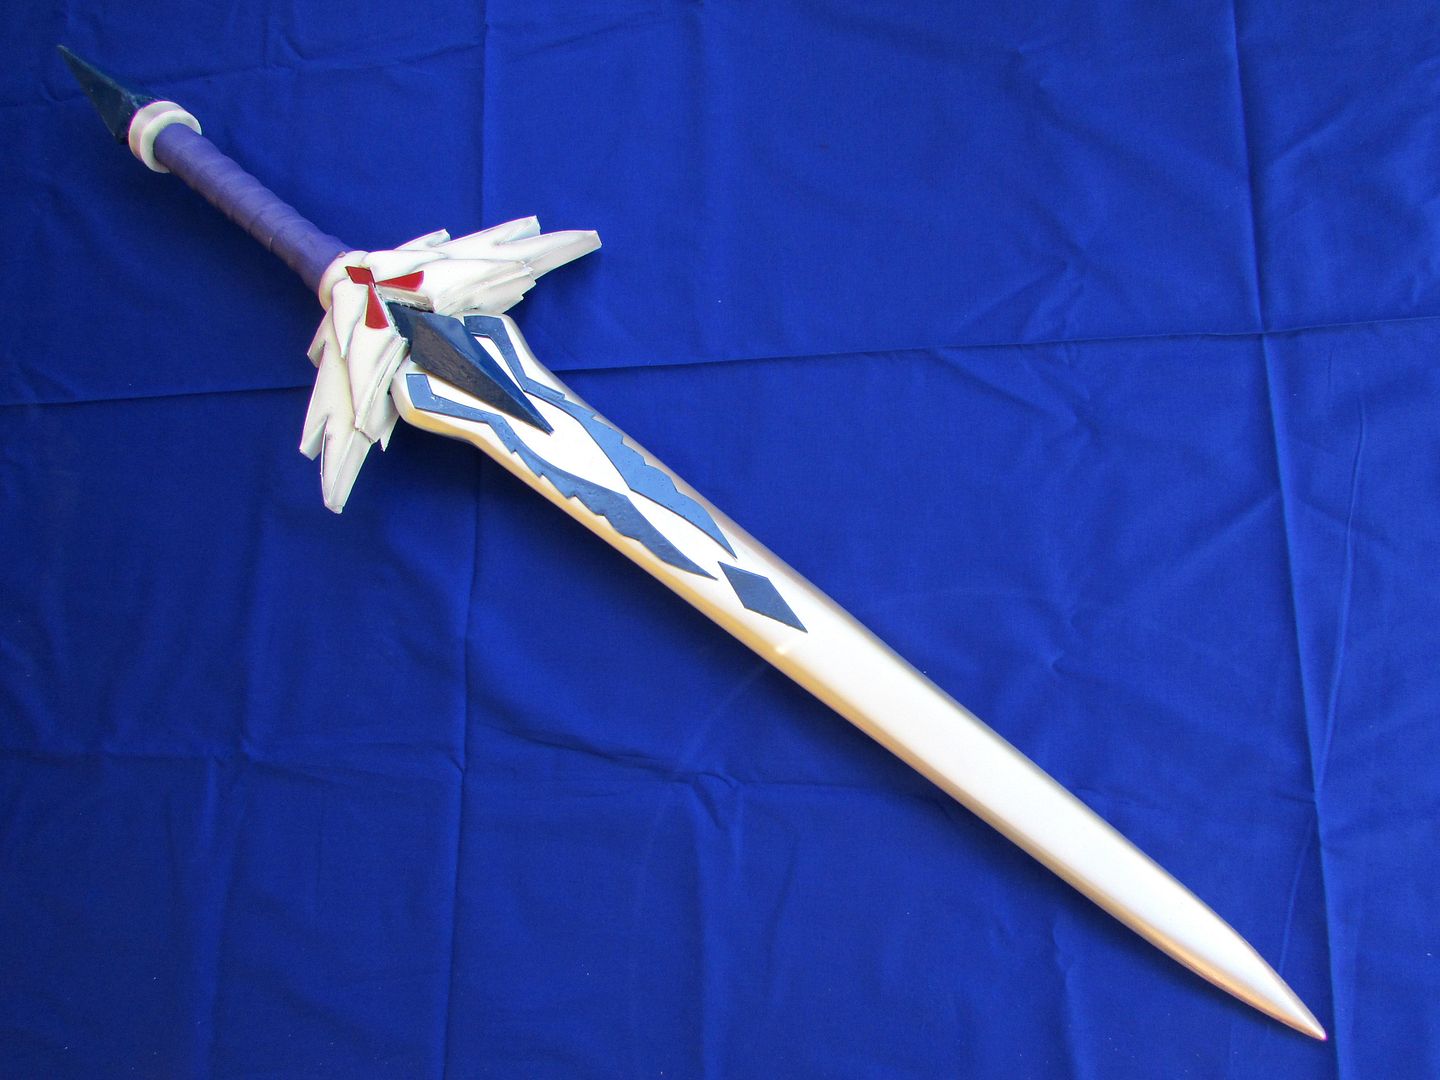
that one of her upcoming major cosplays was going to be Erza Scarlet in her Heaven’s Wheel Armour form.
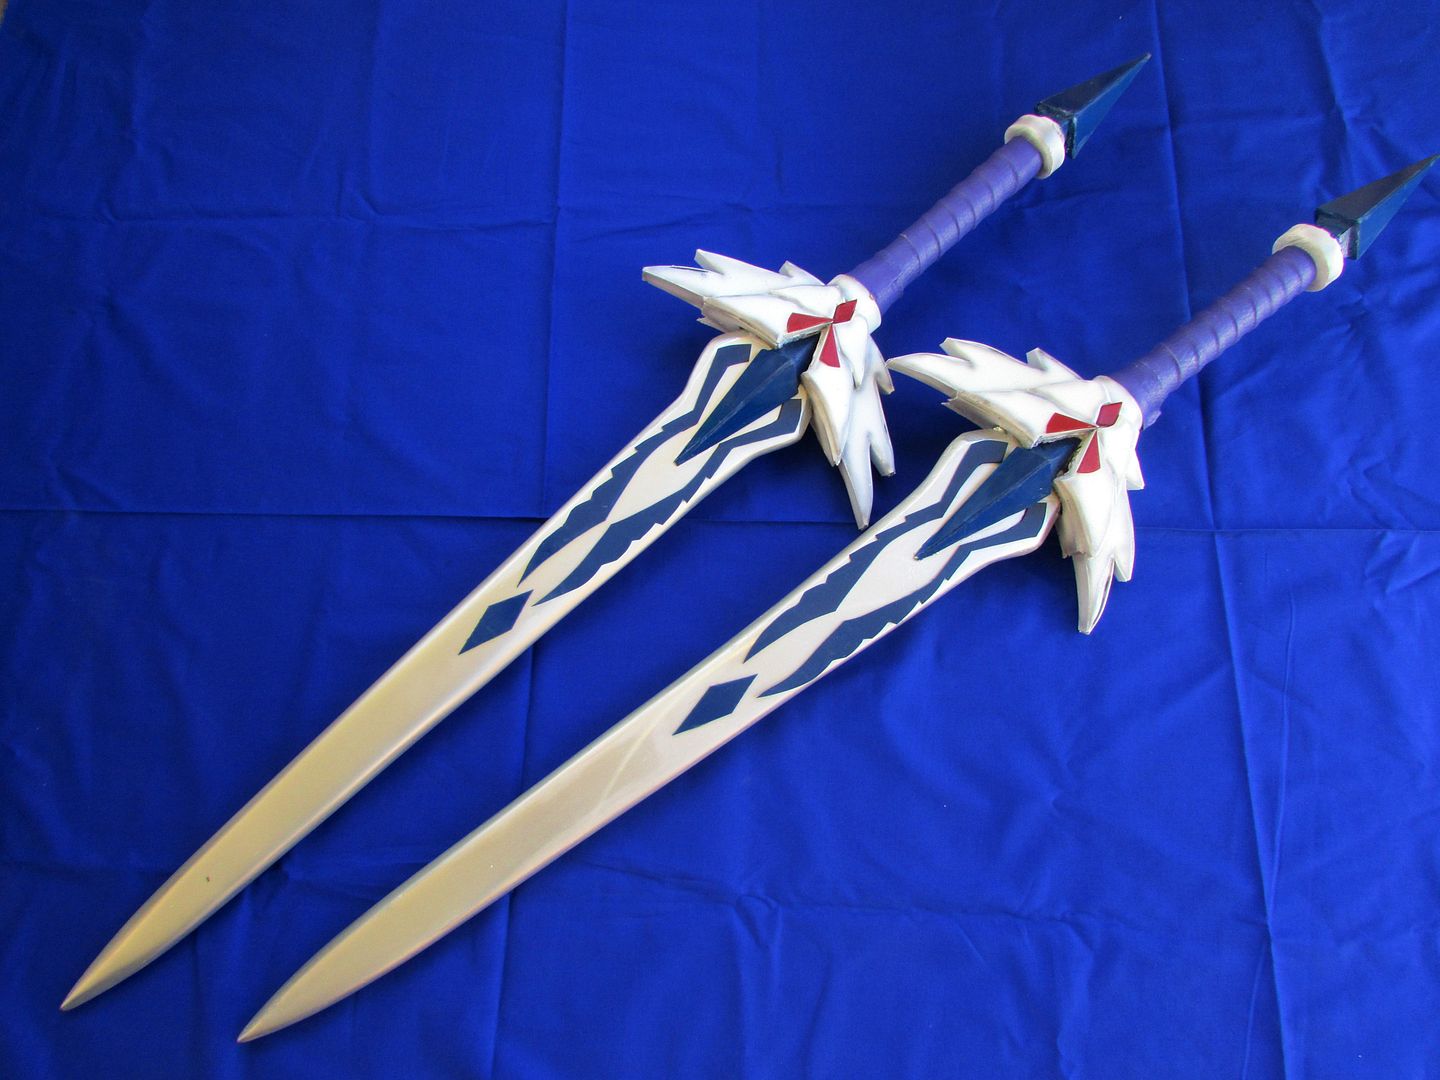
So unaware to her I took this opportunity to crank her out a set of the
swords to give to her at her surprise 21'st so she could use them for the outfit and eventual performance at some point in the future.

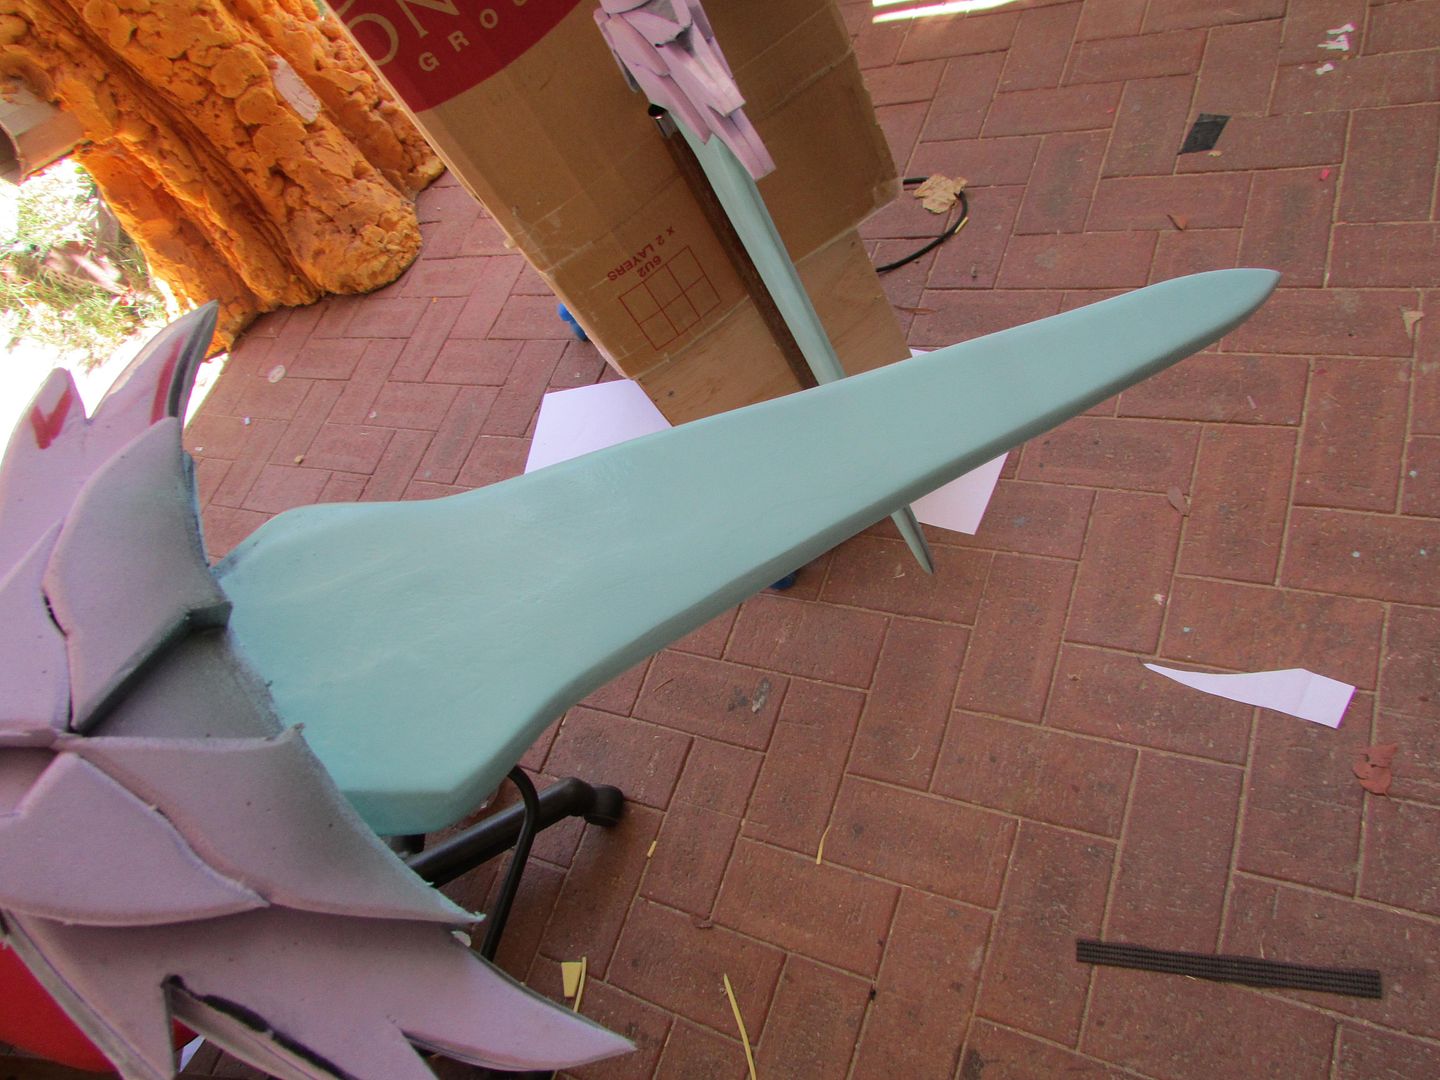
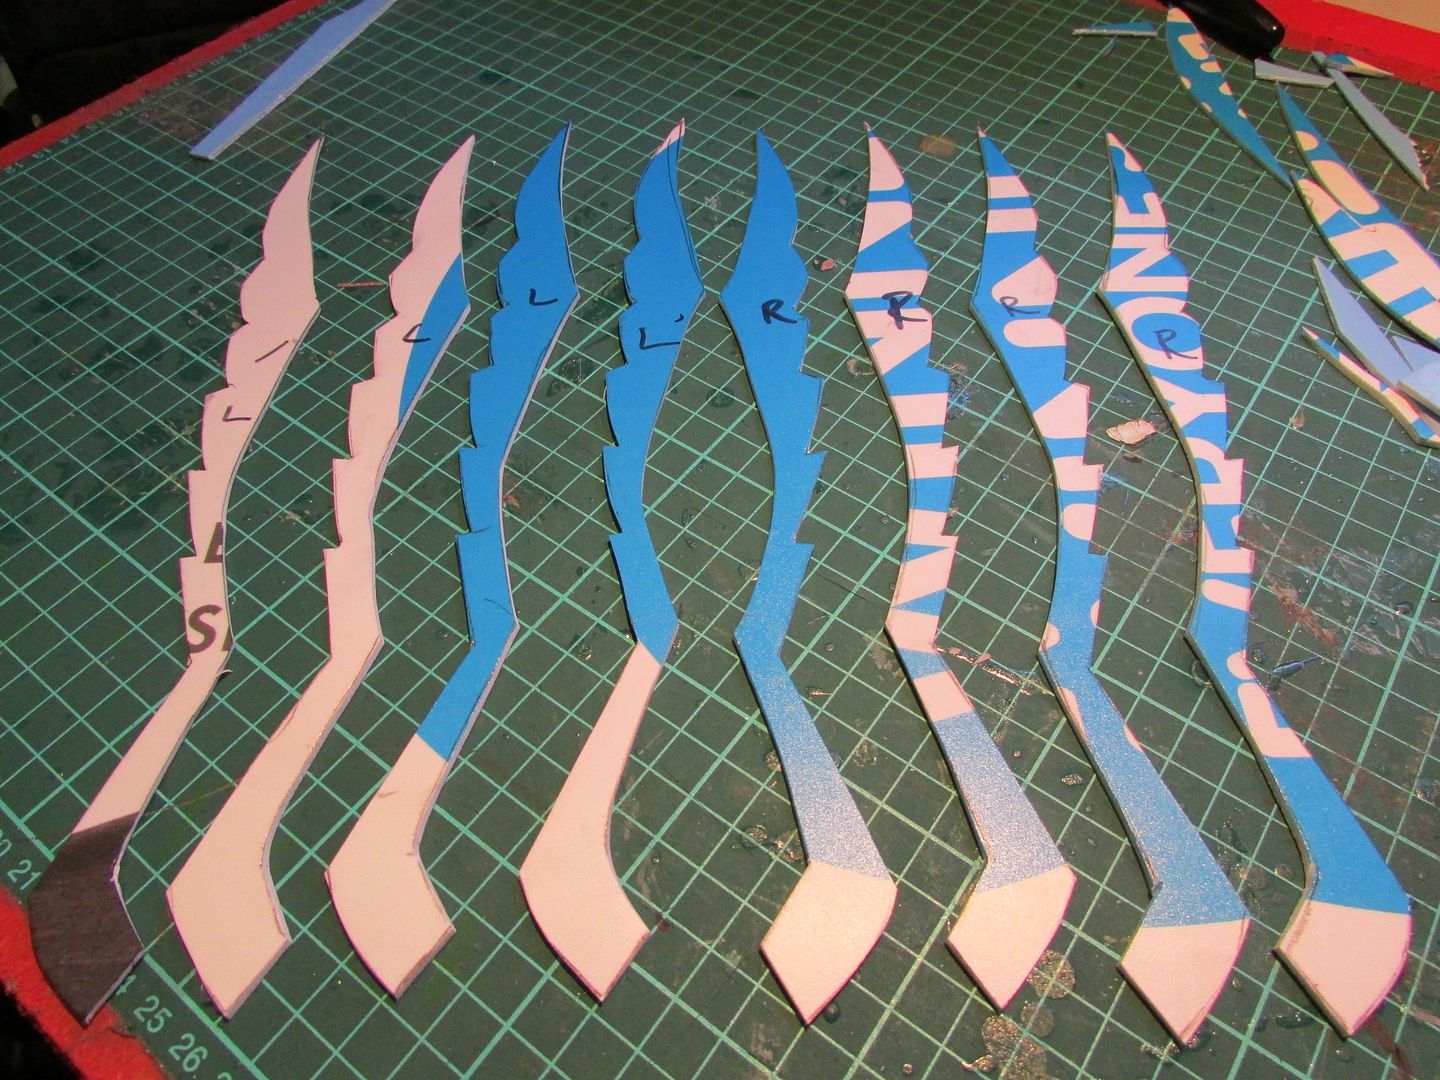
So like always with all my swords I like to start out with a wooden base blade as the main support structure and use that to expand and build the rest of the sword from.
For this instance I decided to go with an 18mm thick pine plank for starters and then went about cutting out the two blade profiles using a jigsaw and shaped the edges using the belt sander.
For this instance I decided to go with an 18mm thick pine plank for starters and then went about cutting out the two blade profiles using a jigsaw and shaped the edges using the belt sander.
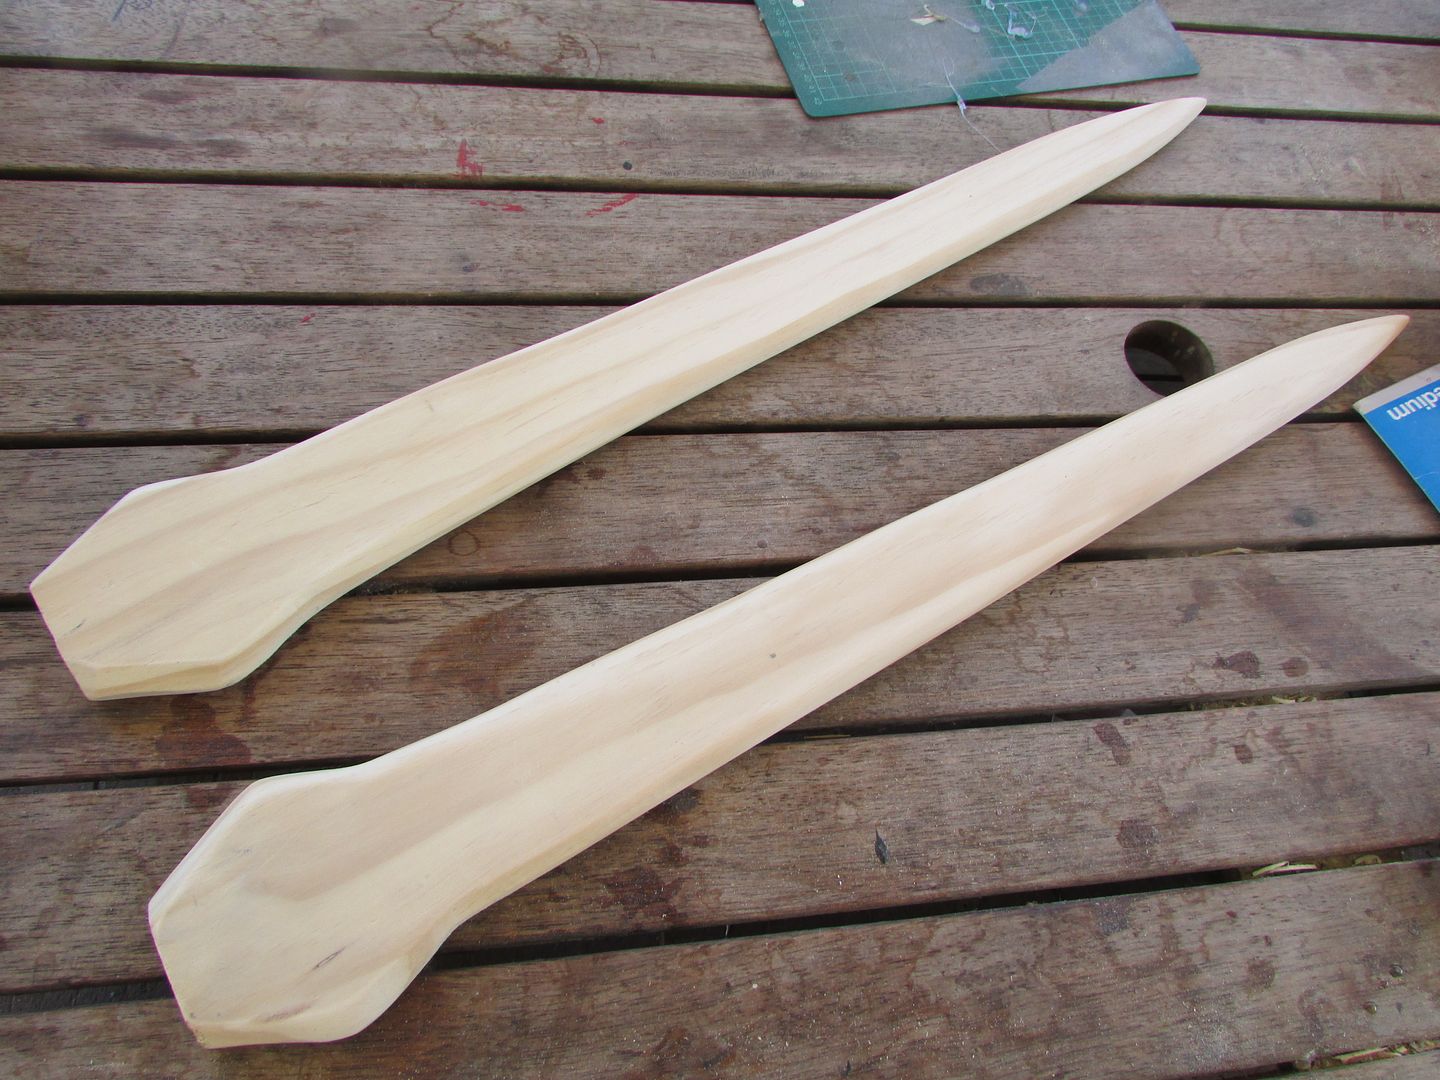
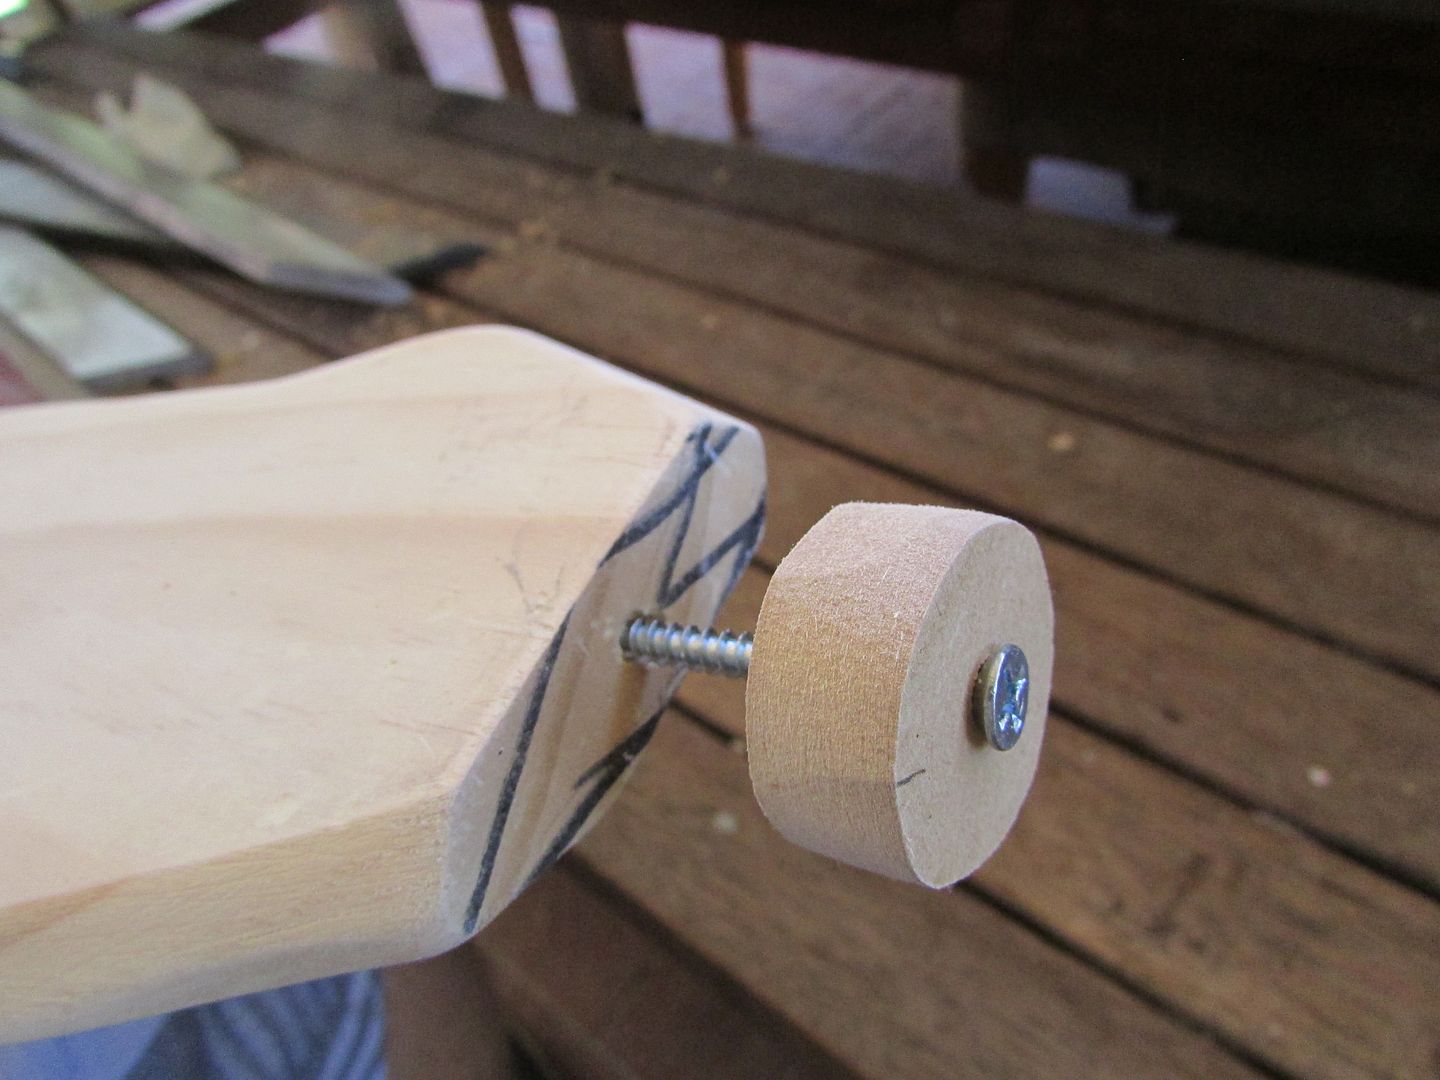
Once a nice shape was achieved, I sanded the whole thing down with 120 grit sandpaper and then started fashioning makshift tangs to support the eventual PVC pipe handle.
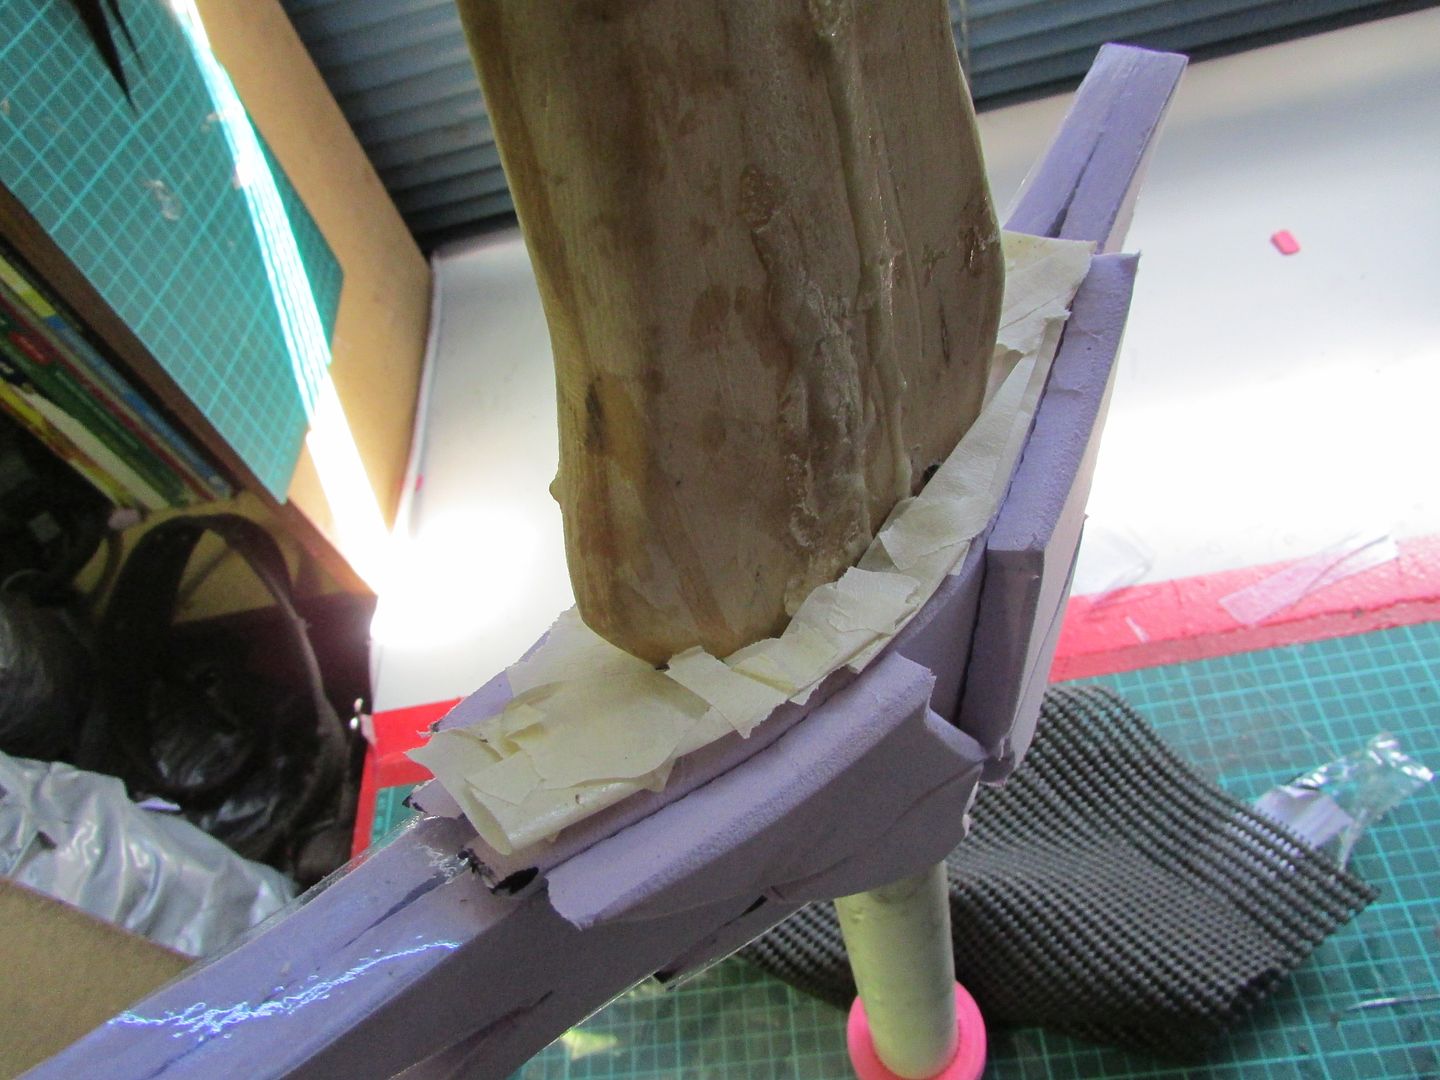
To do that I had to cut out MDF circles using a holesaw that matched the inner diameter of the PVC pipe handle and then using an appropriately lengthy screw affixed the circlular nub onto the butt of the blades.

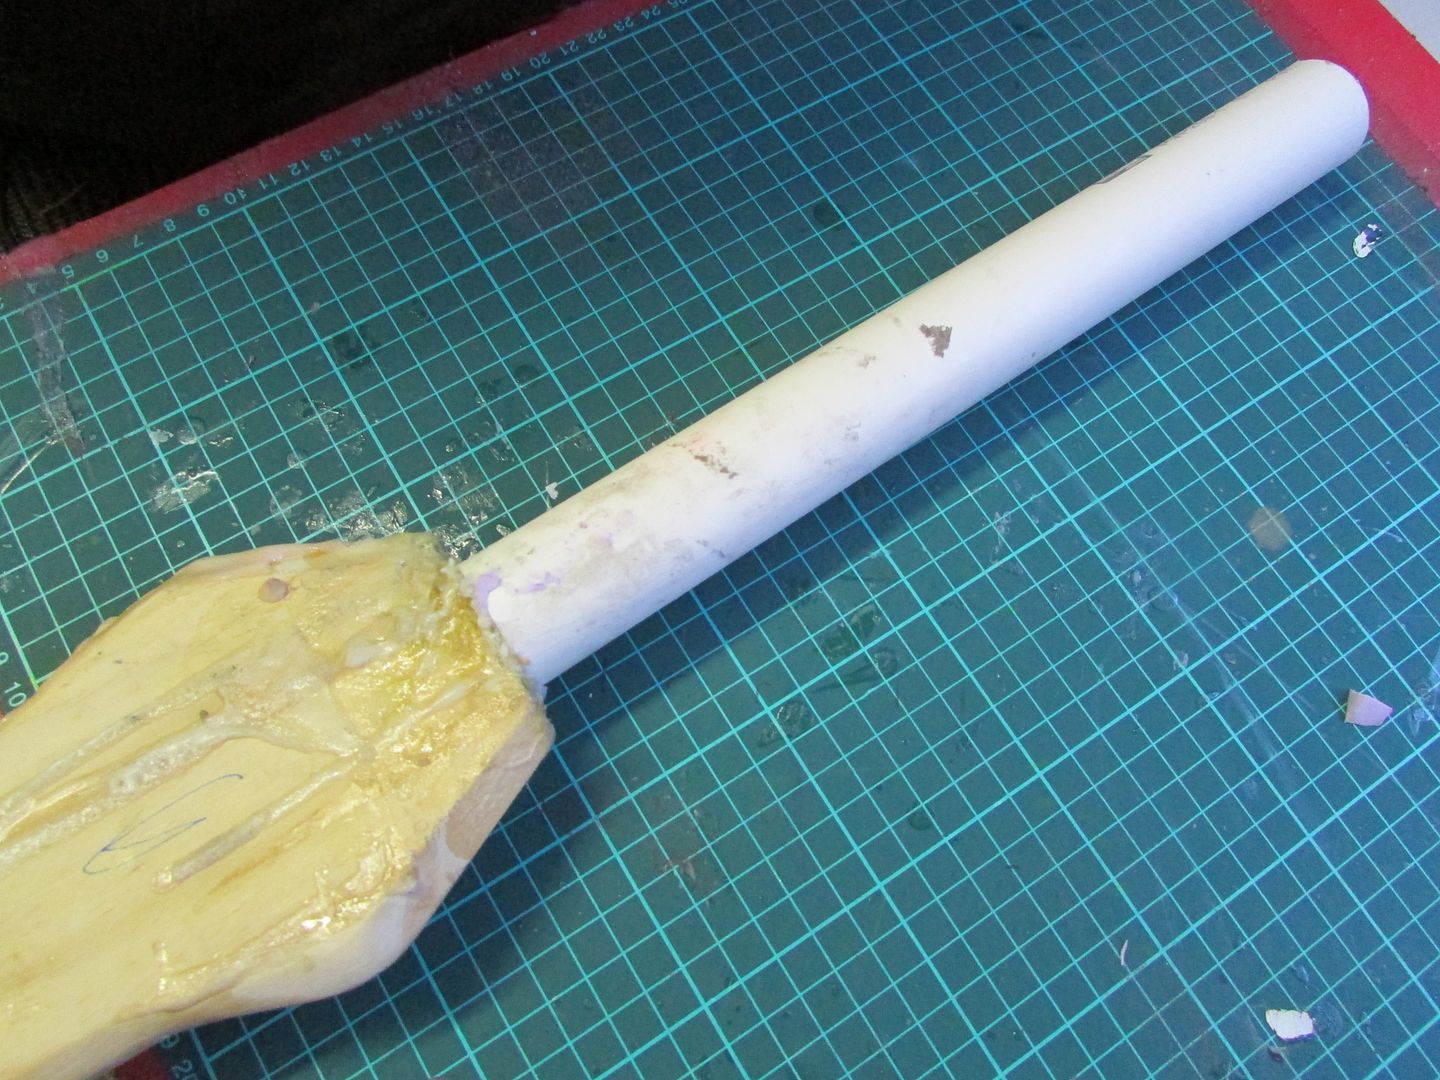
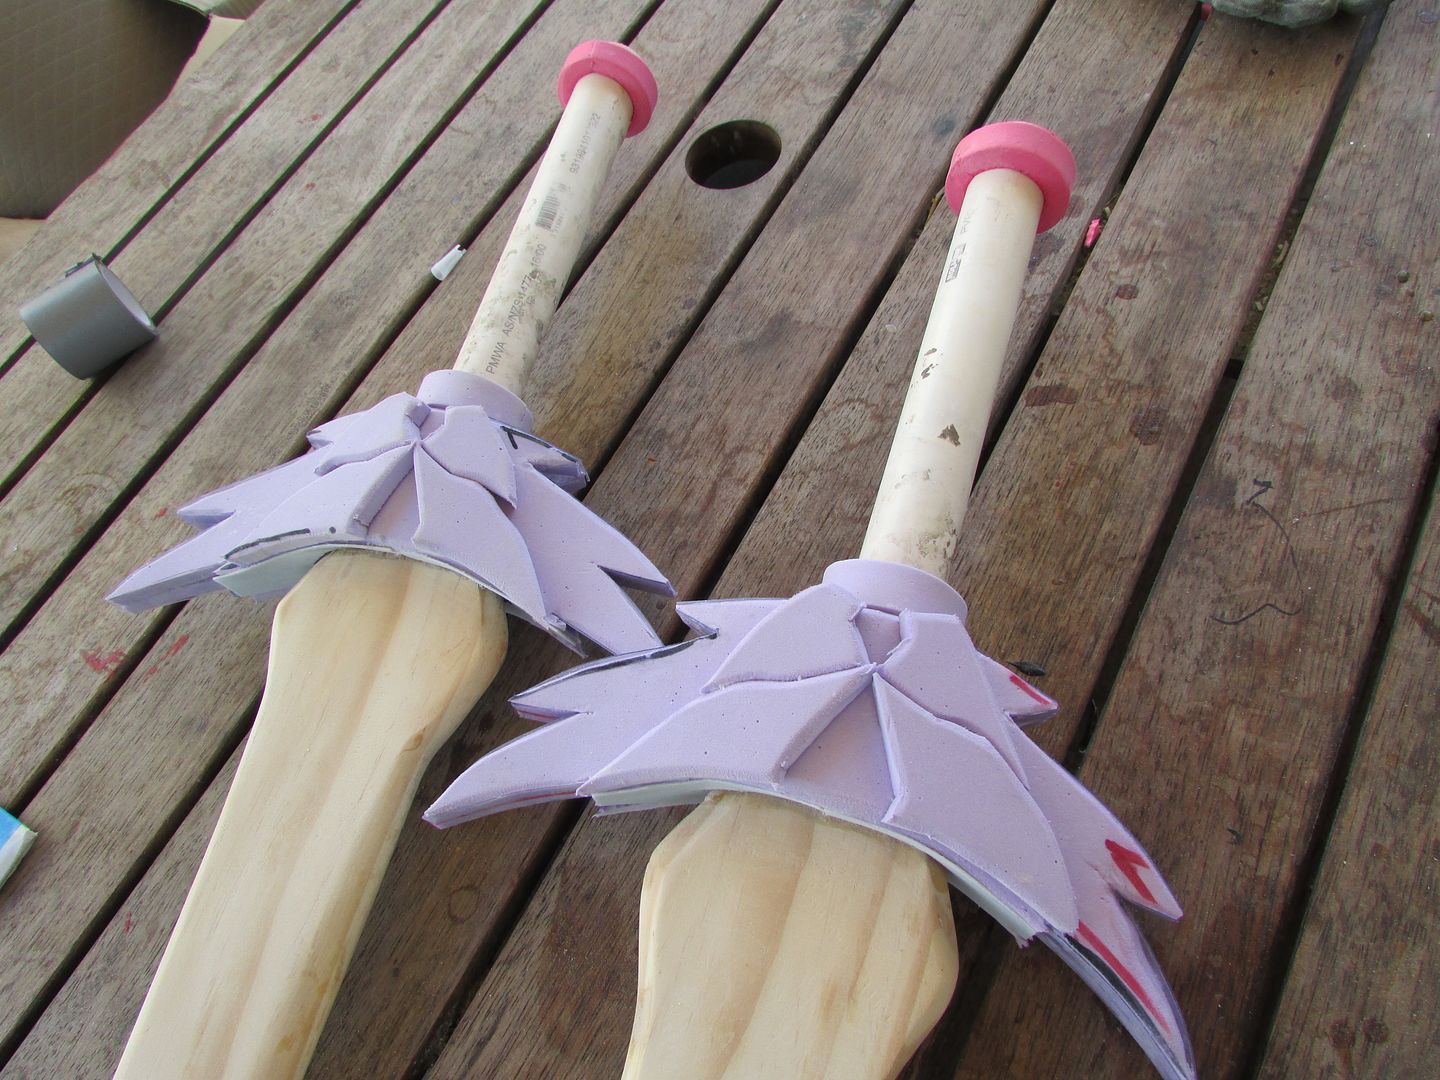
With the tangs firmly attatched, I could then attatch the PVC pipe to the nub with the aid of a polyurethane glue which was allowed to cure and harden.
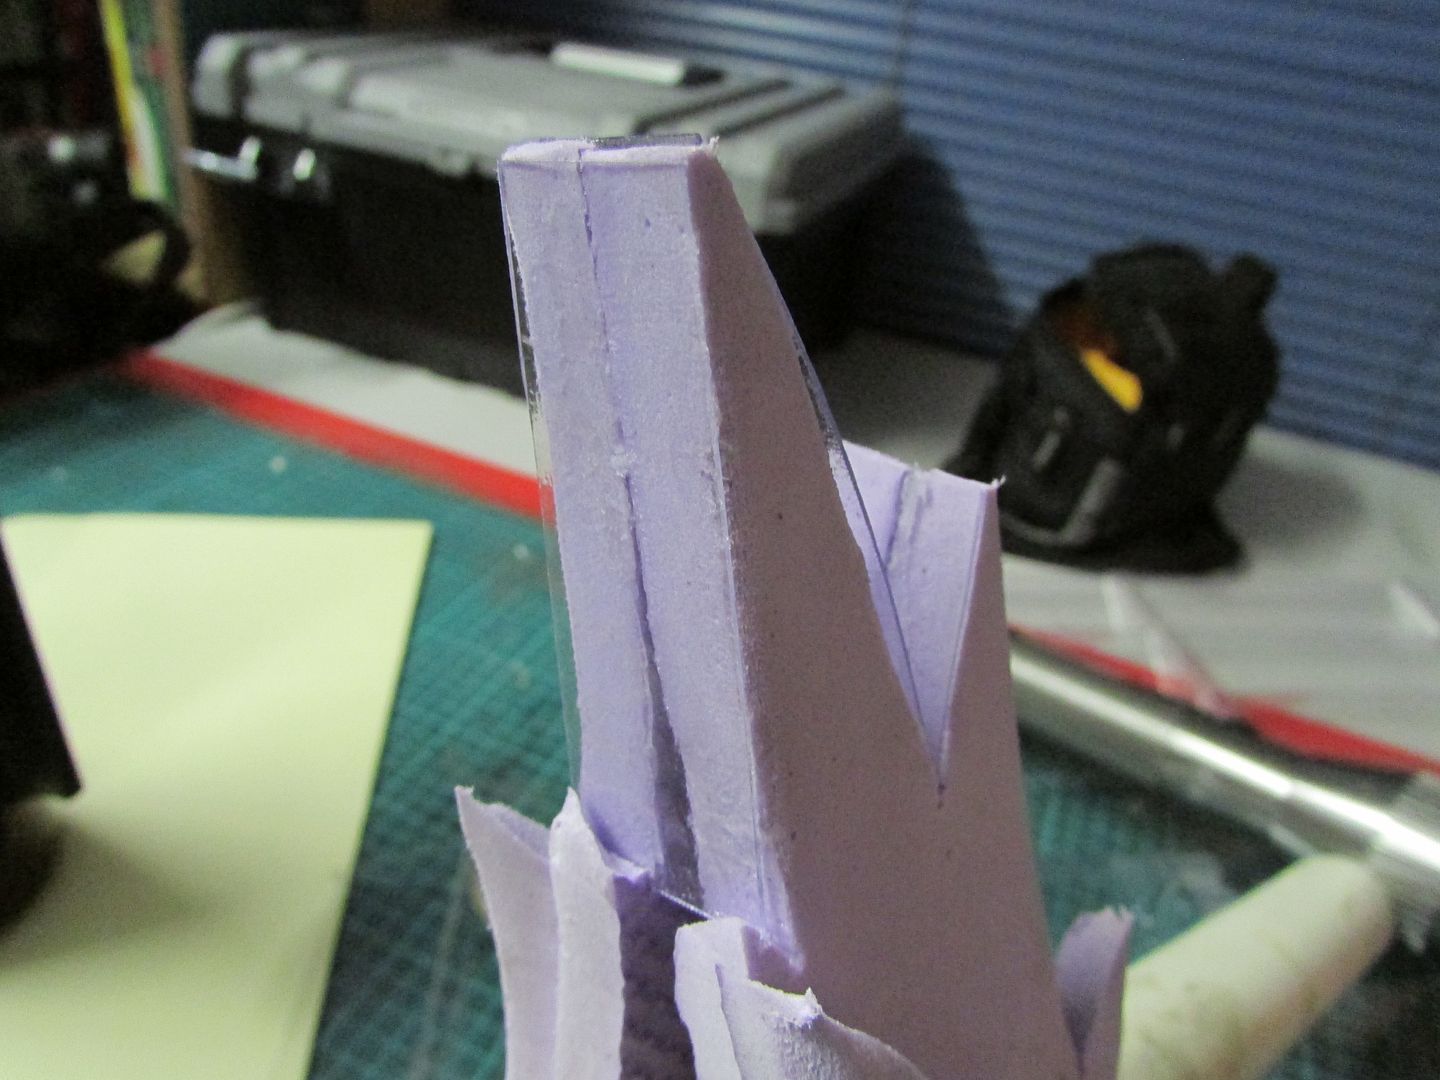
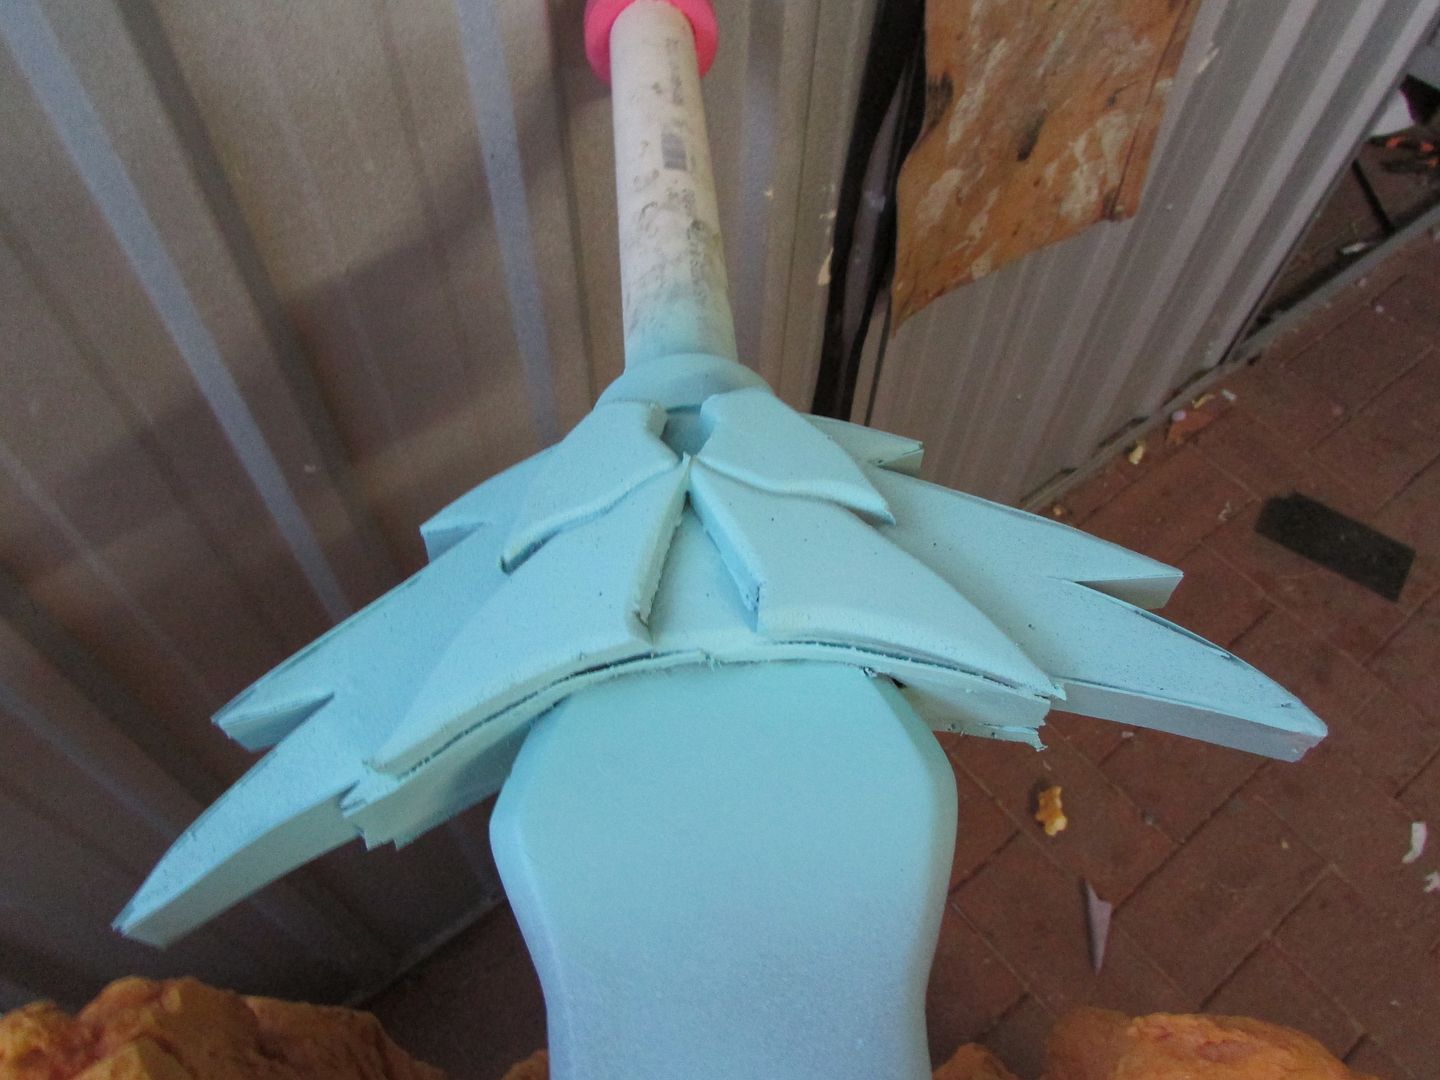
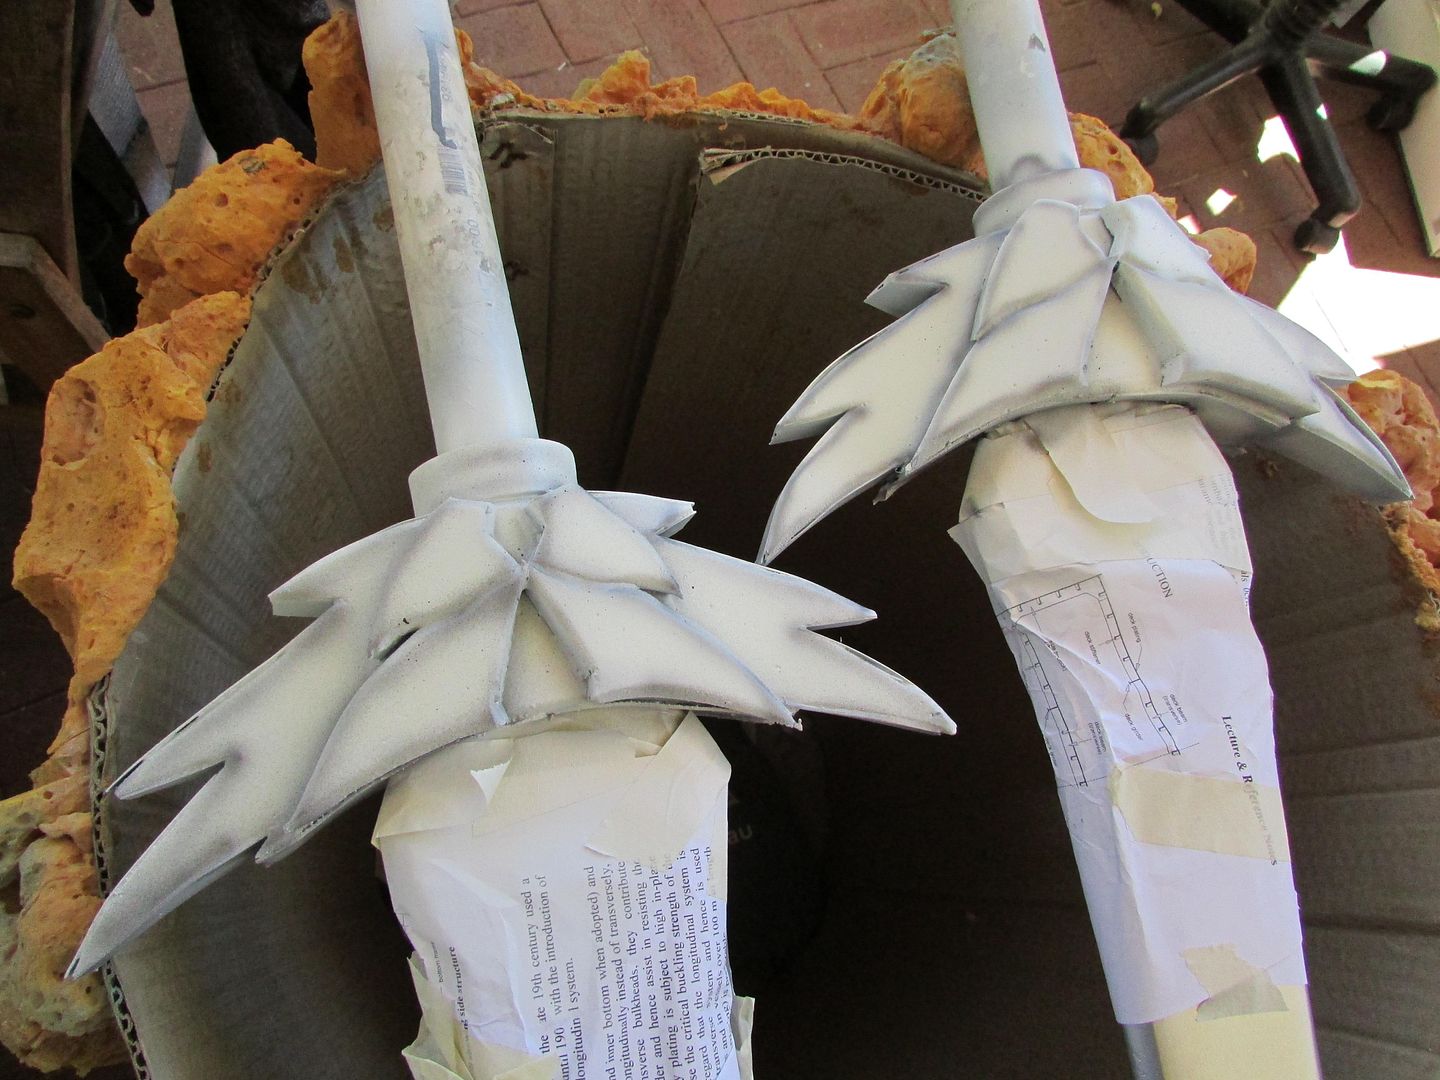
Moving on to the cross-guards of the swords themselves, using a 12mm thick EVA foam from a gym mat I cut out and mirrored two faces in order to sandwhich the blade inbetween using superglue to hold everything together.
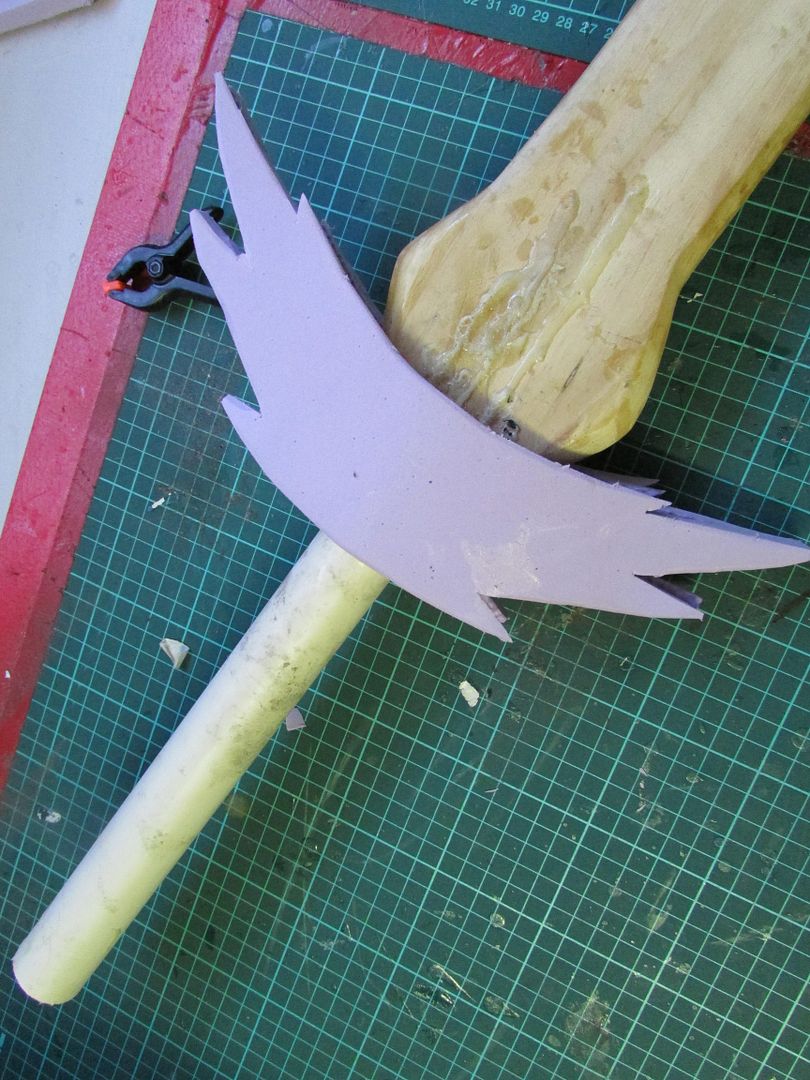
I then attatched in the same manner a raised detail layer on top of that, not before using a rotary tool and drum sanding bit to bevel the edges slightly.
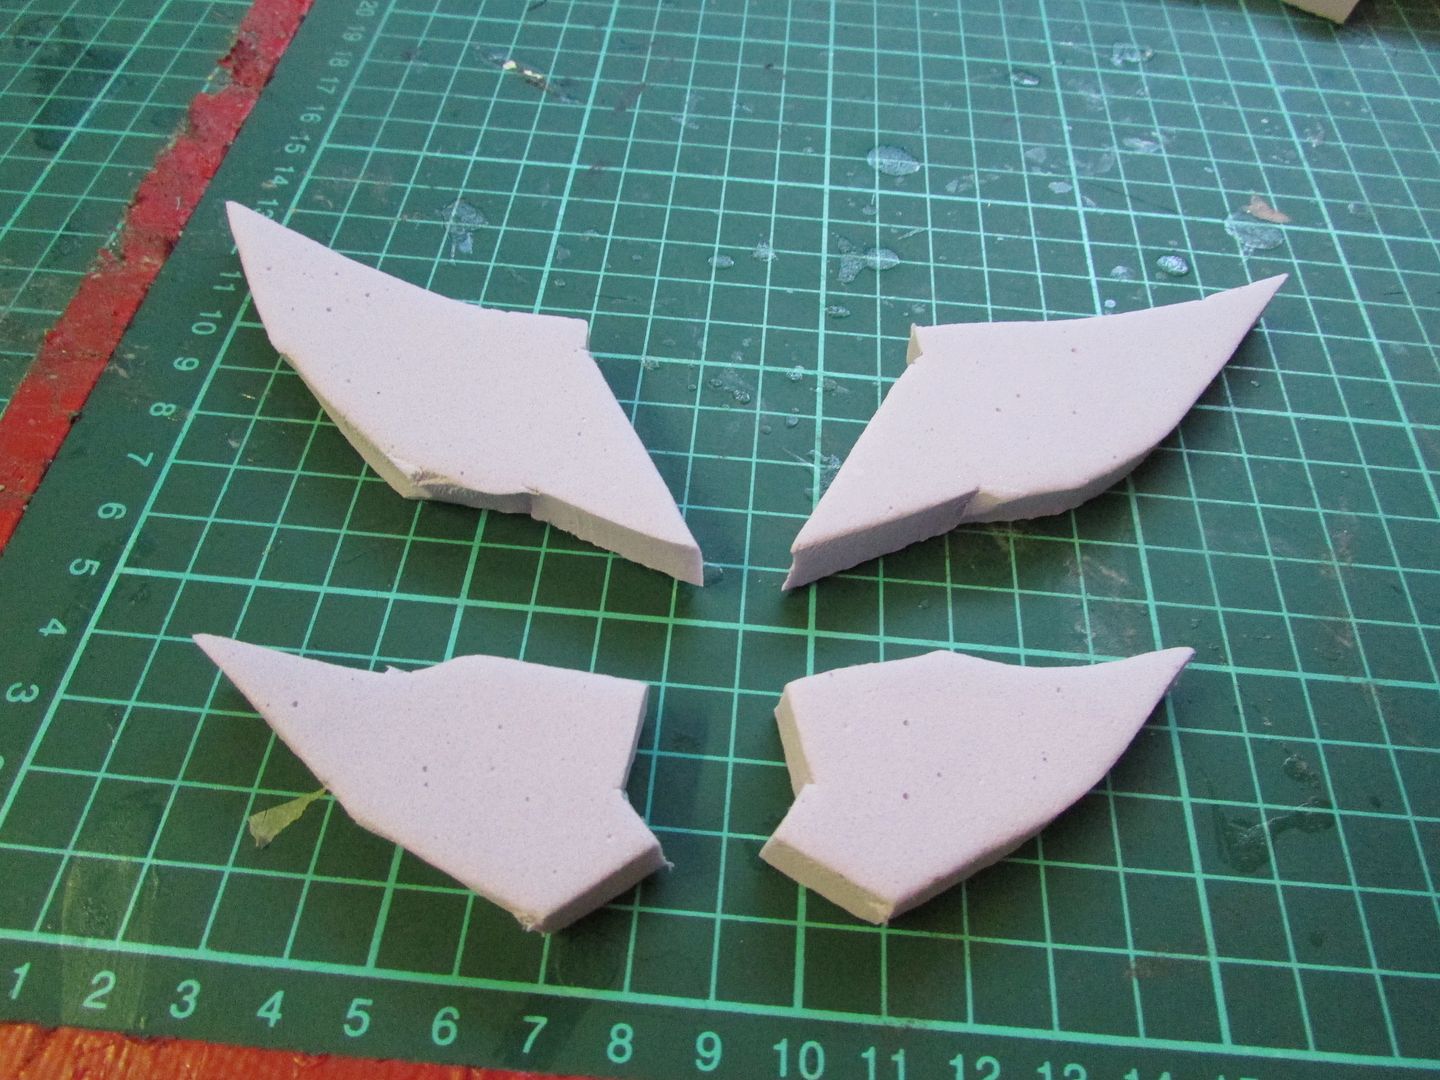
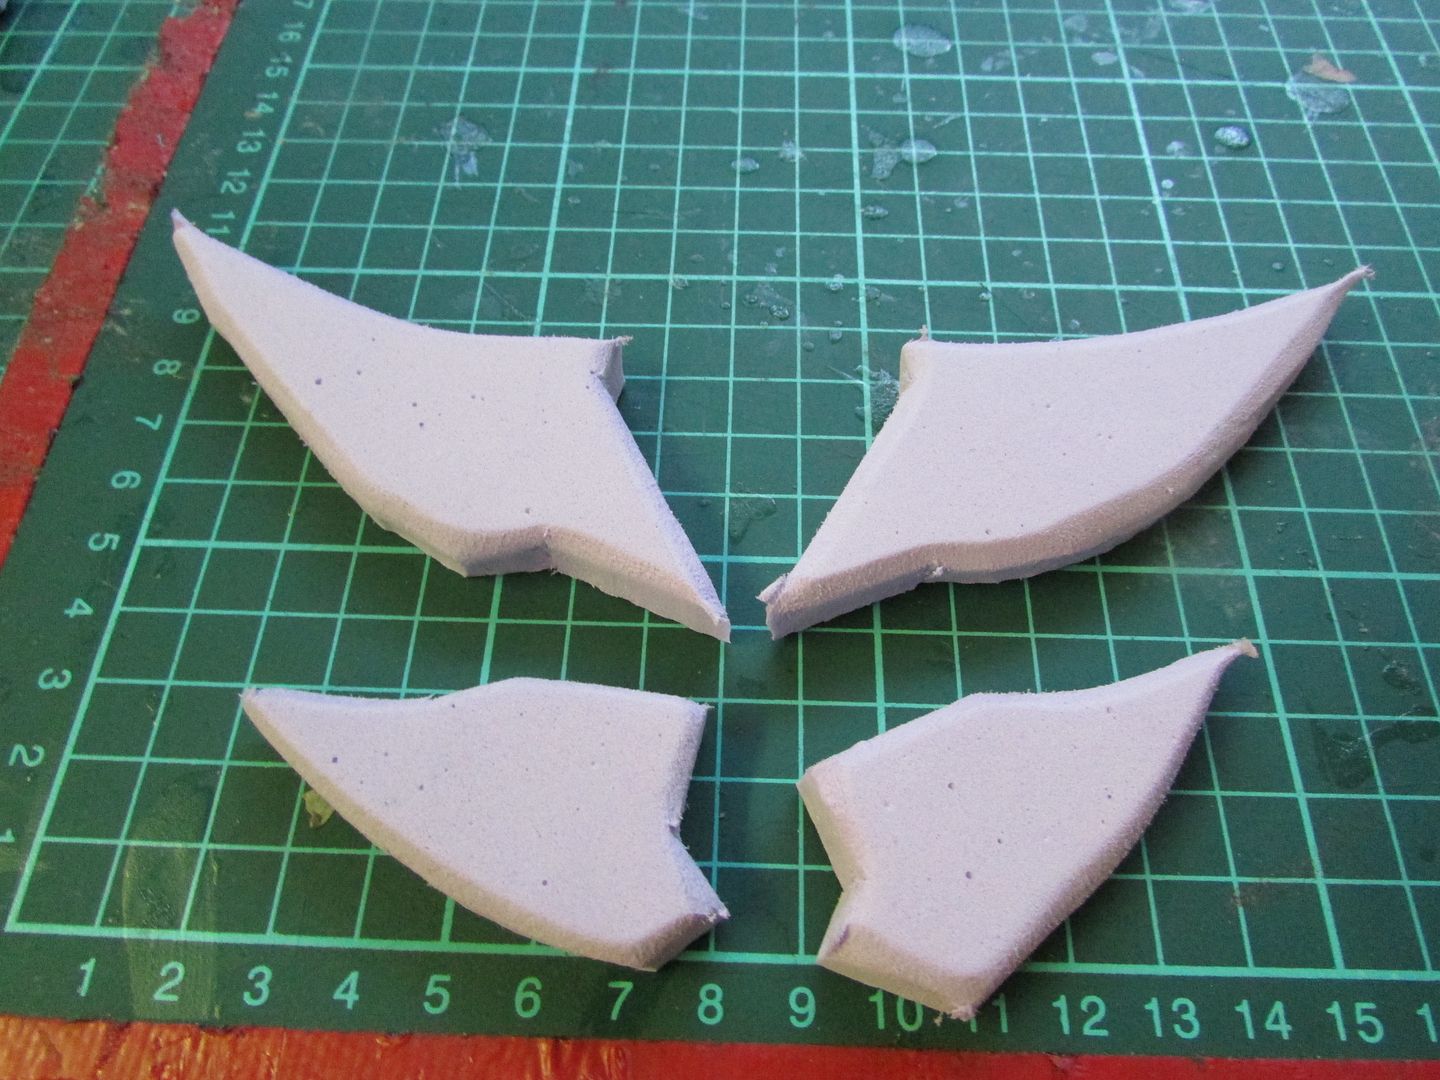

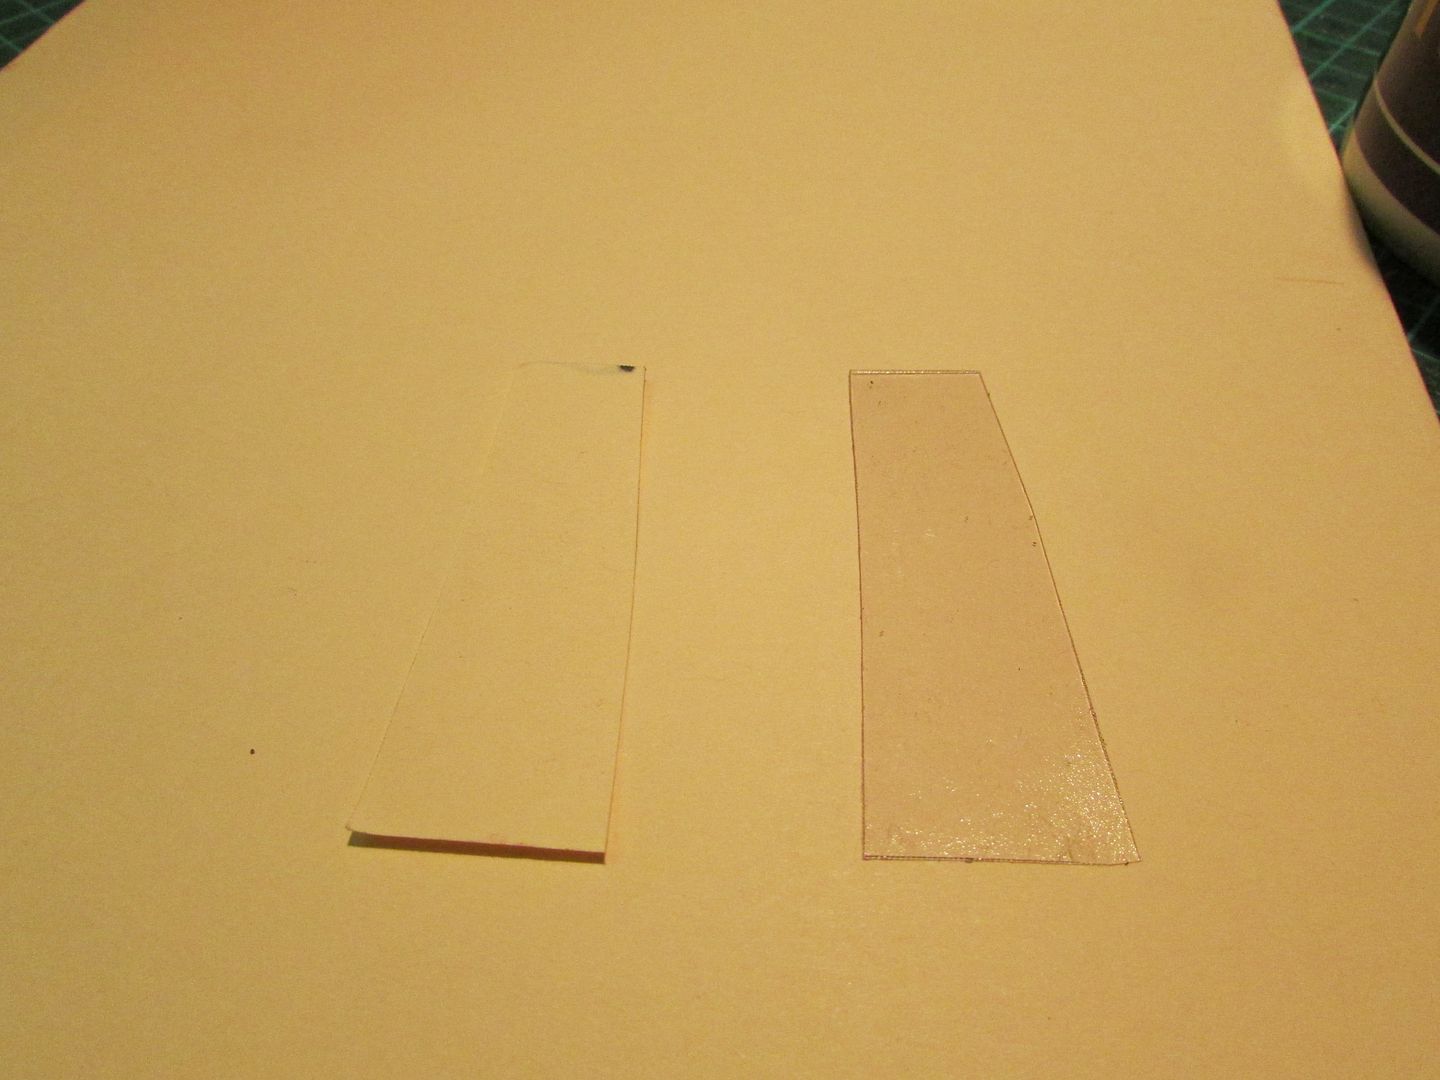
To deal with all the exposed gaps, seam lines and open faces this method of doing the cross-guard presented, I decided to use some masking tape and random off-cuts of card to trace out some makeshift templates that I transfered and cut out onto sheets of acetate and wonderflex.
And using those cut to size acetate and wonderflex pieces superglued them into place to cover up the faces.
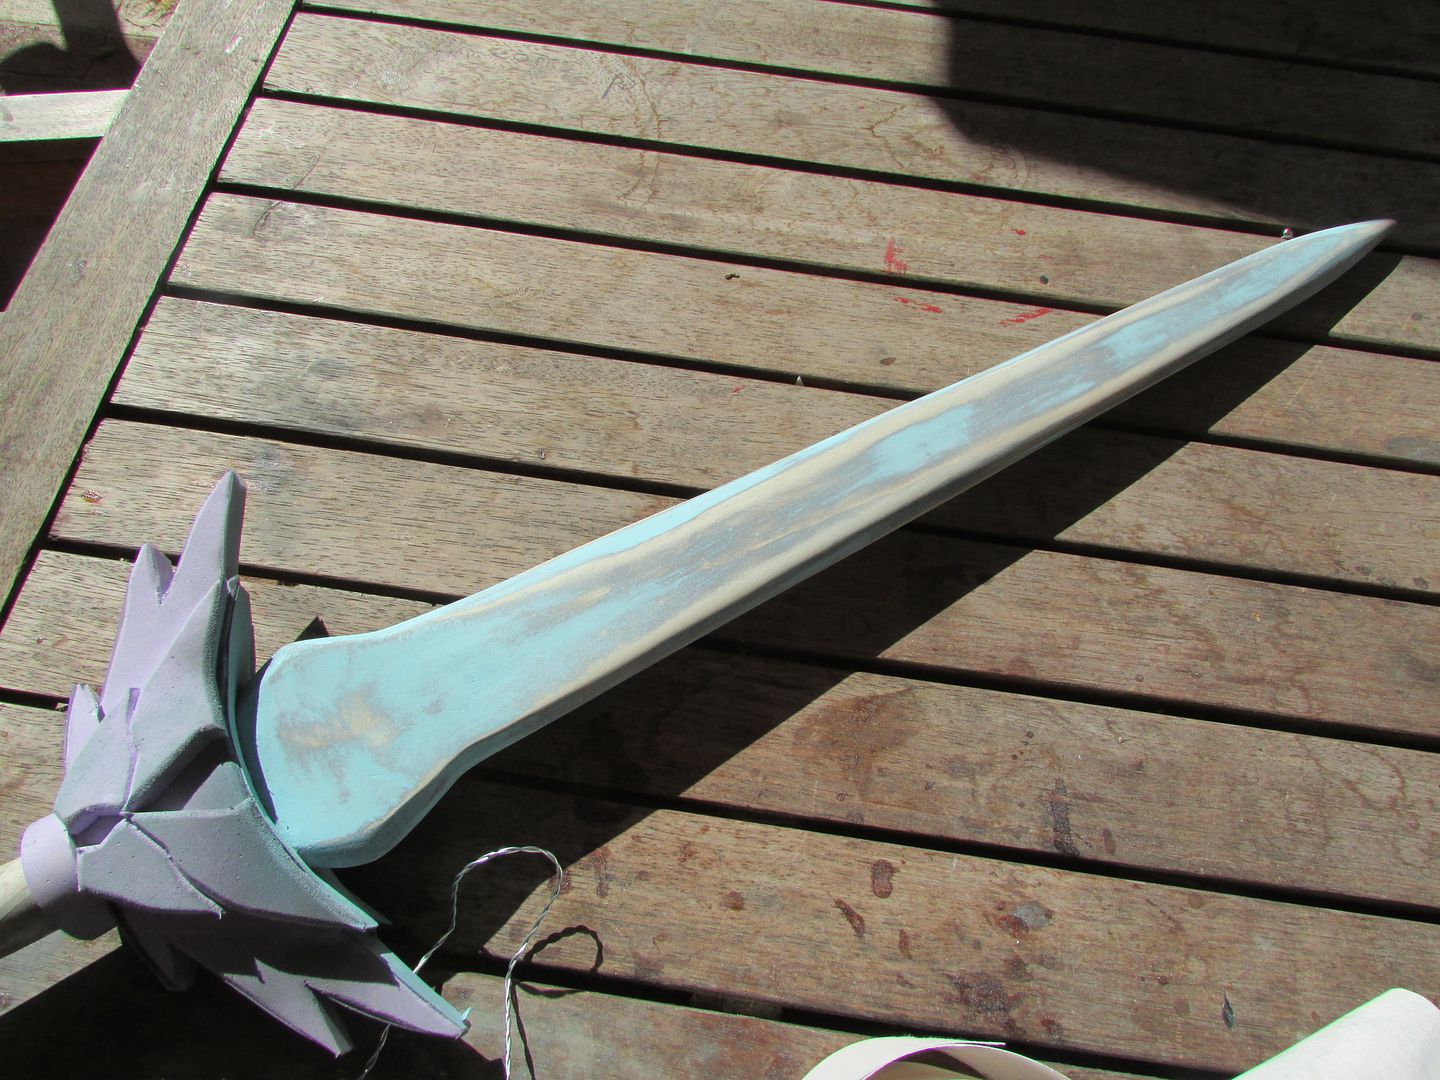
Now with all the gaps covered up nicely it was then simply a matter of sealing the foam pieces with five coats of a 1:1 wood glue and water mixture to prep the surface for the eventual paint job and further work.
Now by this point the wood grain on the blade surface was still fairly prominent, so to get rid of it I decided to try out a new material in the form of an acrylic spray putty I bought from the automotive shop.
As the name implys it is an acrylic sprayable putty that once sprayed onto a surface, hardens to a rigid slightly rubbery state and is meant to fill in all the small defects and gaps. Which when used in conjunction correctly with proper sanding techniques can achive a glass smooth finish.
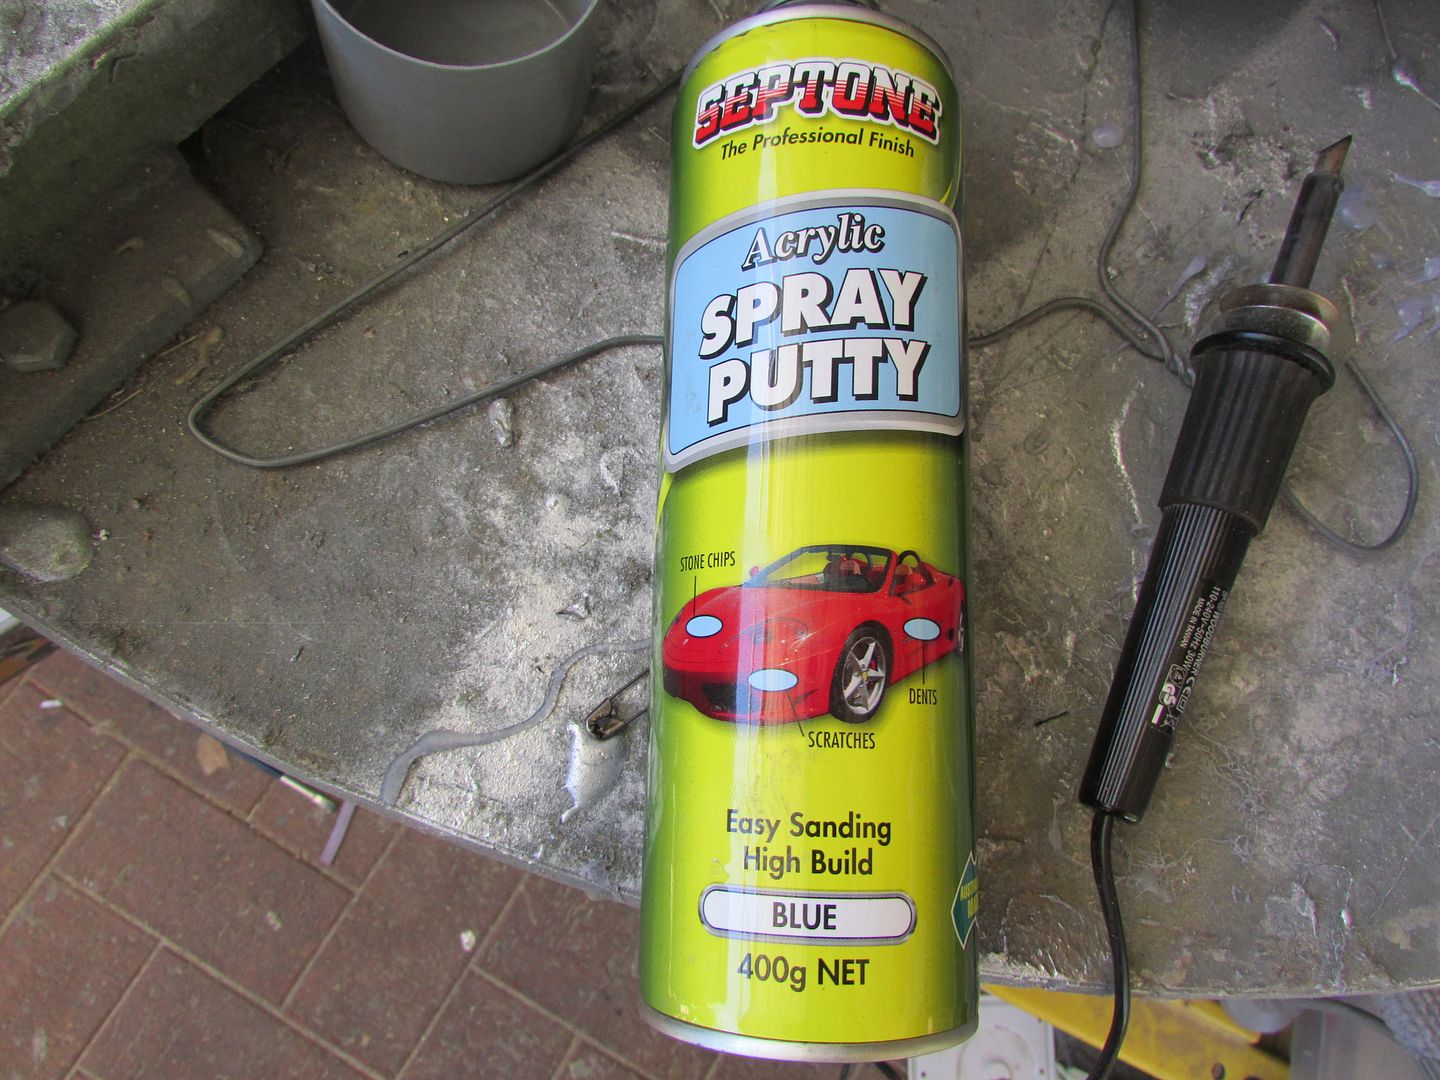
For this project I did about three passes of first spraying the putty, allowing it to dry, sanding with 120 then 240 grit sandpaper and then a final sanding pass using grade 1 steel wool.
Doing this produced an incredibly smooth finish and got rid of the wood grain perfectly; I can not stress enough the wonders of using steel wool as the final stage of sanding for these kind of applications, since there is definitely a noticeble difference in texture and surface finish because of it.
Since the results from the acrylic putty were so promising, I
also ended up spraying it onto the cross-guard to fill in any tiny holes
the PVA-Water glue sealing may have missed, and as the putty hardened it gave the entire thing a
kind of rubberised coating.
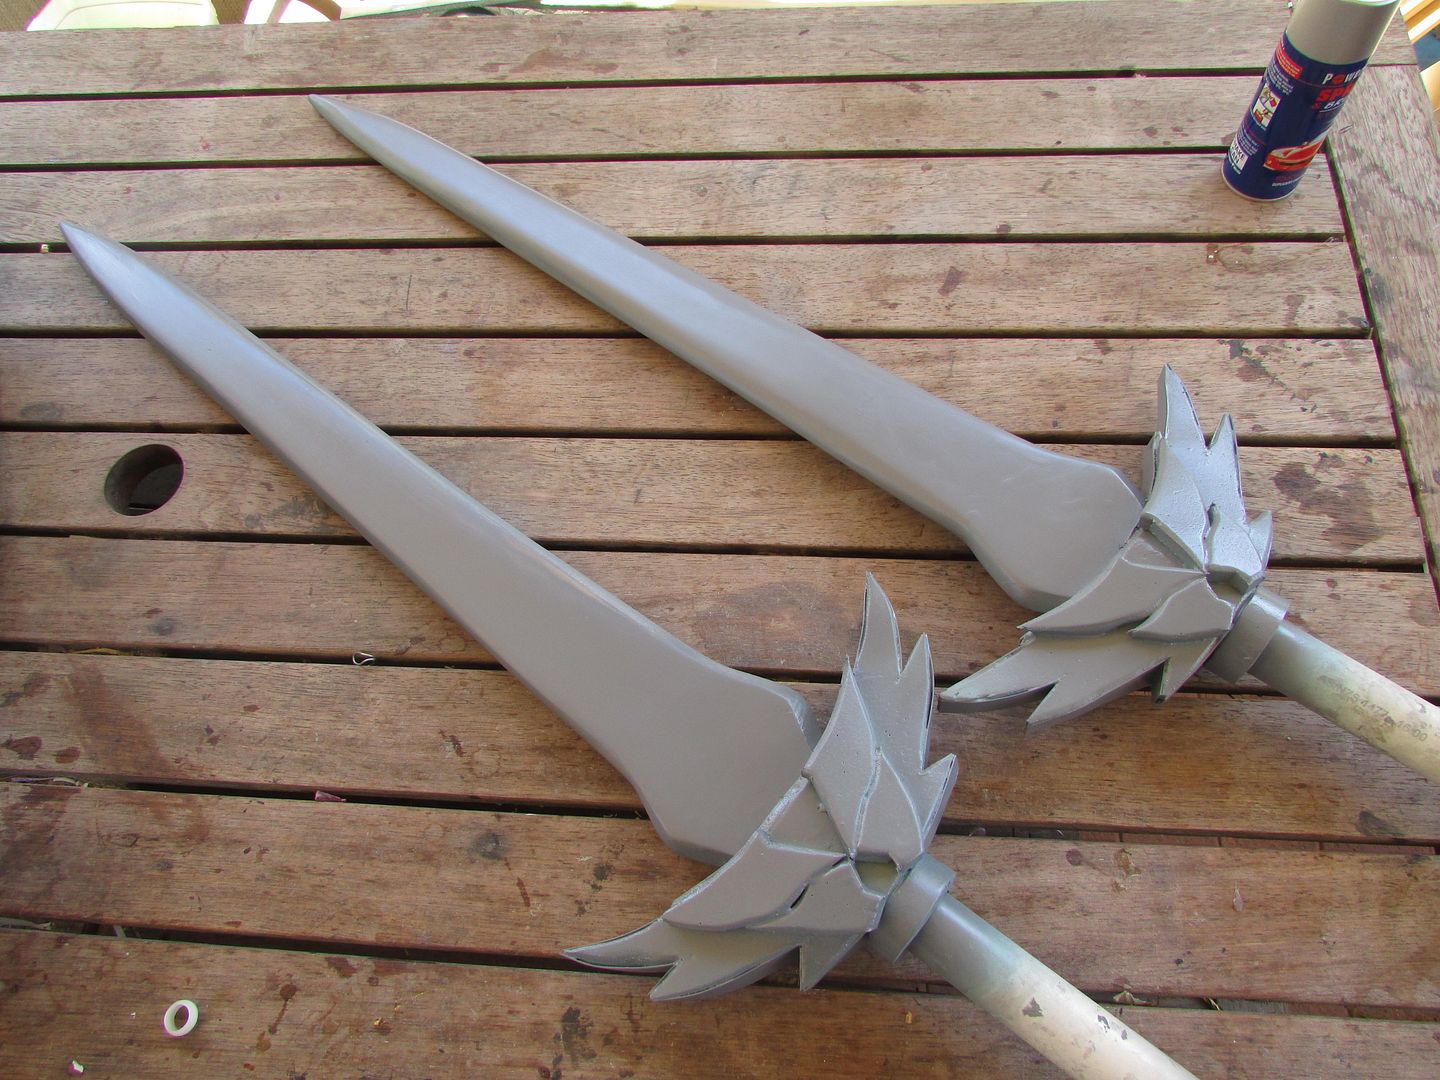
Then to top all this prep work off was two coats of grey primer, which if there were any still remaining made for certain all the defects and gaps were filled in making the swords now ready for painting.
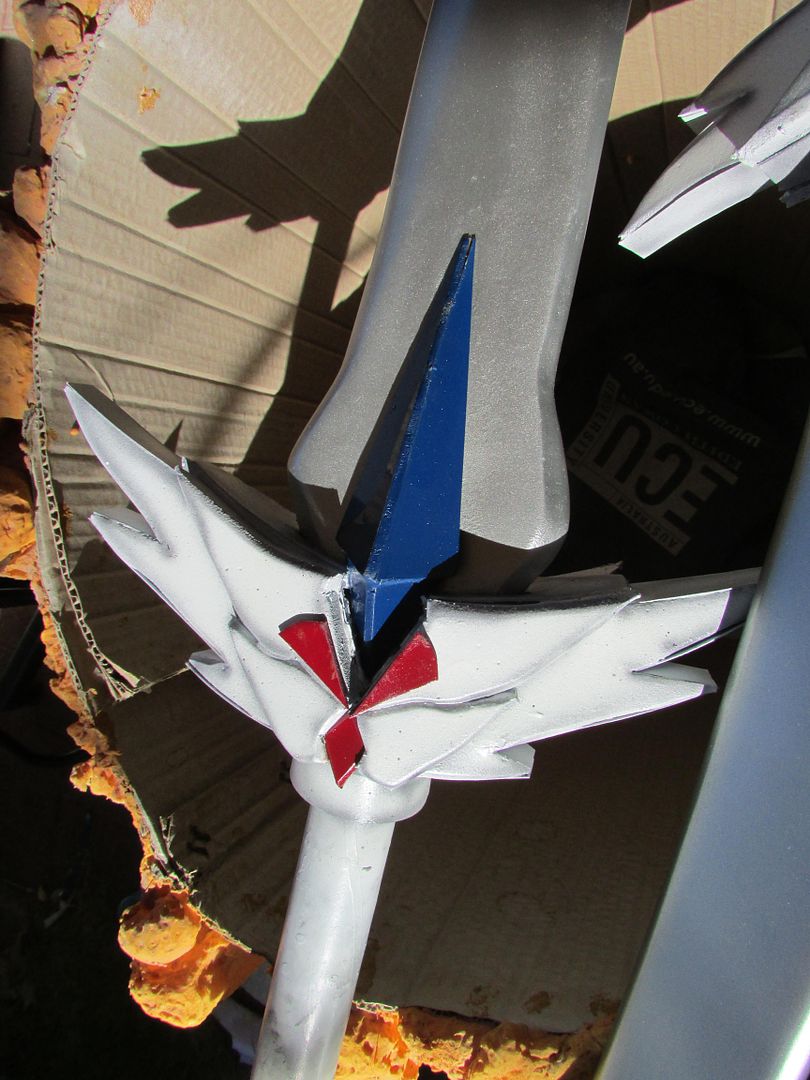
But before that I still needed to also make the various decorations and gems that are inlaid on the surface of the blade and cross-guard as well as the pommel.
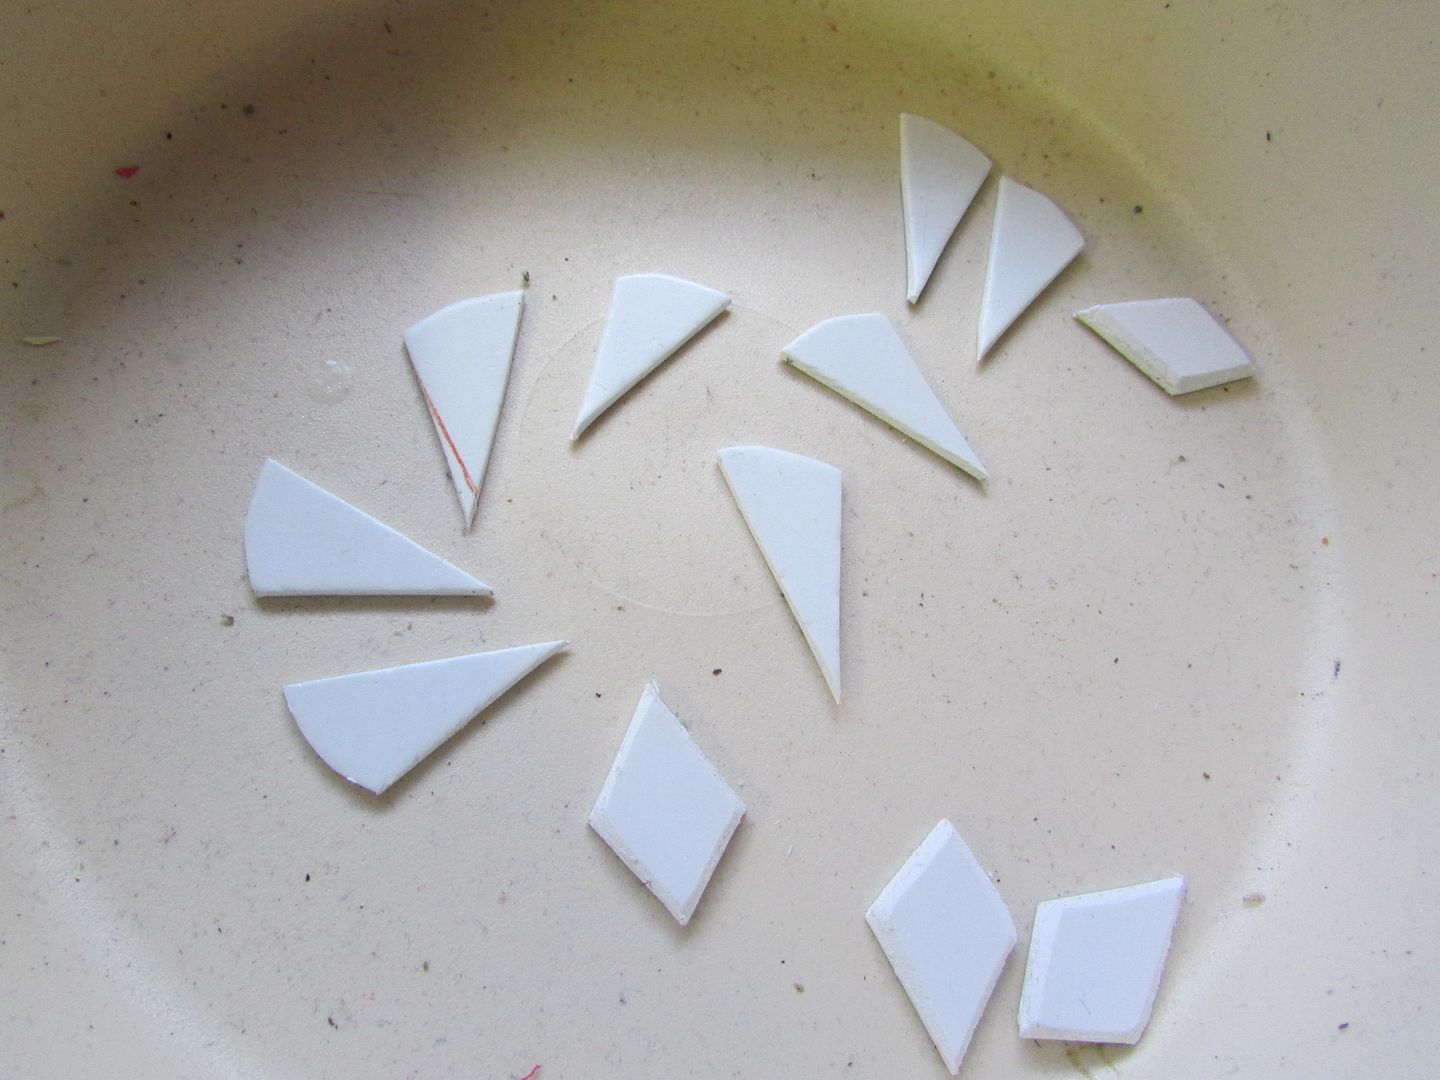
So starting off I decided to make some makeshift gems by hot gluing cuts of
cardboard together to make the half diamond shapes that I needed.
But in order to hide the
grainy surface of the cardboard, I super glued ontop a layer of acetate sheet to give
the surface a smooth gem like finish.
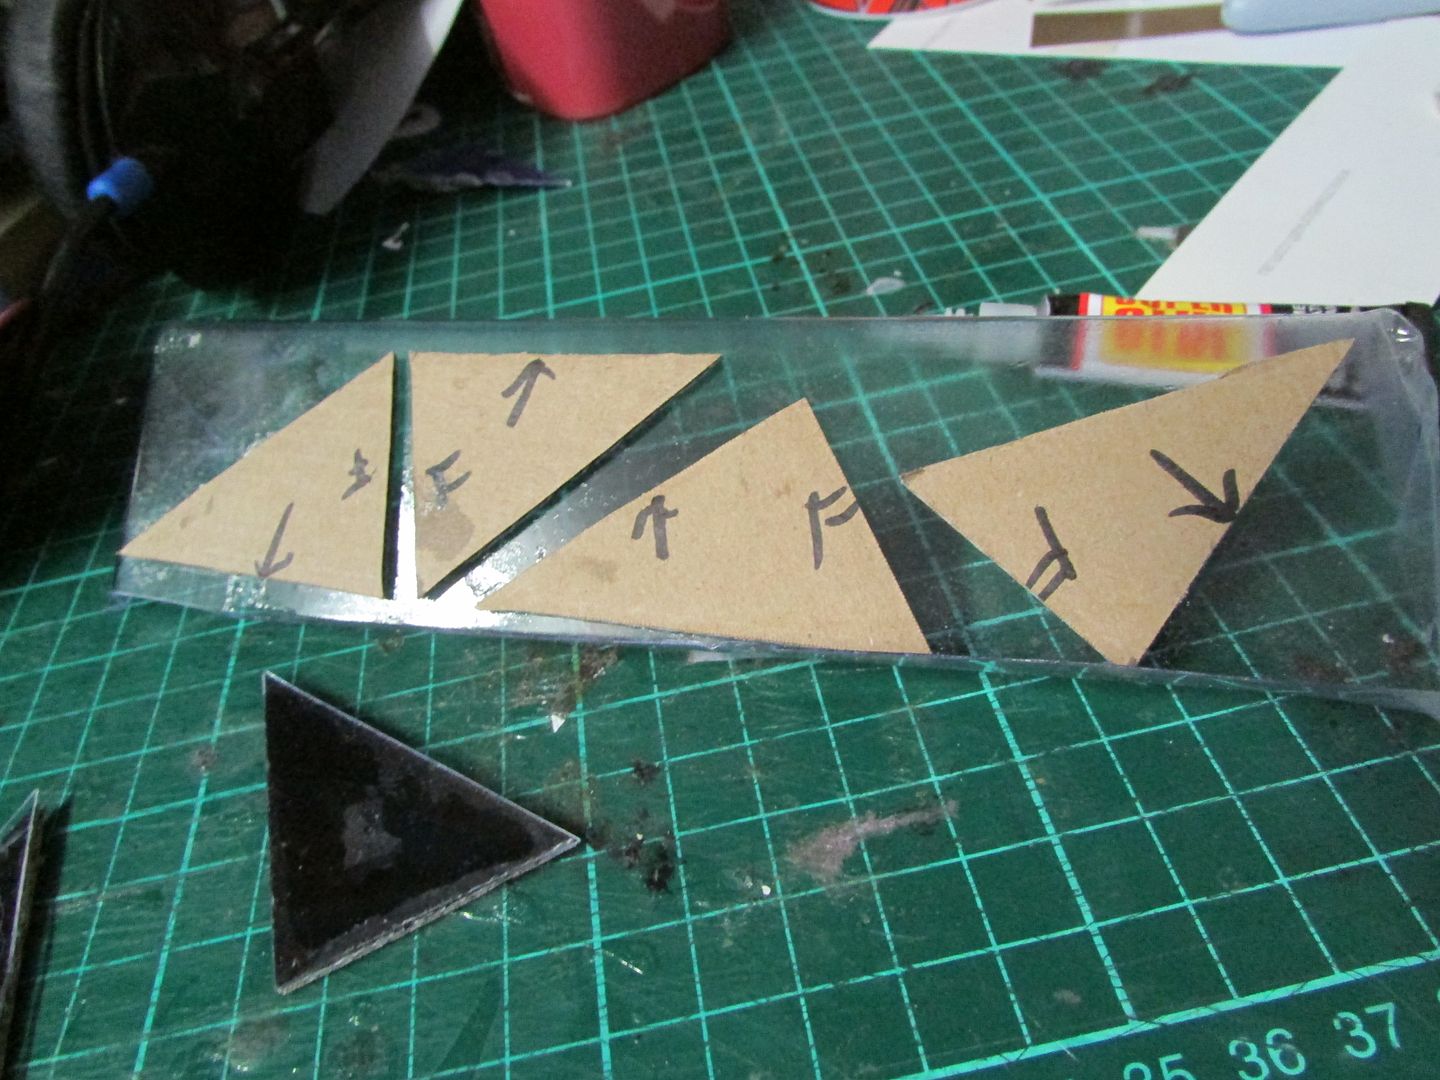

The seam edges of the gem pieces were still showing a bit of the cardboard grain underneath so they were filled with plumber's
epoxy and sanded to make them appear seamless.
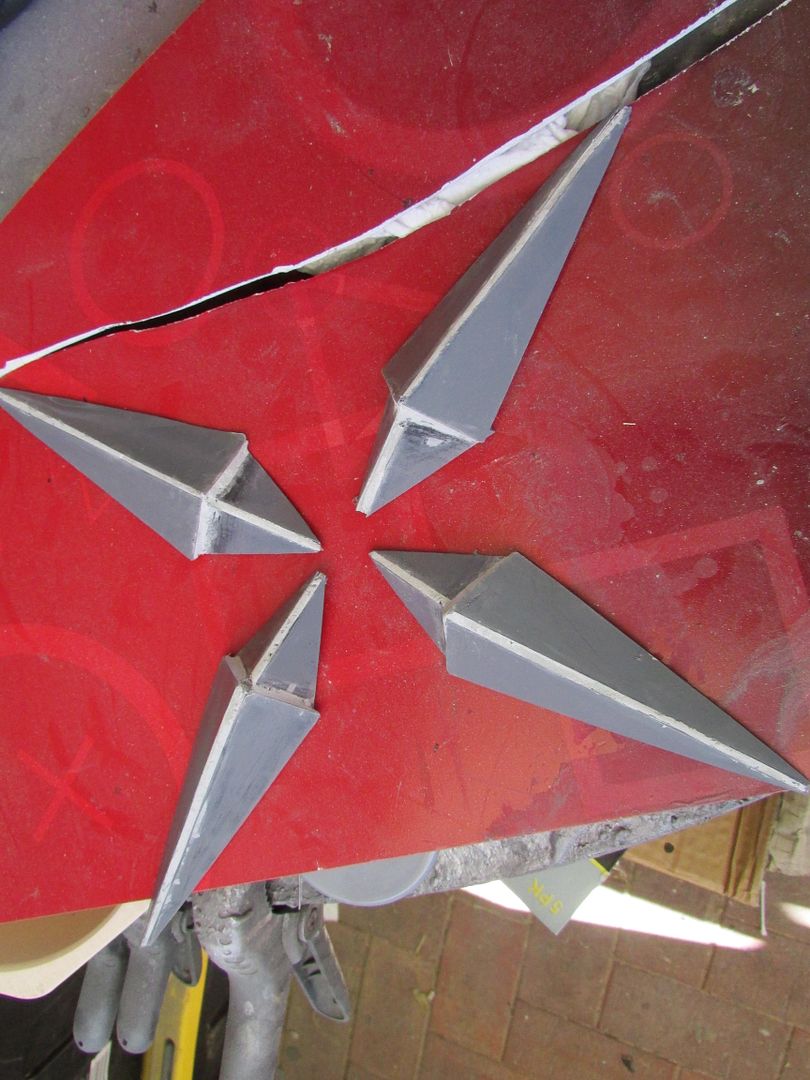
For the red gems that are inlaid in the cross-guard and the
blue diamond and winged parts on the surface of the blade those were simply flat shapes cut
from some PVC sheeting I had lying about.
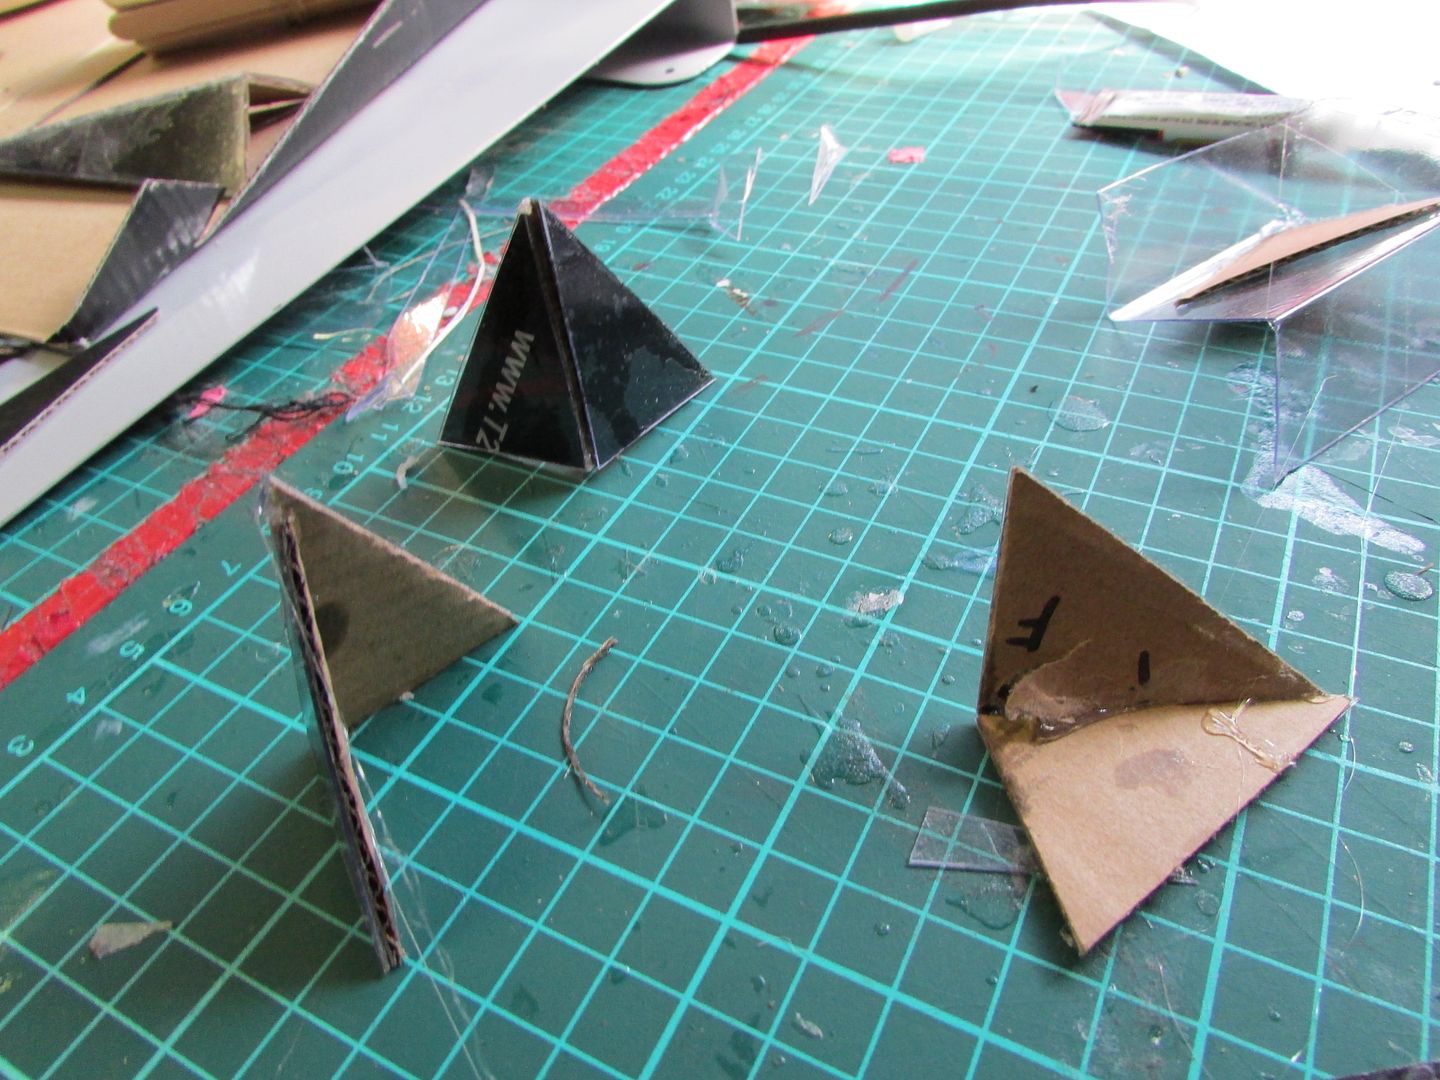
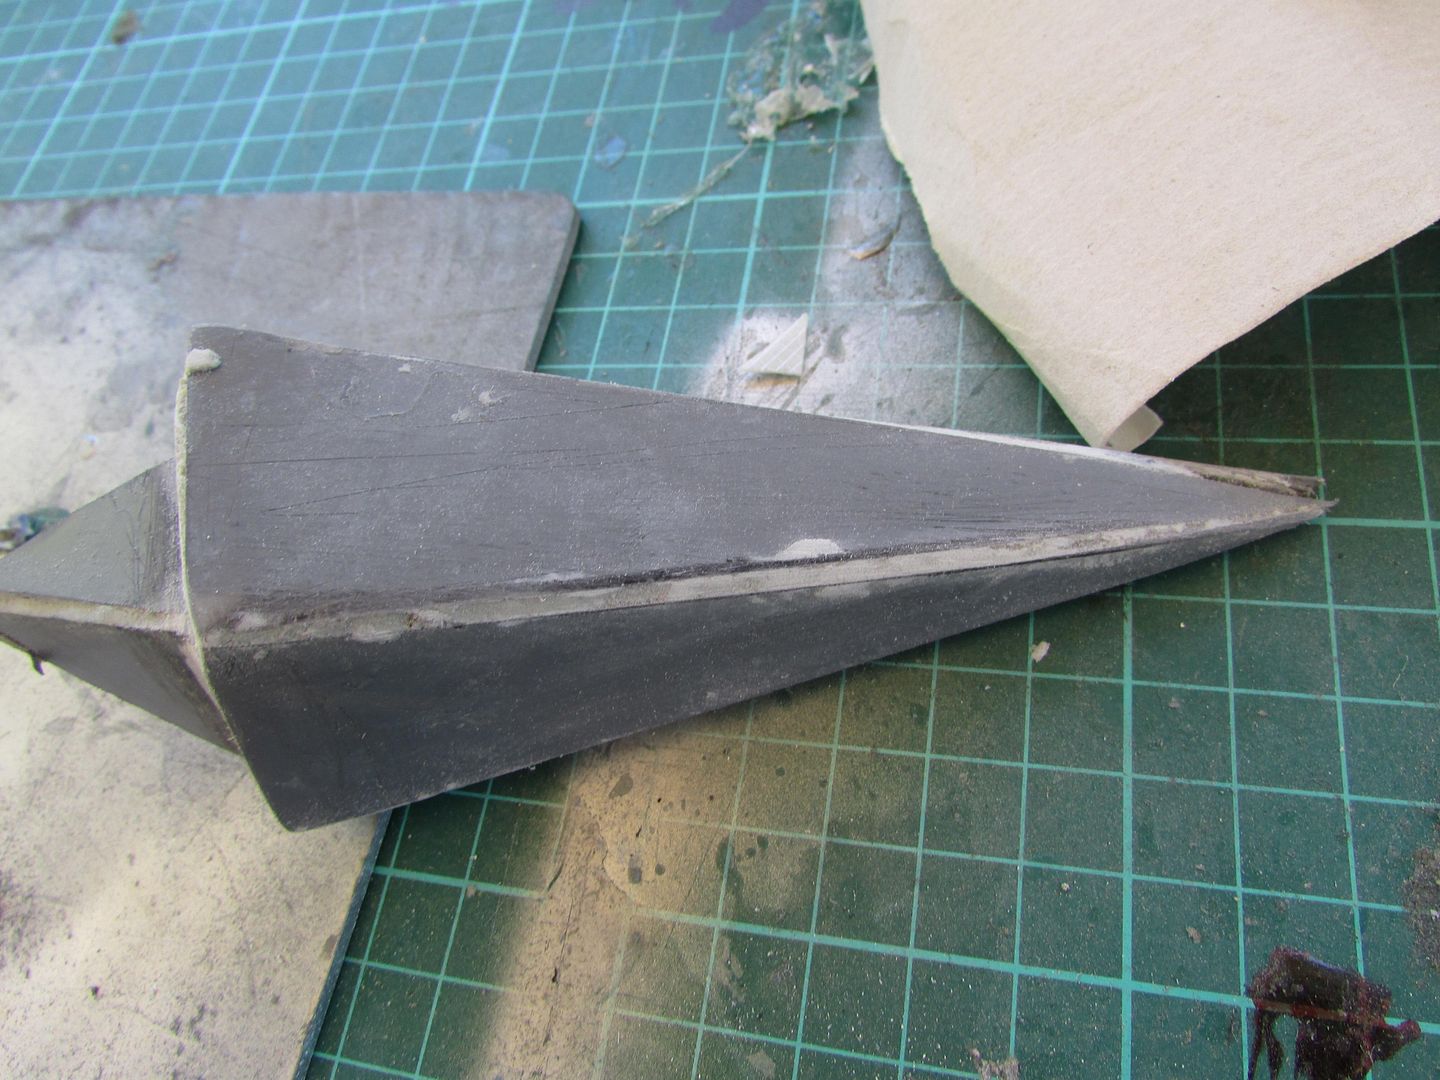
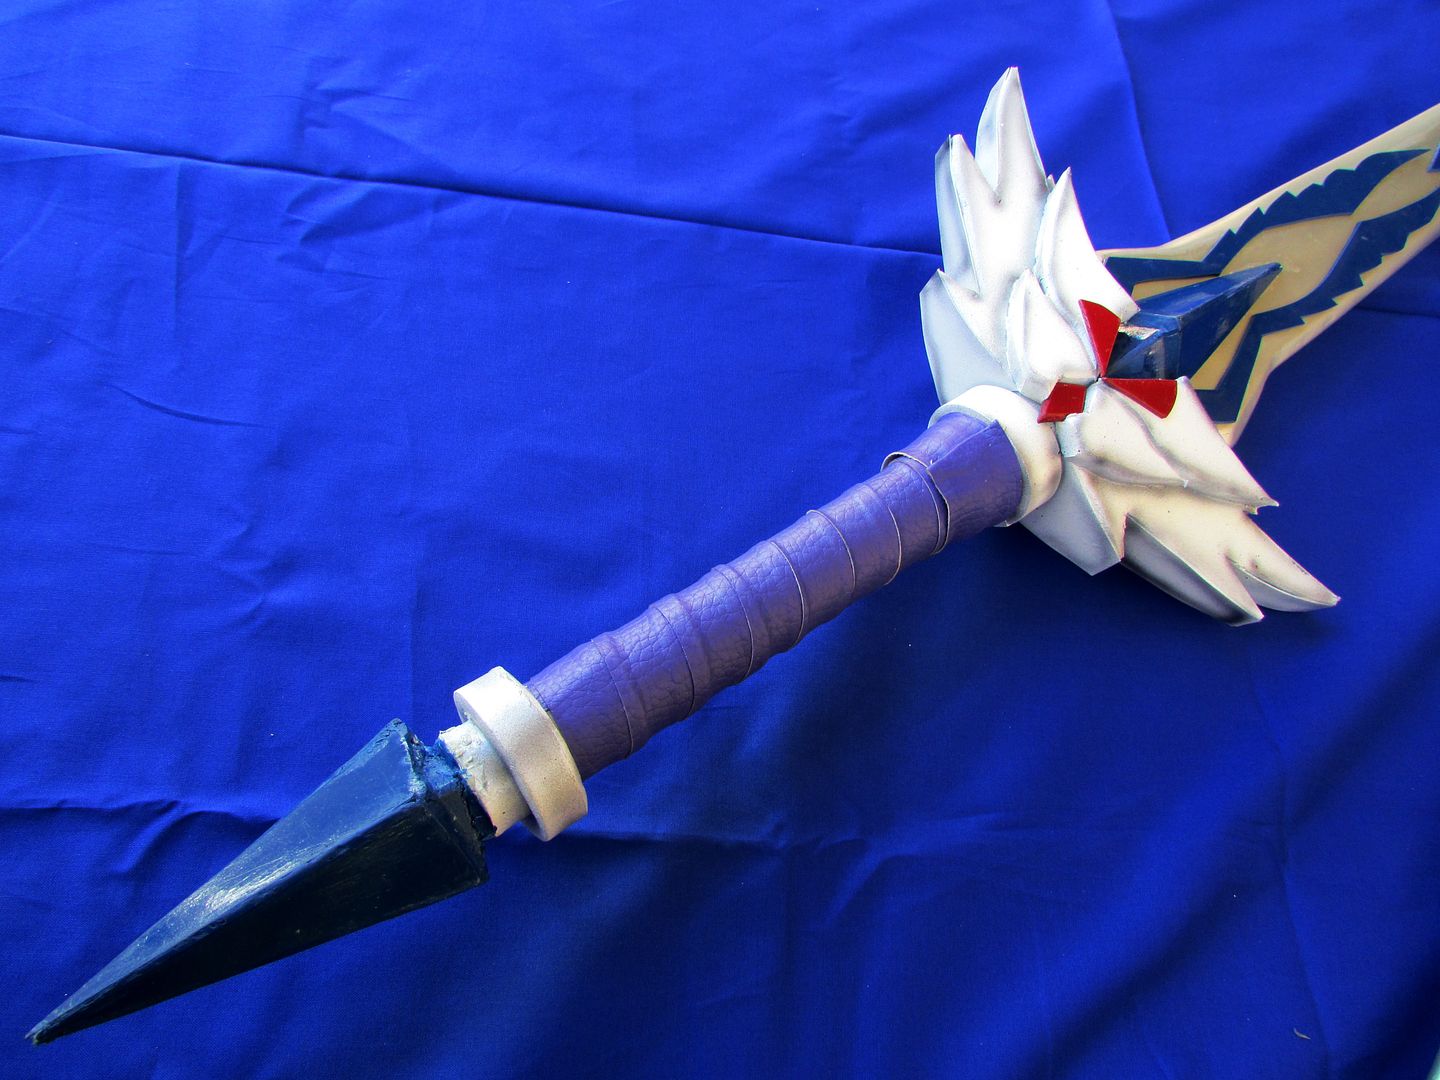
For the pommel’s, using the same half diamond pieces I had made
earlier, I made enough so that I could hot glue the two halves together to make
a complete 3D shape.
Then wedged it down the end of the PVC pipe handle and held it in place as the hot glue cooled, followed by plugging up the gaps with more plumber epoxy.
With all that done I
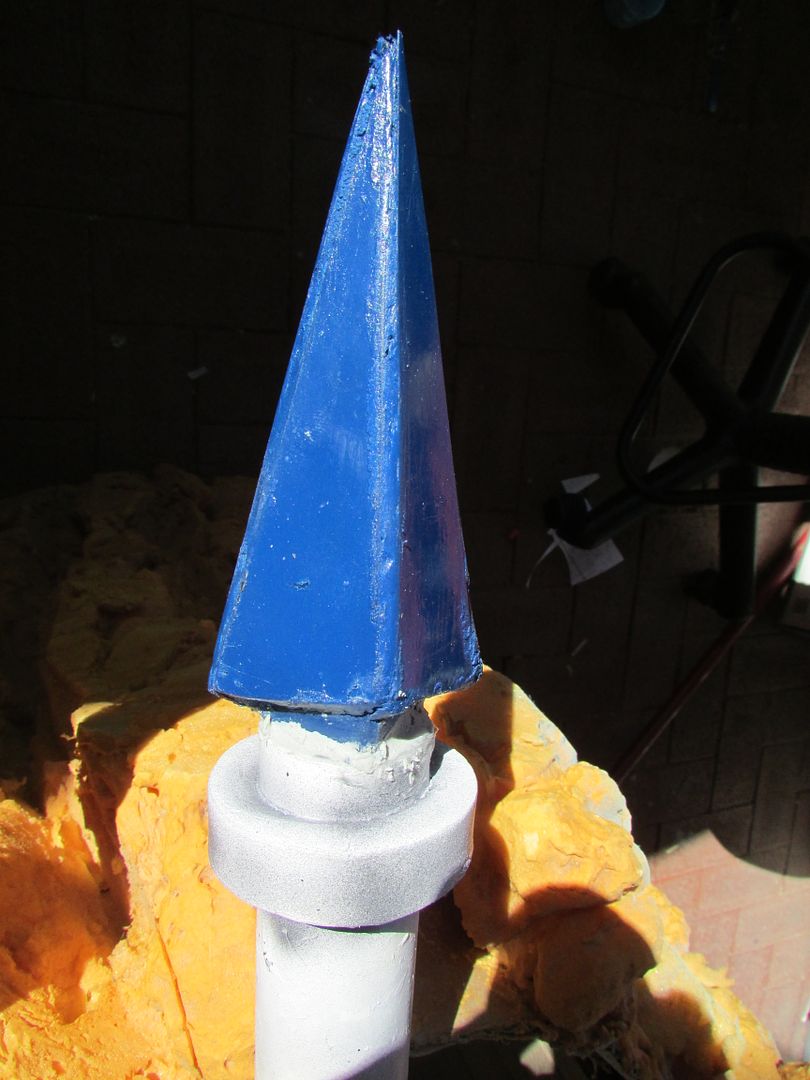
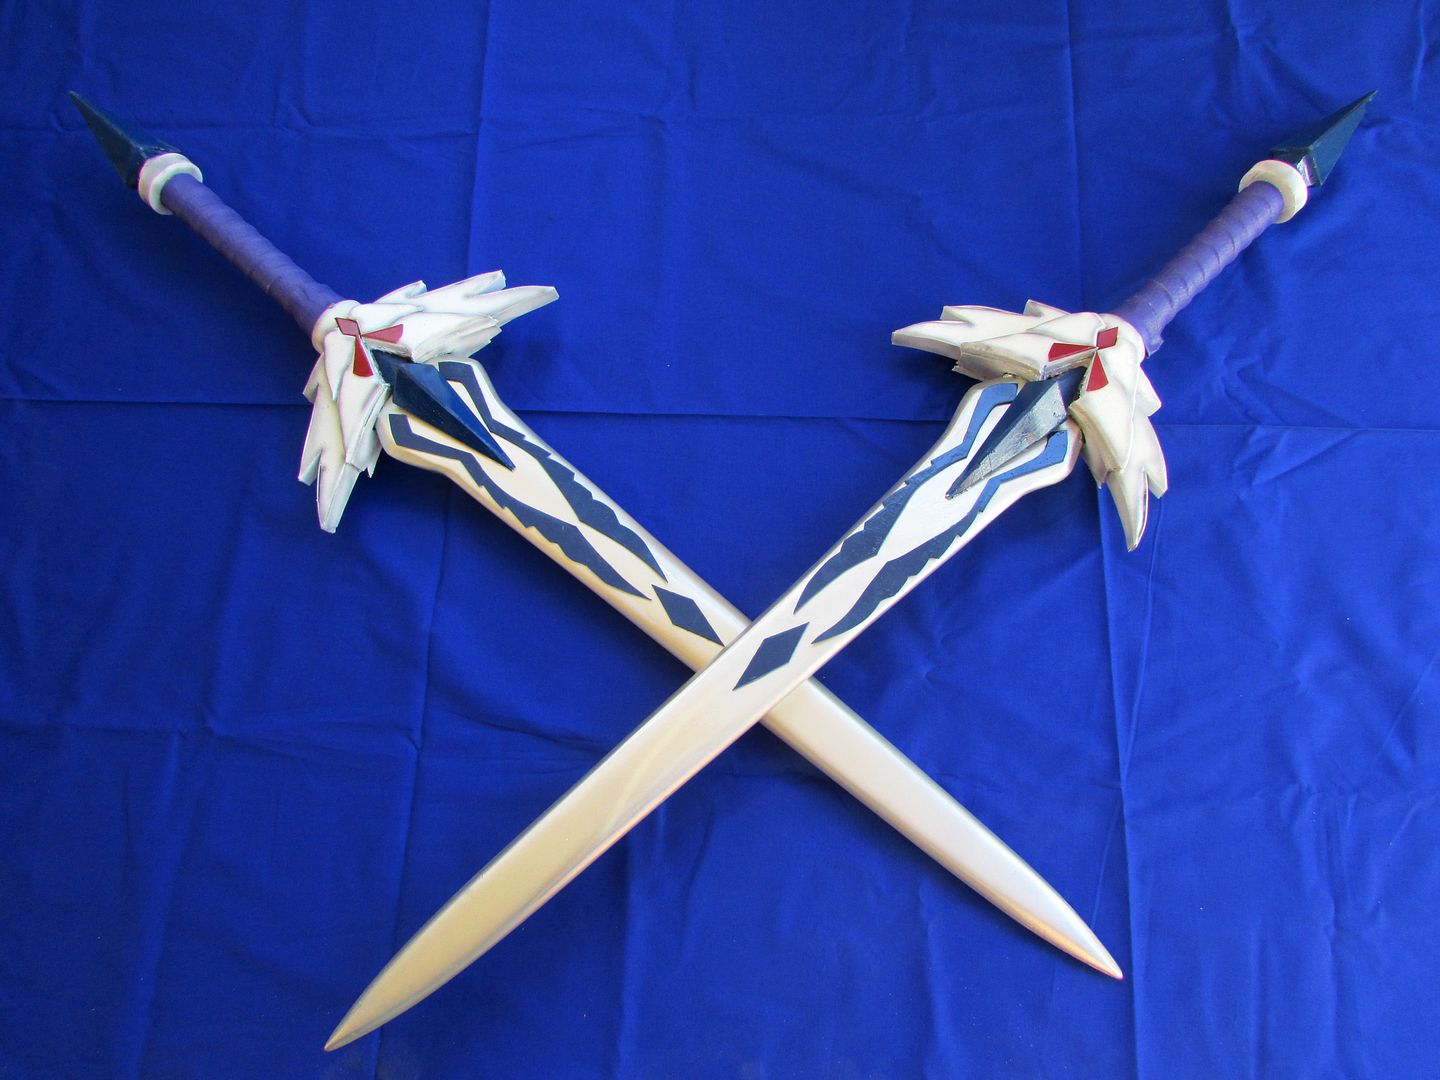
could then start on the paintjob proper. First off I gave the cross-guards a coat of acrylic
white spray-paint and then using my airbrush filled with silk black went around
highlighting the edges and features.

For the blade it recieved a once over with automotive quality chrome spray-paint, and
for each of the decorations and gems they recieved an appropriate red or blue enamel. which when dry were glued into place onto the surface of the swords using epoxy glue.
With the glued pieces set in place finishing the last aspect of the build off was the handle wrap, which I did using a strip I cut off a roll of blue upholstery vinyl and then simply coiling it about the handle and hot gluing the ends down.
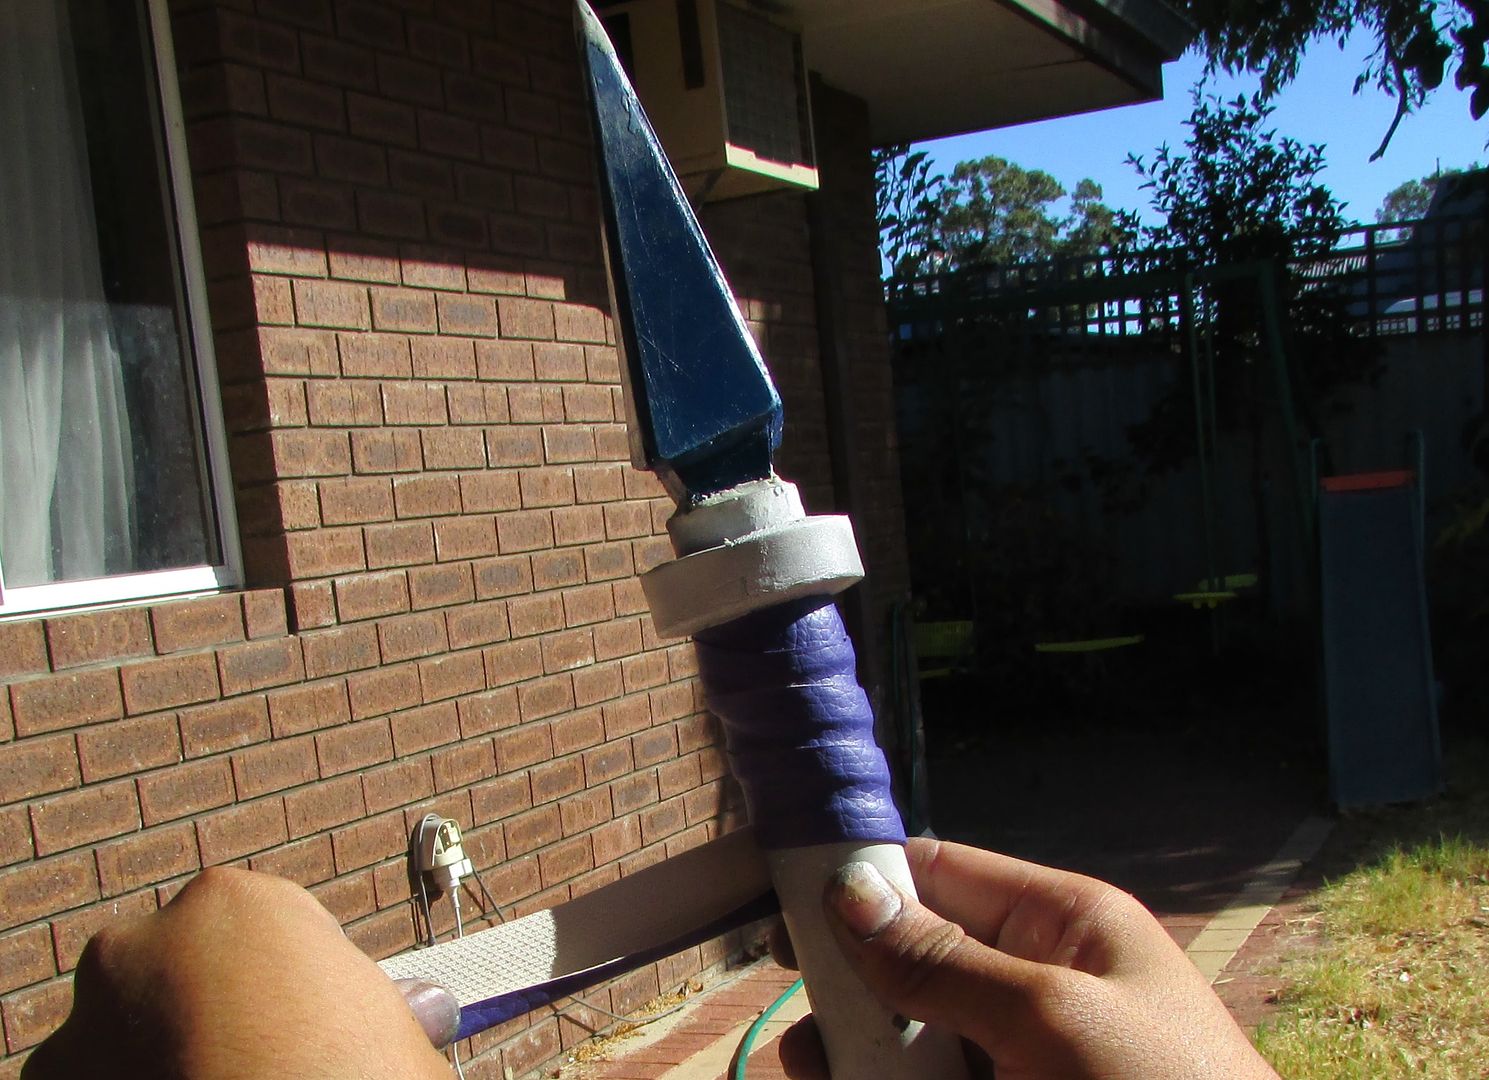
Not before capping off the entire build with a good coating of clear coat
to make everything shine and protect the paintjob from coming off.


Thanks for reading